

I. Purpose
This feature allows managers to display different menus based on specific time schedules on the Online Ordering website.
II. Instruction steps
1. Configure Menu Schedule on the dashboard
Step 1: Access Menu Schedule
- On the Dashboard, go to the Online Ordering app.
- Select Menu online.
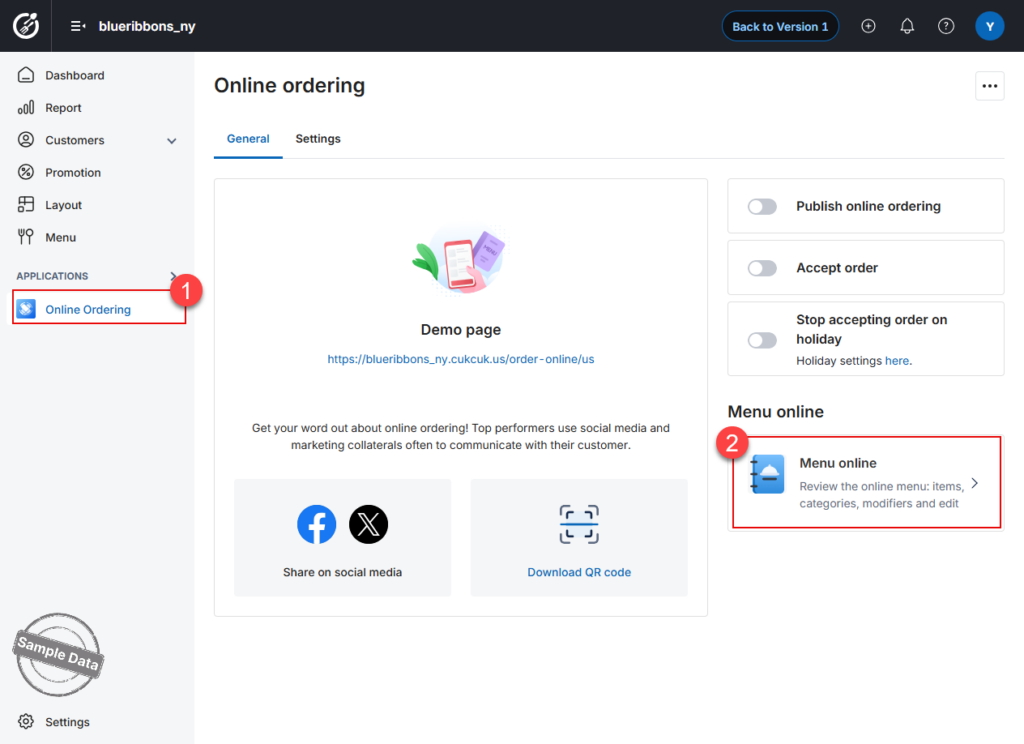
Step 2: Create a Schedule
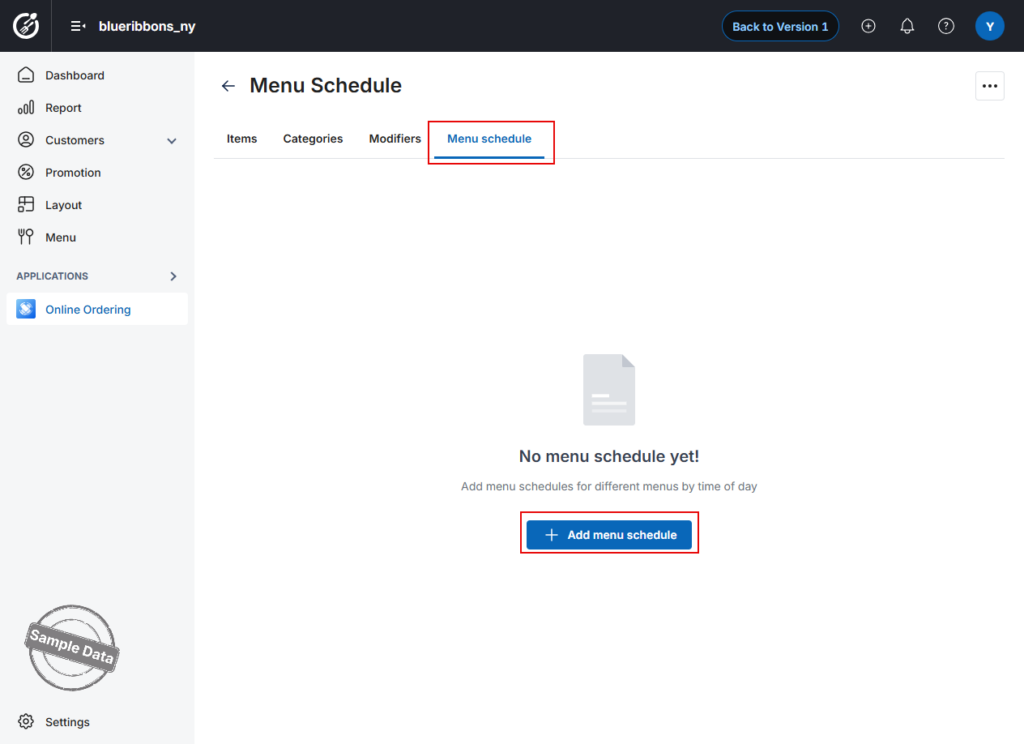
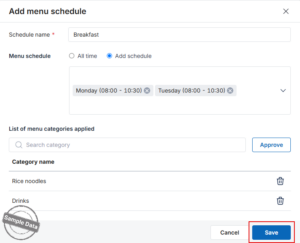
- Open the Menu schedule tab.
- Click Add menu schedule.
- Check Add schedule.
- Select the applicable time schedule(s).
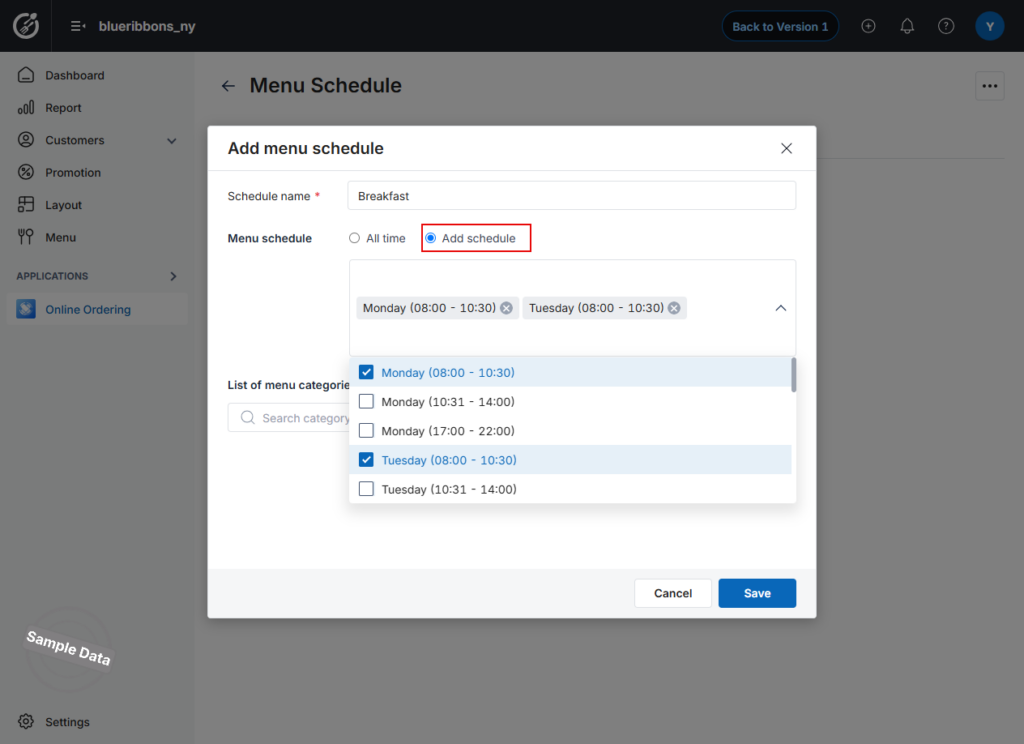
- Click Approve.
- Select the menu categories you want to apply for this schedule.
- Click Select to confirm.
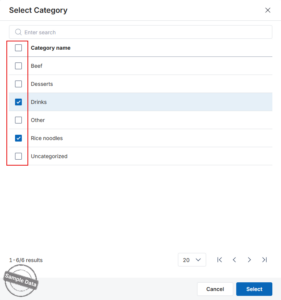
- Click Save to apply the configuration.
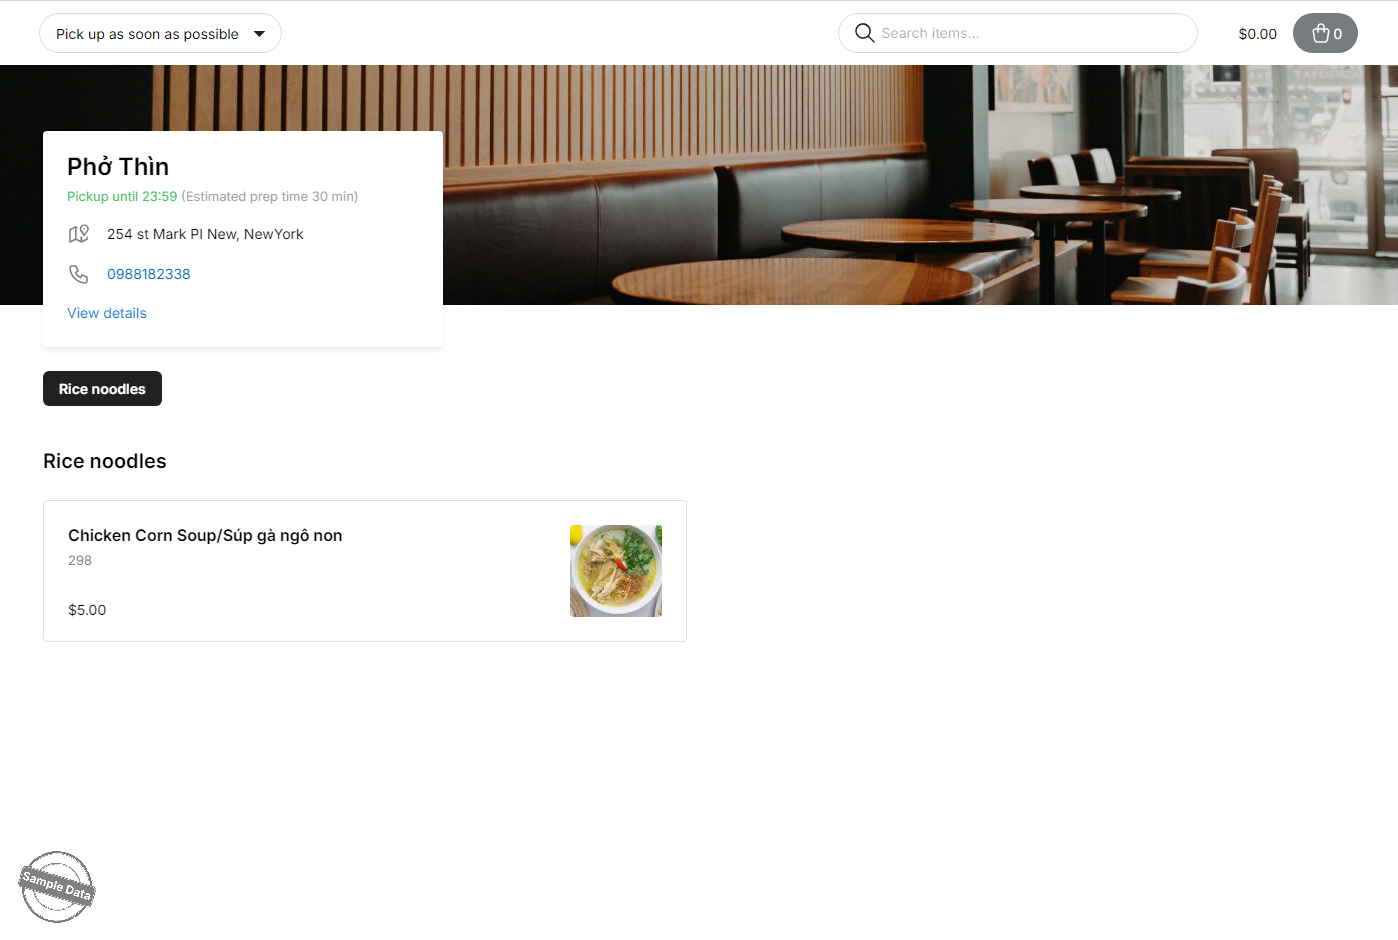
2. Behavior on Online Ordering Website
When customers place an order during a configured time slot, the system will only display the menu items assigned to that schedule.
Have a nice day!


