

I. PURPOSE
The restaurant manager can configure which menu items will be displayed on the Kiosk.
II. INSTRUCTION STEPS
1. Install Kiosk app
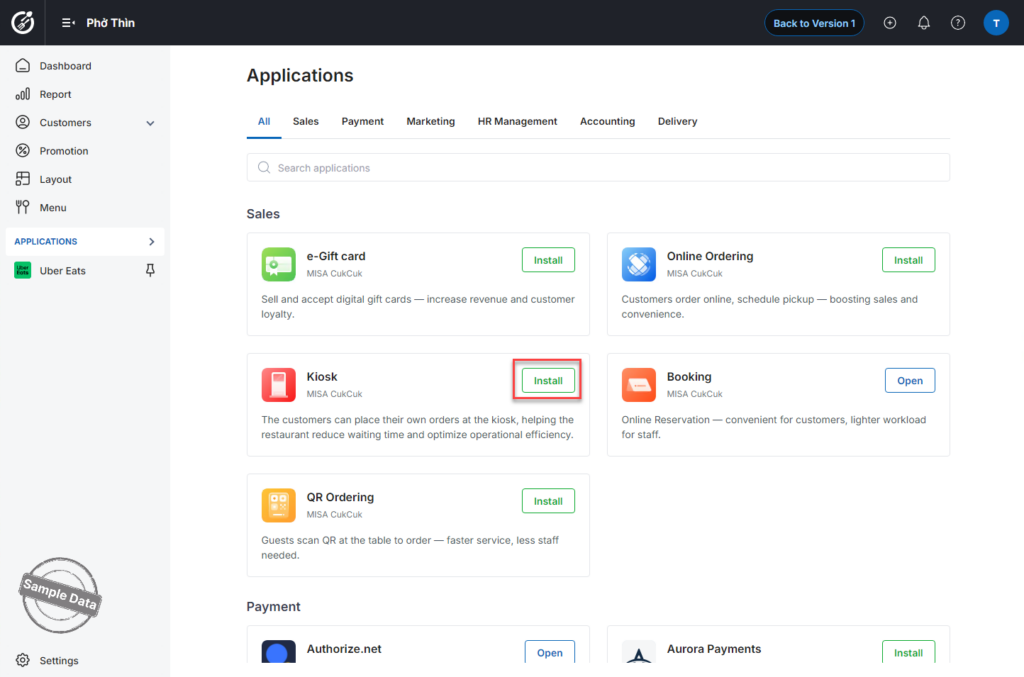
- On the Dashboard, go to Applications.
- Find Kiosk App and click Install.
- Click Install again to confirm.
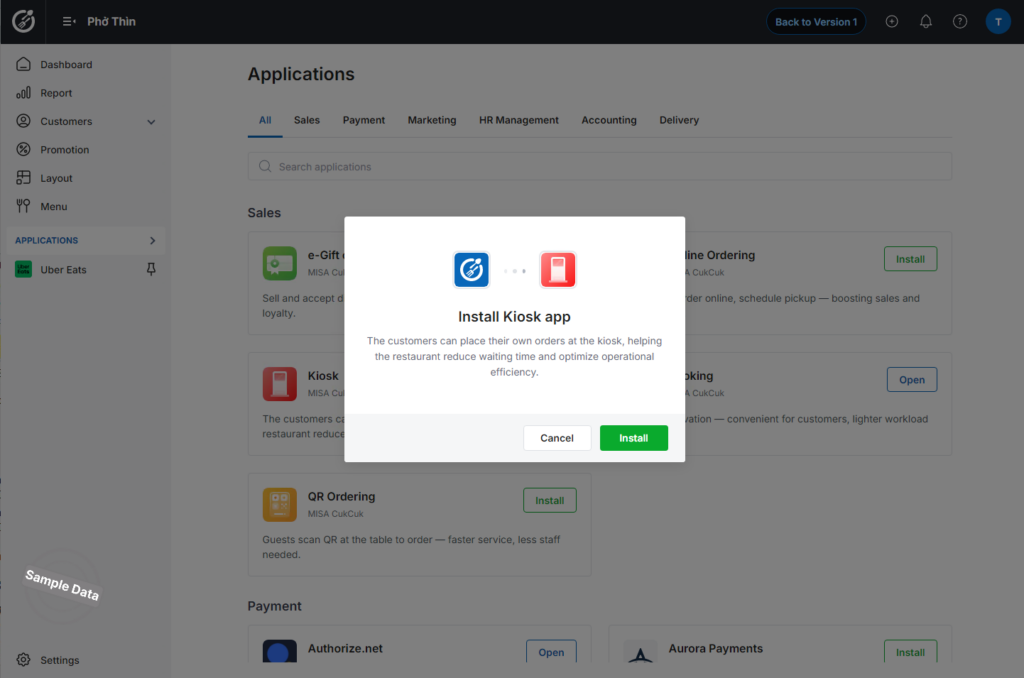
The Kiosk application is now successfully installed.
2. Set up Appearance
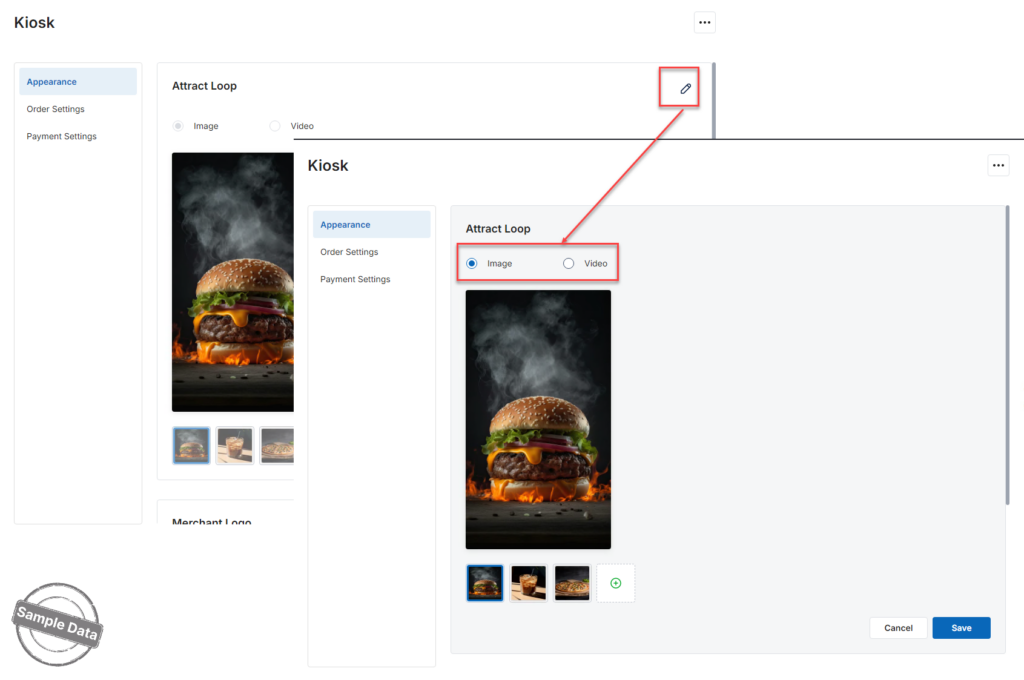
- Click the Edit icon in the Appearance section.
- Upload images or videos to customize how your restaurant is displayed on the Kiosk.
- Click the Add icon
 to upload additional images or videos if needed.
 - Click Save after completing the setup.
3. Set up Payment Settings
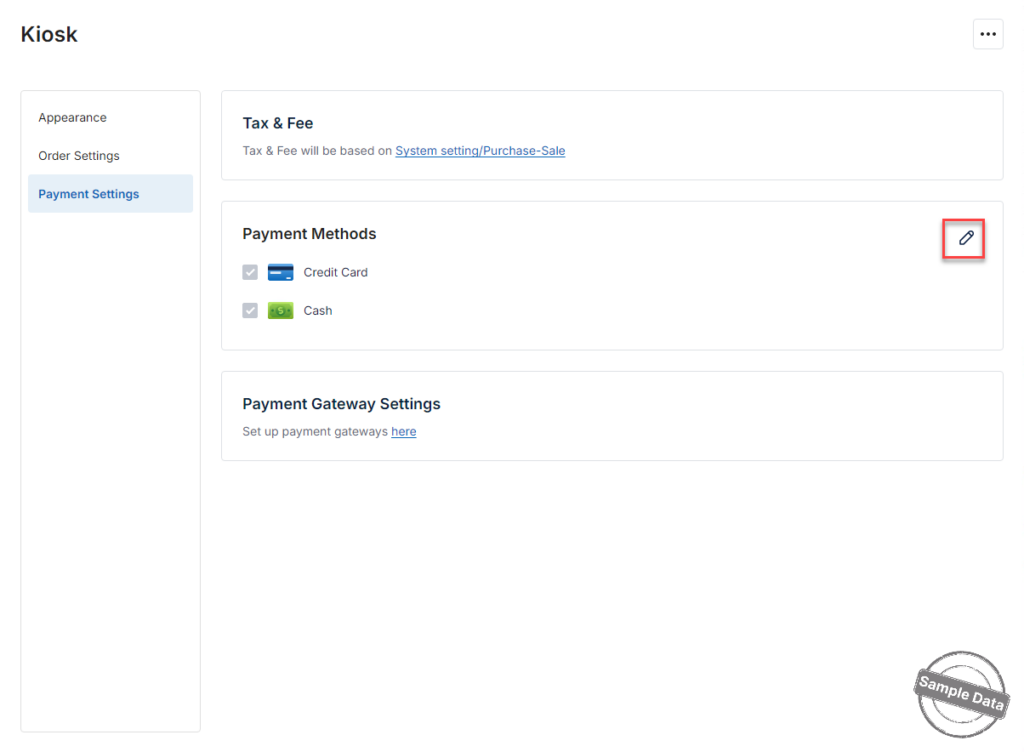
- In the Payment Methods section, click the Edit icon.
- Check or uncheck the payment methods you want to enable on the Kiosk.
- Click Save to apply the changes.
4. Set up Items on Kiosk
a. Enable existing items
- Go to Menu.
- Select the item you want to update.
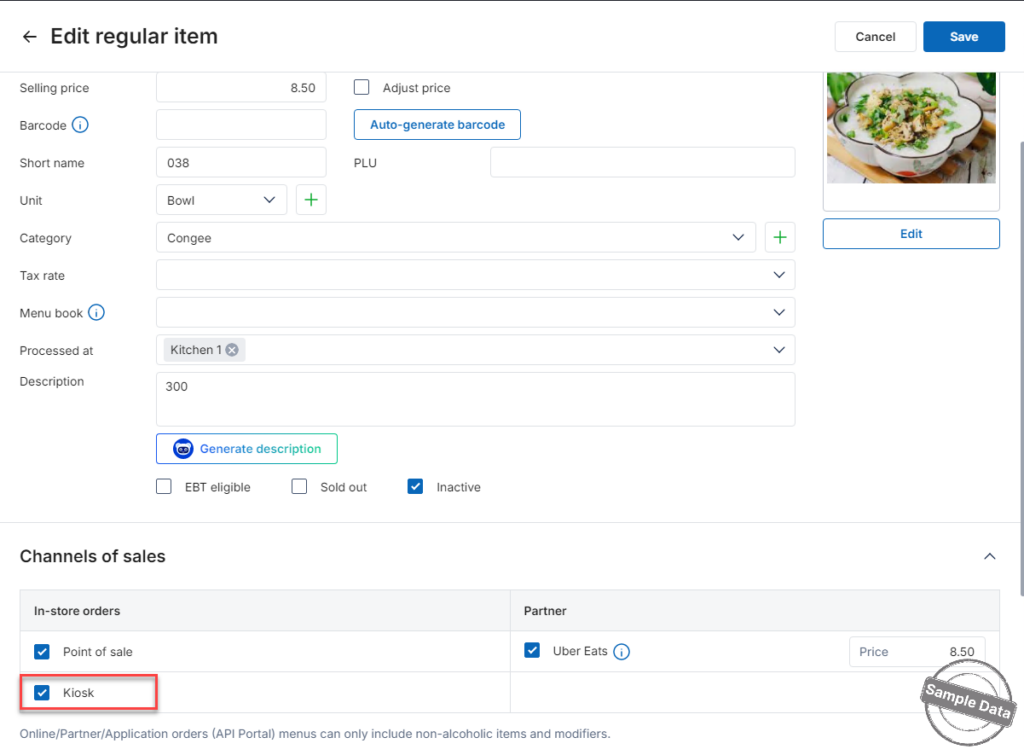
- Scroll down to Channels of Sales.
- Check Kiosk.
- Click Save.
b. Enable new items
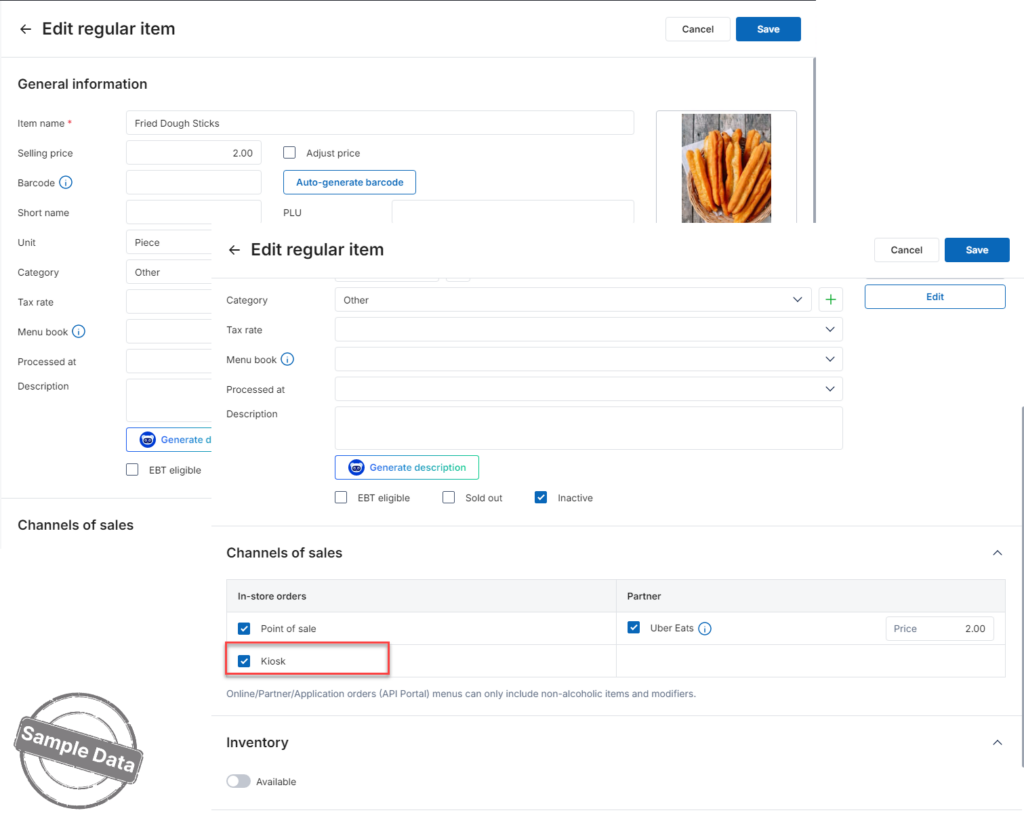
- Click Add Item.
- Enter the required item information.
- Scroll down to Channels of Sales and check Kiosk.
- Click Save.
5. Set up Modifiers on Kiosk
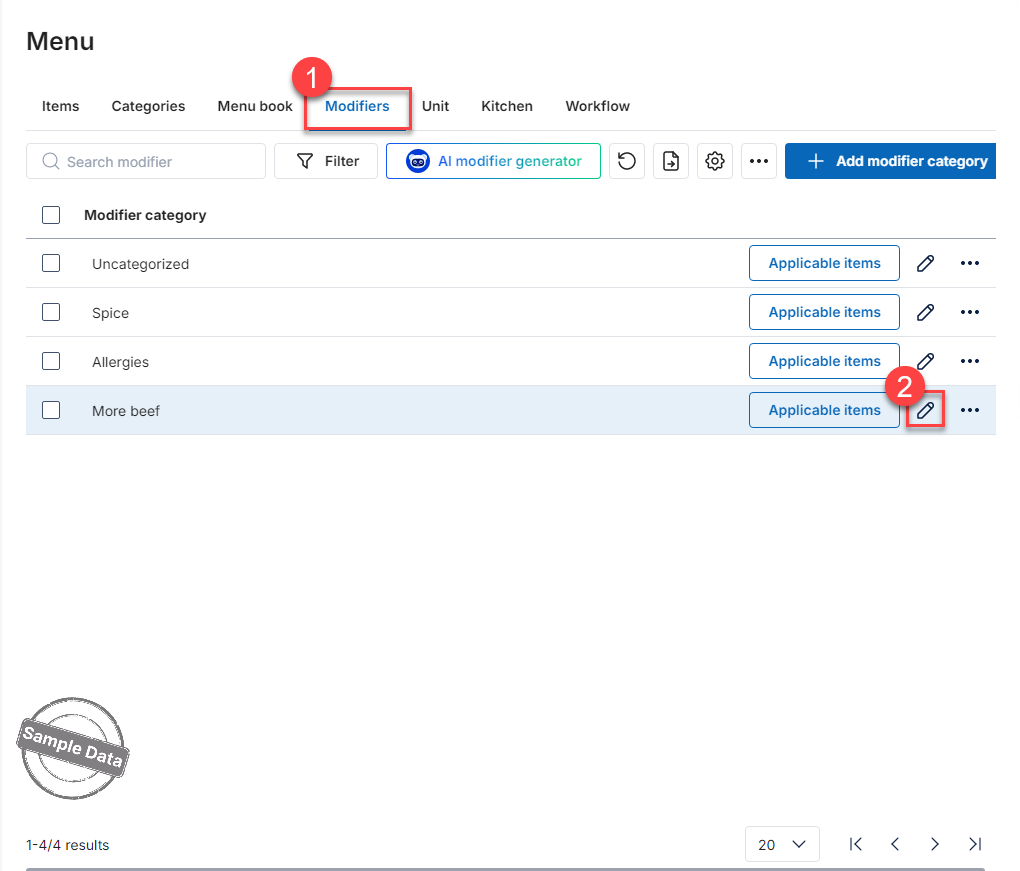
- Go to the Modifiers tab.
- Click the Edit icon for the modifier you want to update.
- In the Channels of Sales section, check Kiosk to enable this modifier on the Kiosk channel.
- Click Save to apply the changes.
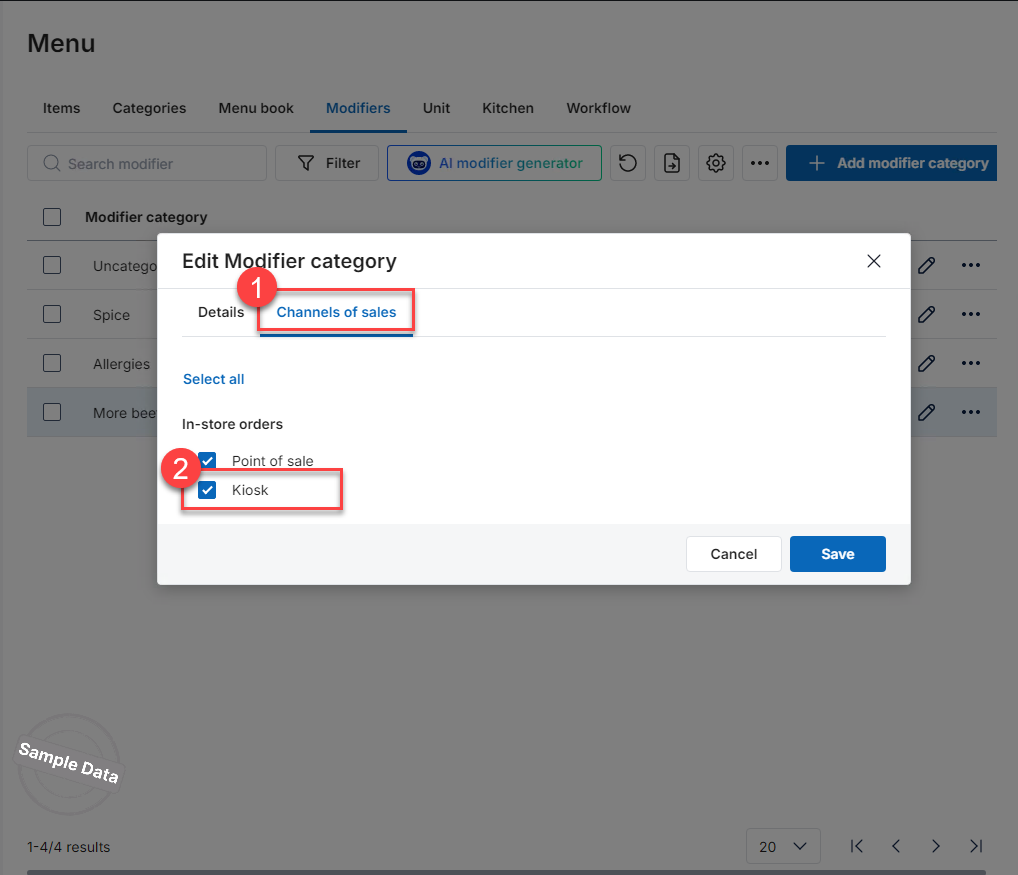
The selected modifier is now available for orders placed on the Kiosk.
Have a nice day!


