

I. PURPOSE
The restaurant can effectively manage and monitor the list of waiting customers, helping to avoid delays and overcrowding during busy periods.
II. INSTRUCTION STEPS
1. Set up the Waitlist on the dashboard
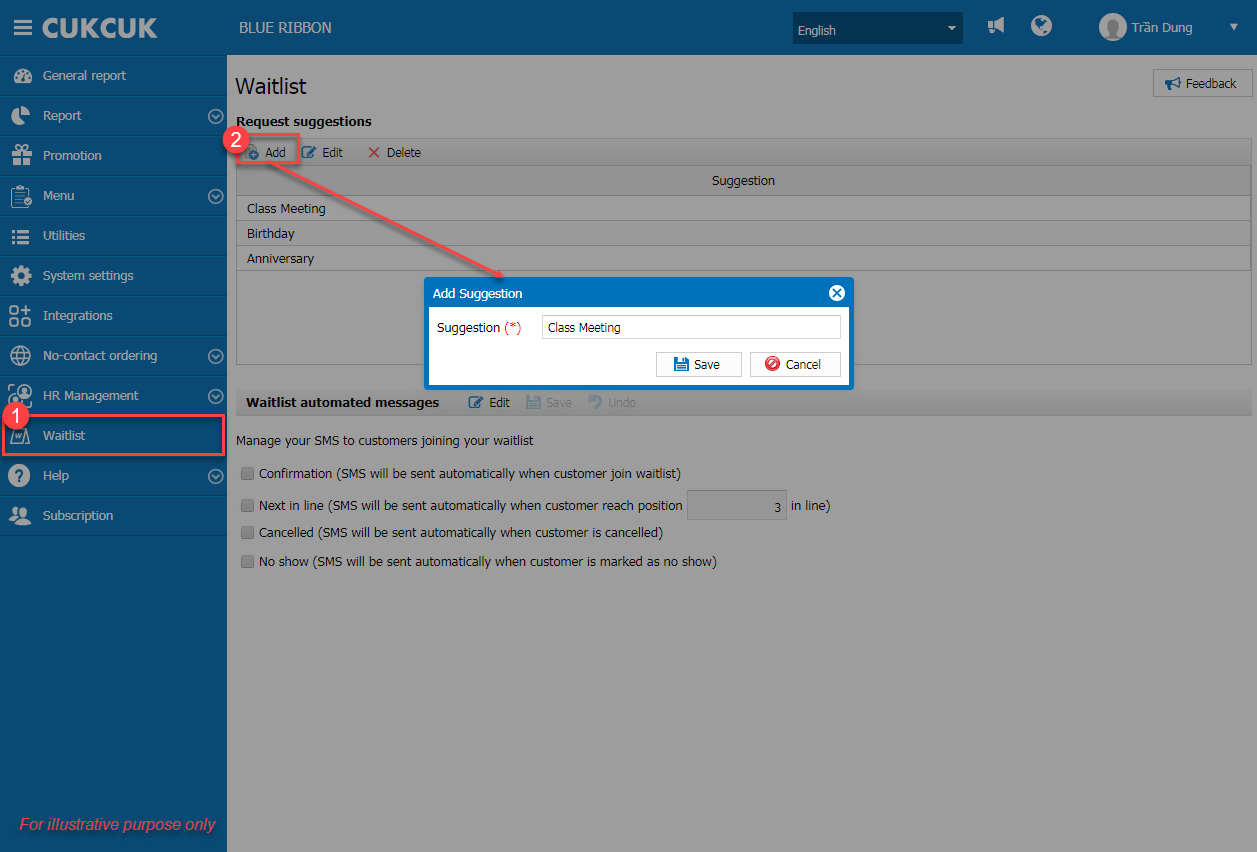
On the management page, select Waitlist. Here, the restaurant can add suggested requests. Then, click Save.
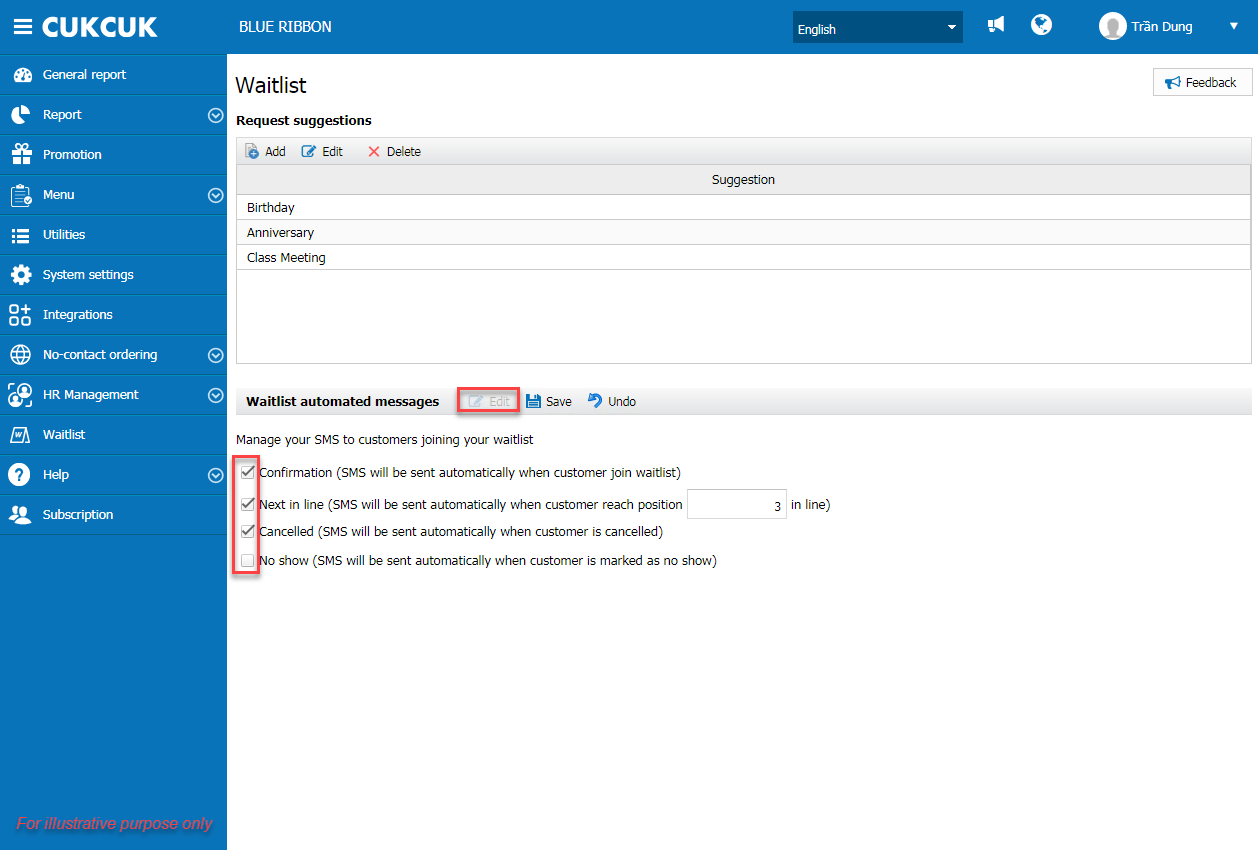
To send automated messages, click Edit under Waitlist automated messages and tick the activities for which you want to send messages automatically.
2. Add customers to the waitlist
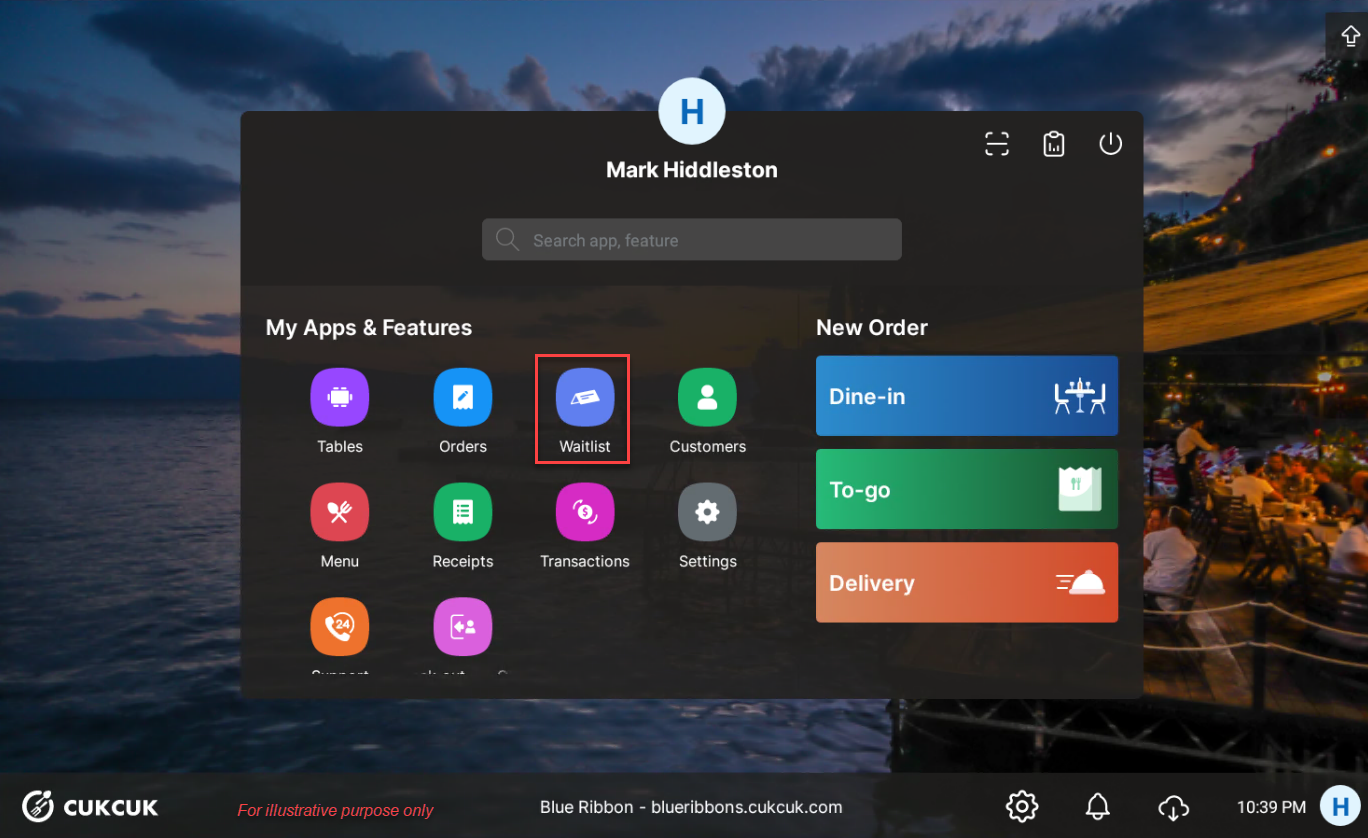
On a tablet or phone, go to Waitlist.
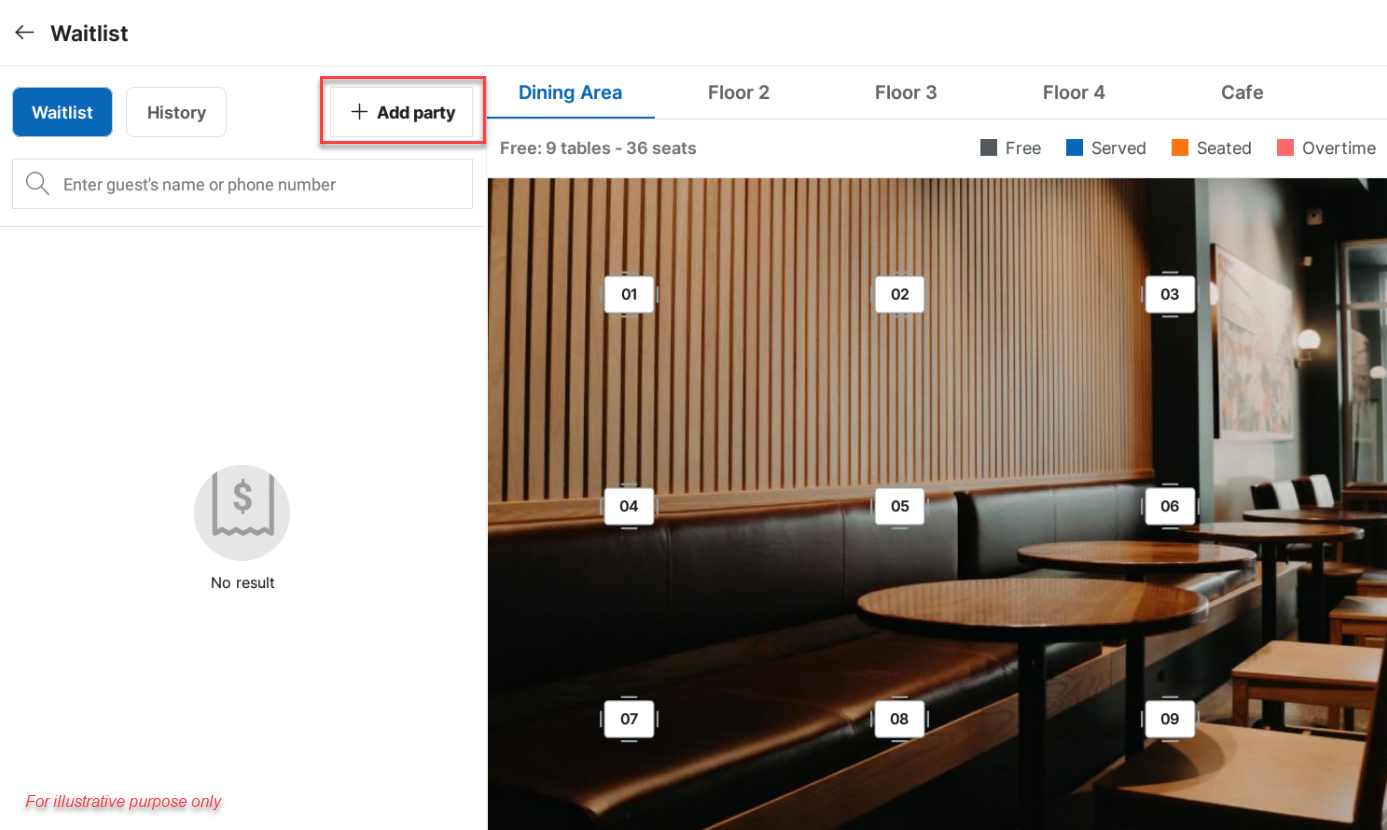
Click Add party.
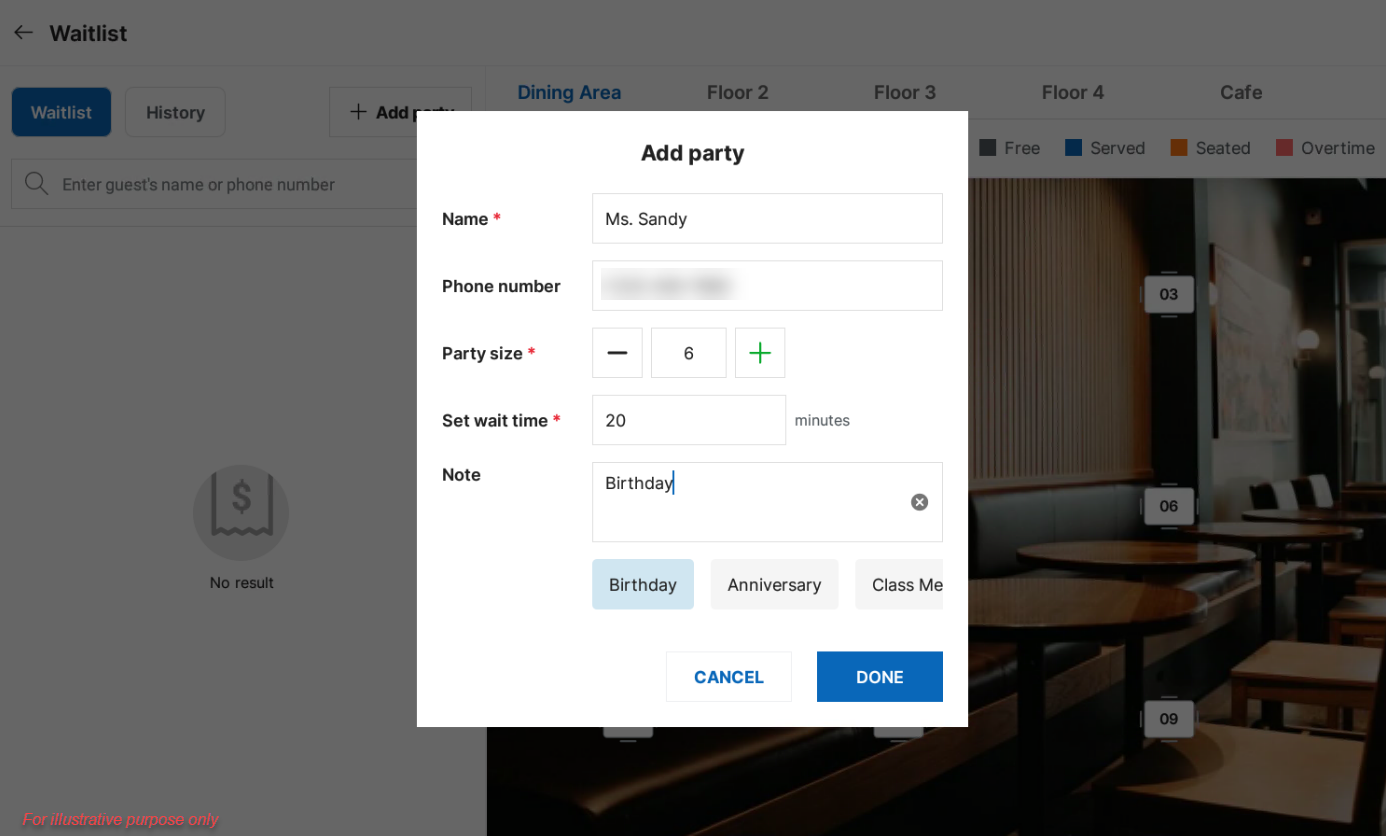
Enter the customer’s name, phone number, number of guests, waiting time, and any notes (if applicable). Then, click Done.
To edit customer information, click the icon  and select Edit.
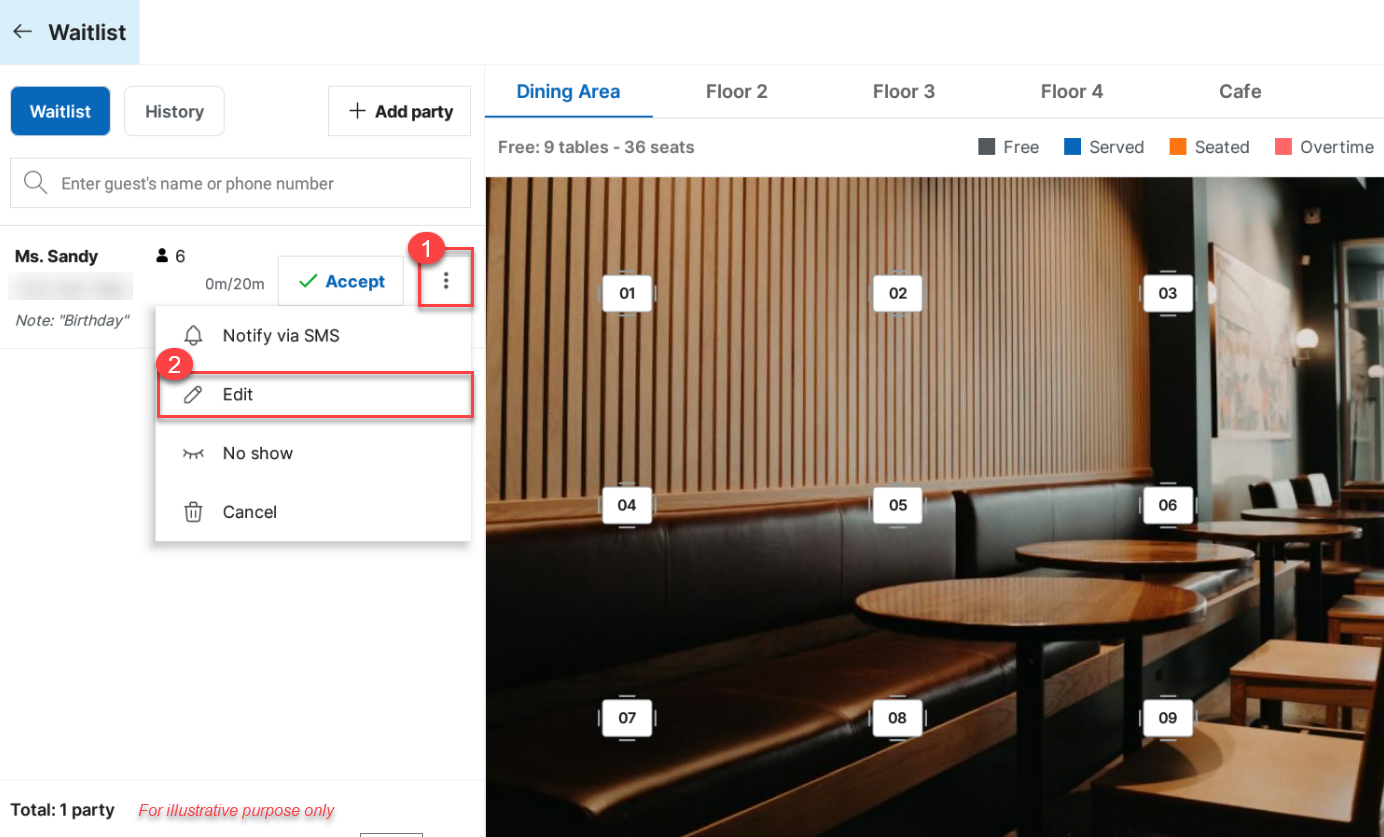
Make the necessary changes.
3. Assign tables
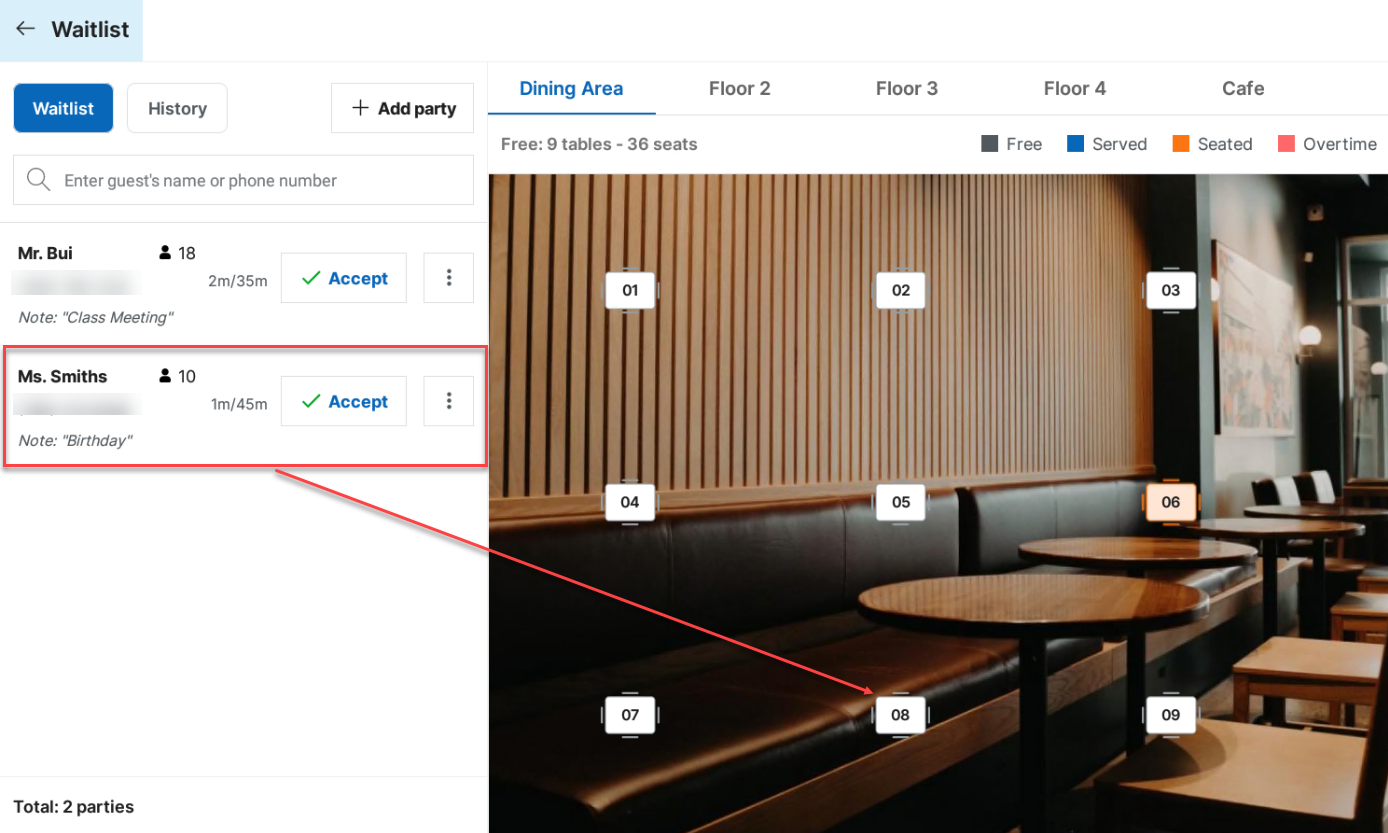
When a table becomes available, if only one table is needed, staff can drag and drop the customer onto the vacant table.
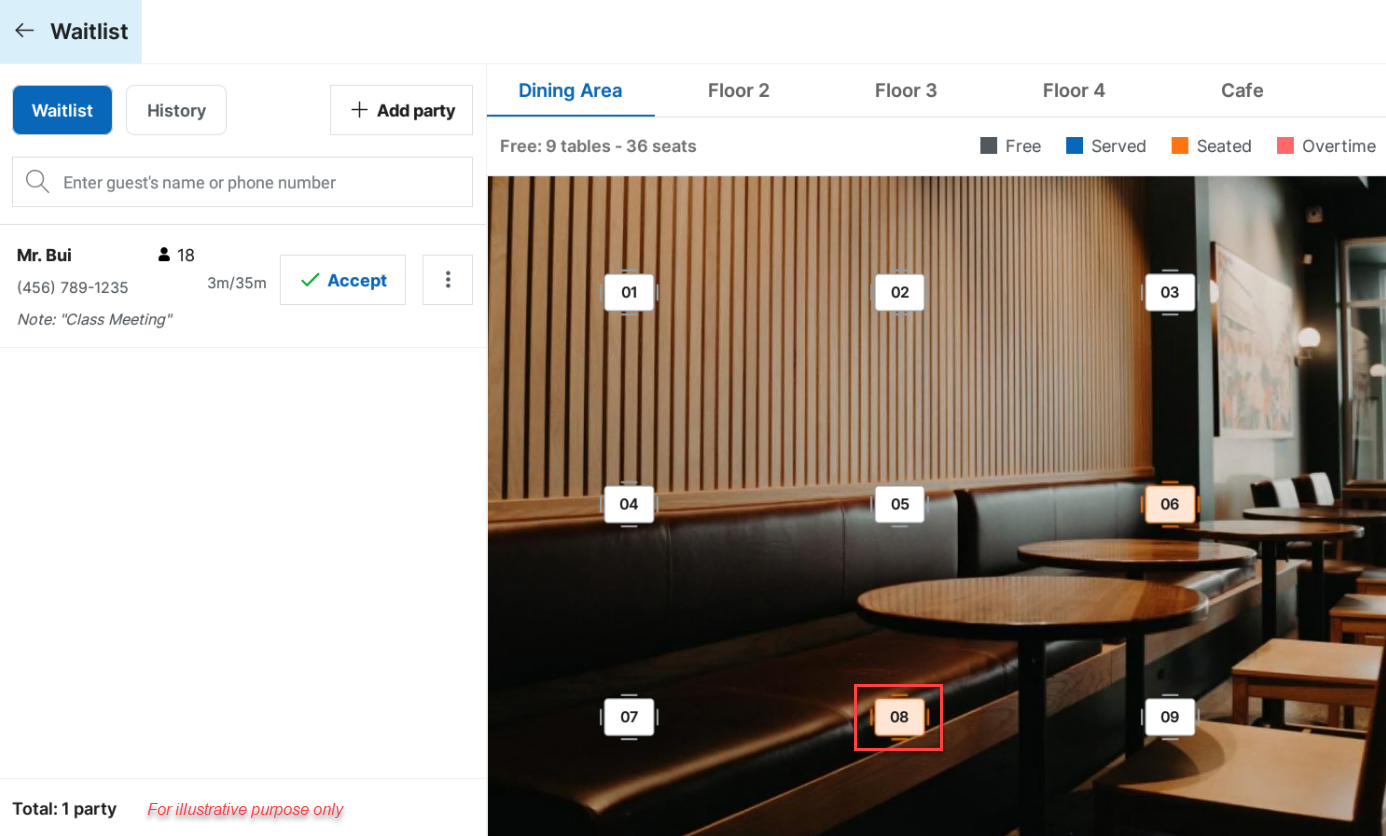
Once successfully assigned, the table will turn orange.
If the group requires more than one table, press the Accept button.
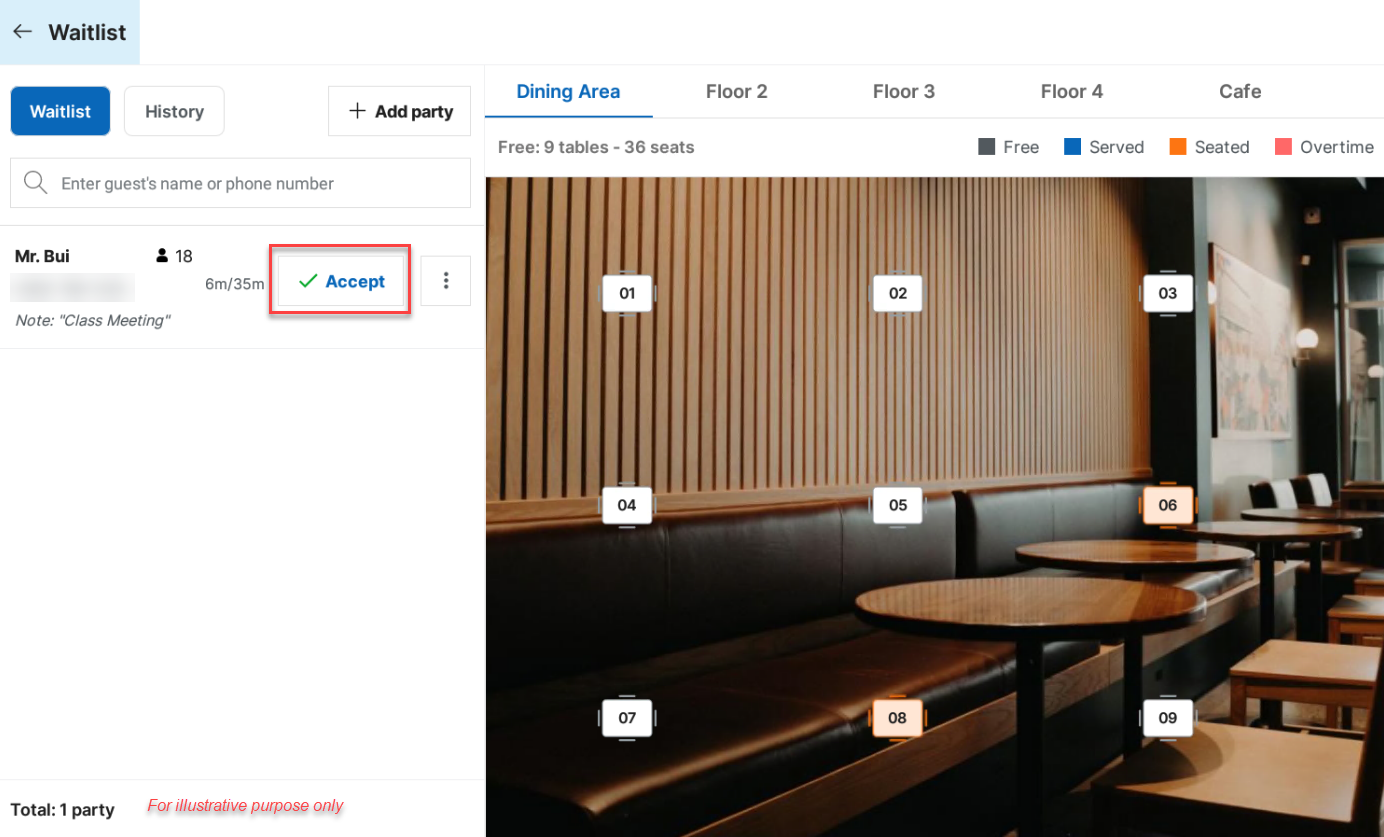
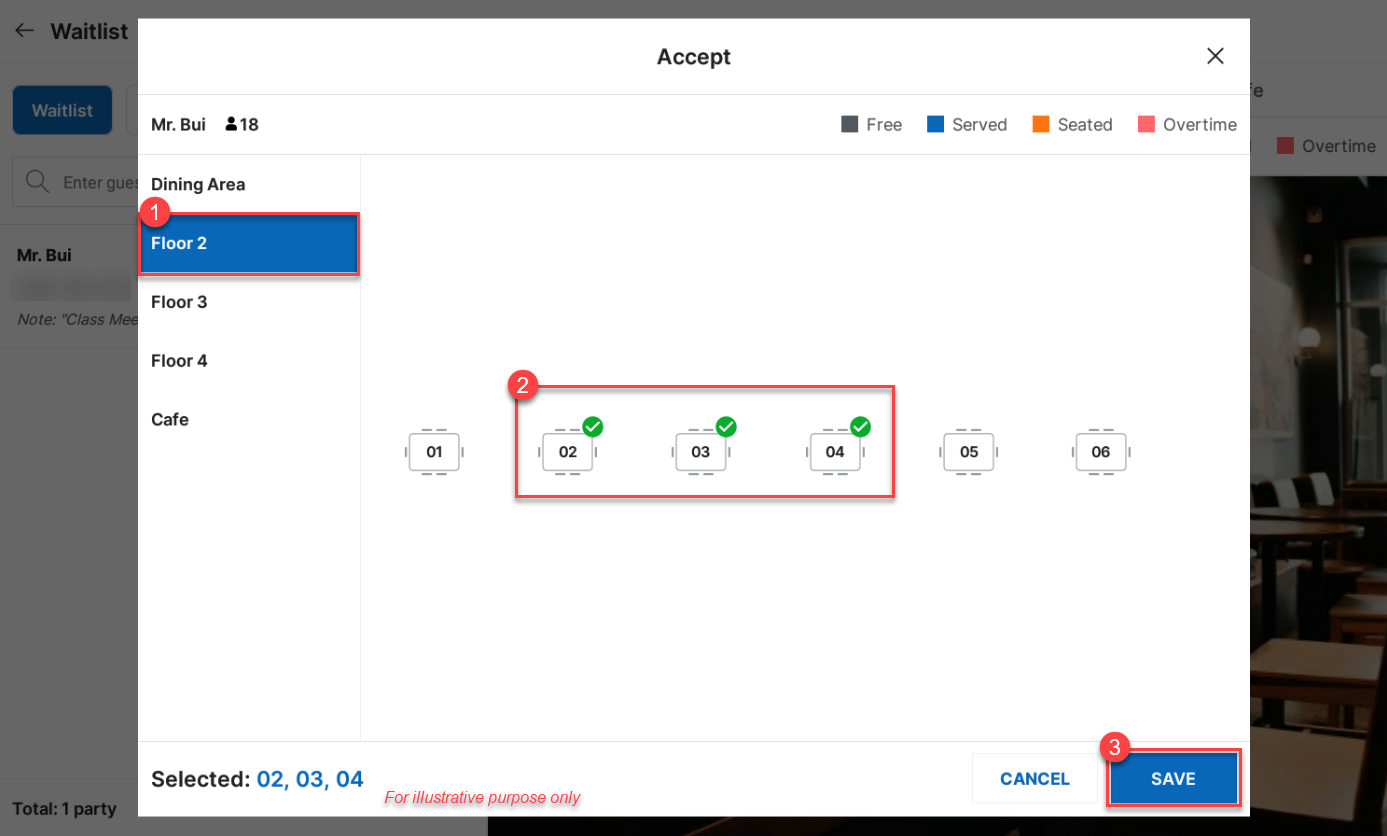
Next, select the area, choose the tables, and click Save.
4. Remove customers
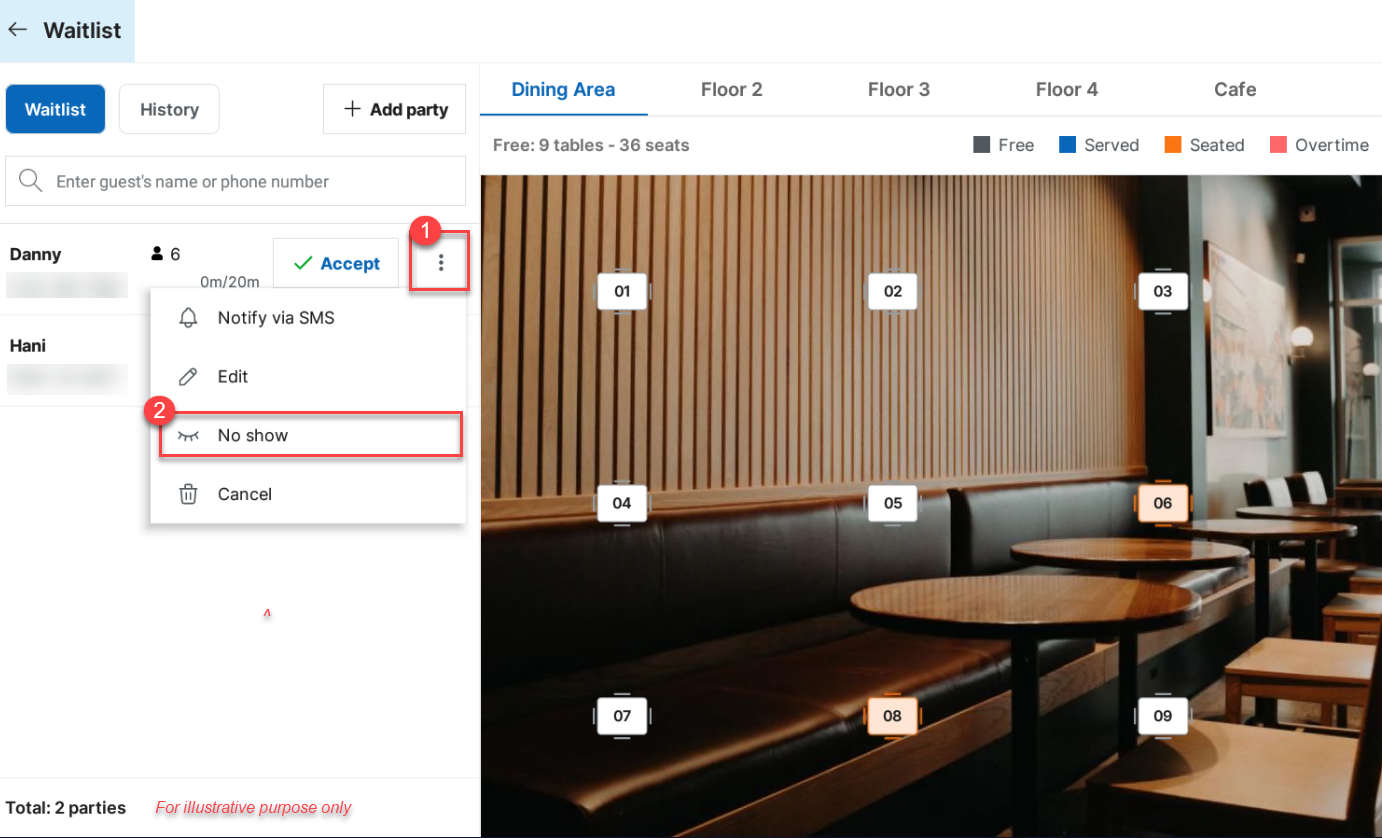
If a customer does not show up, click the icon and select No show.
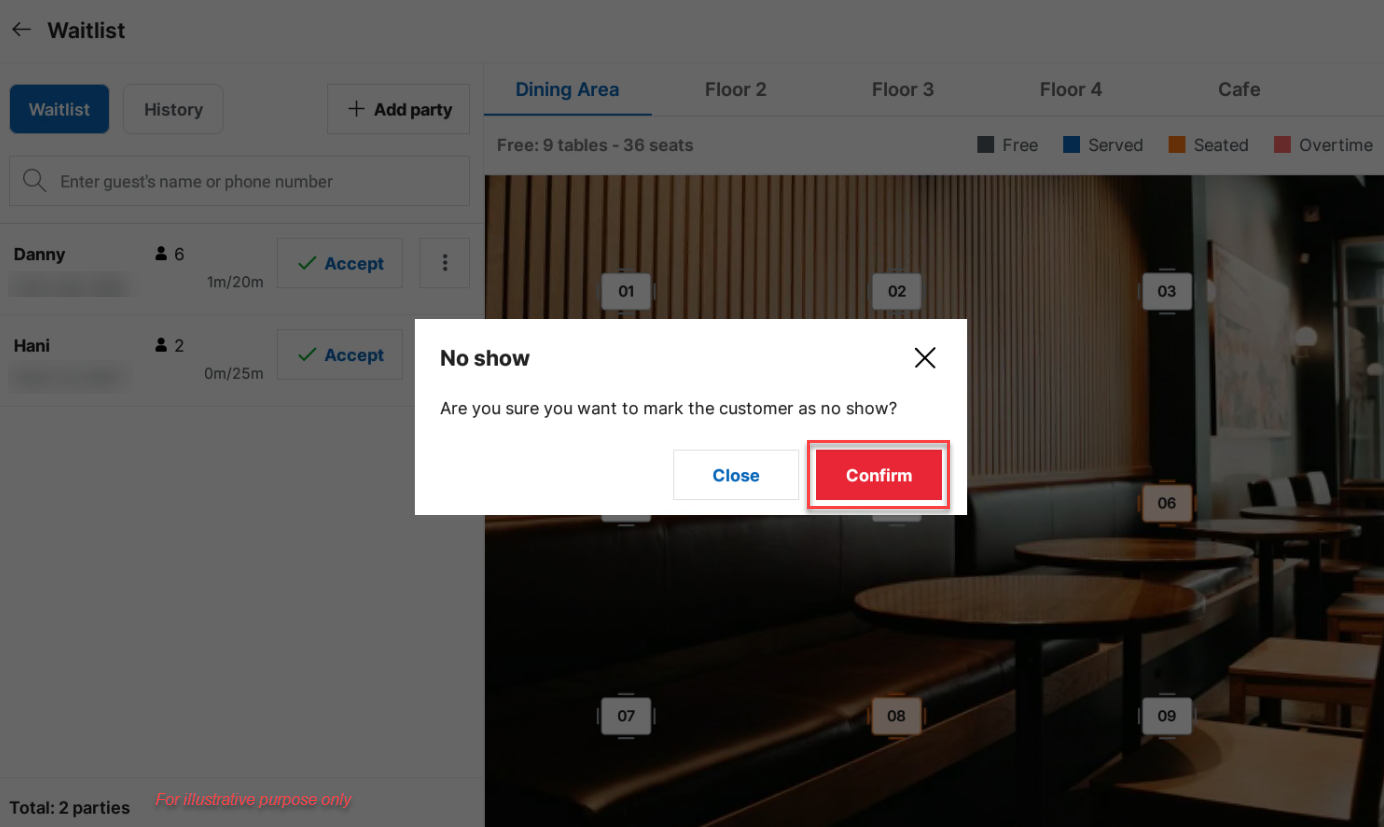
Click Confirm to confirm the action.
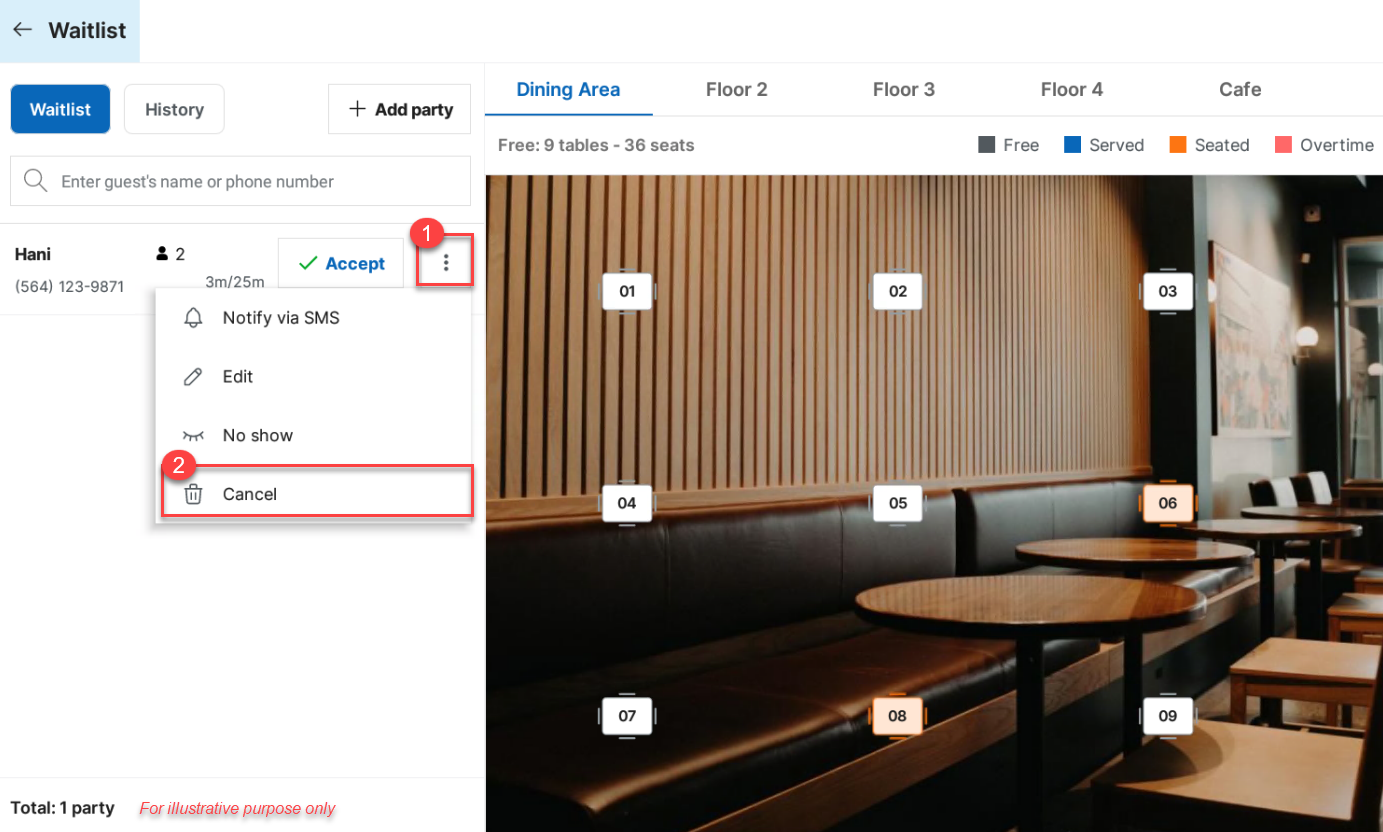
If the restaurant is overloaded and cannot accept more guests, or if the customer calls to cancel, click the icon and select Cancel.
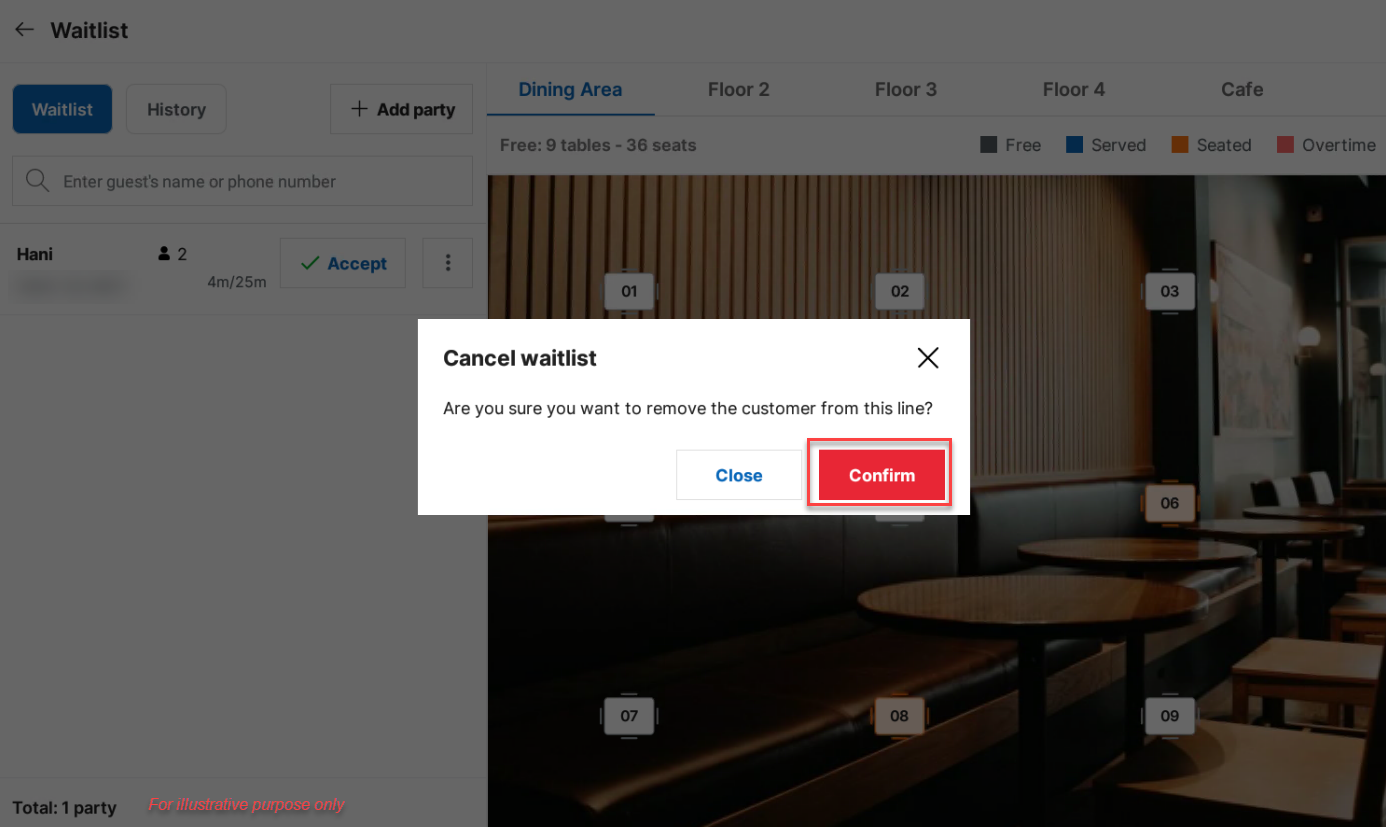
Nhấn Confirm để xác nhận.
Click Confirm.
5. View waitlist history
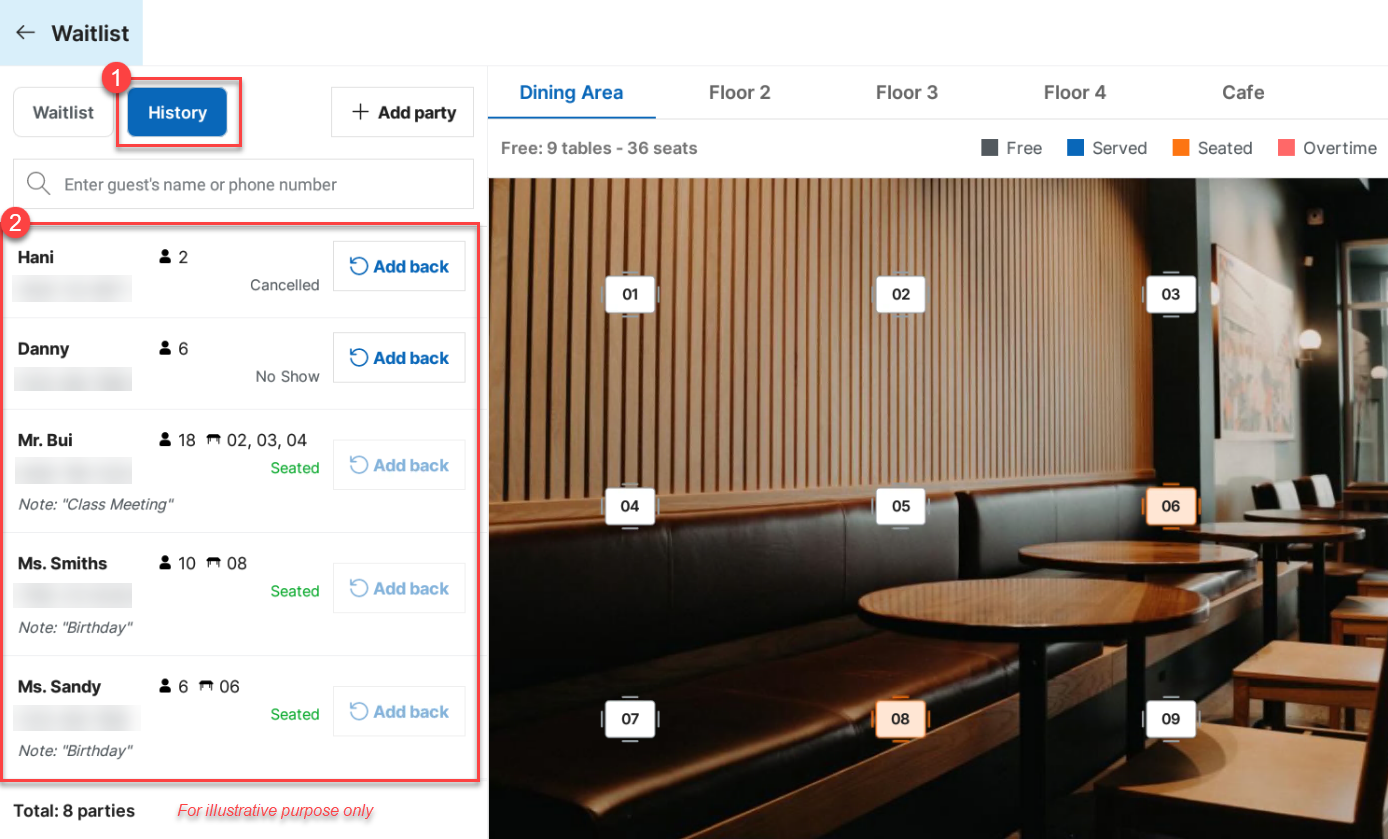
To view the waitlist history, click History. Here, management can review details of customers who have been tabled, no-shows, or cancellations.
Have a nice day!


