
I. Purpose
With the Reservation feature, the customers can easily make reservations and the staff can manage tables efficiently.
II. Instruction steps
1. Install reservations
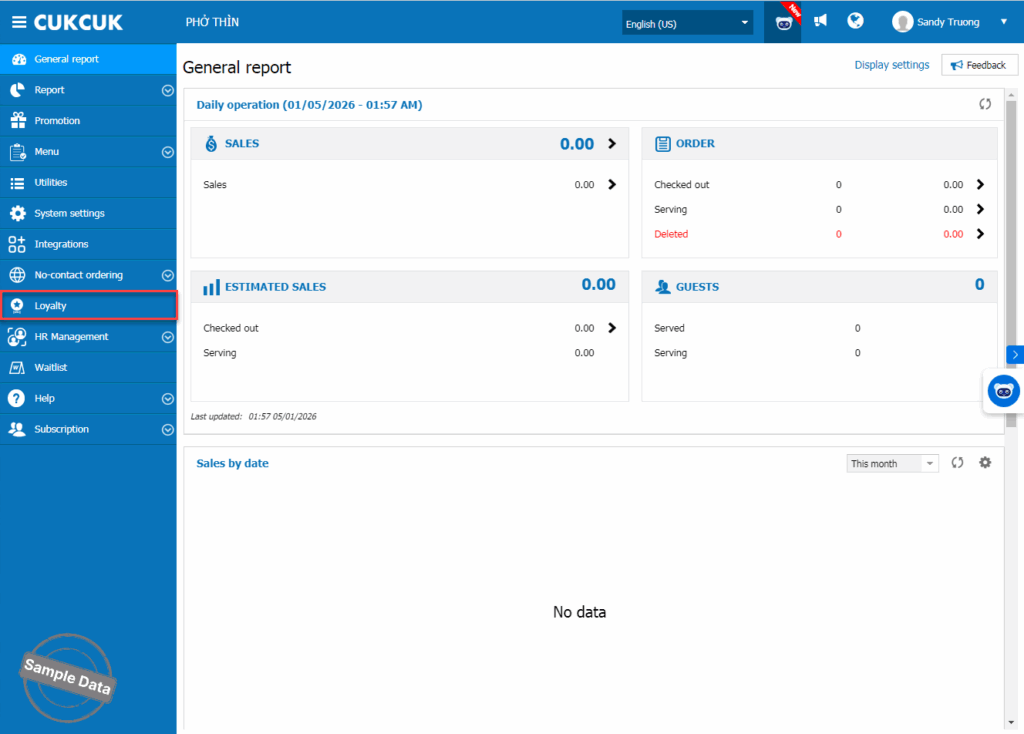
On the management page, click Loyalty.
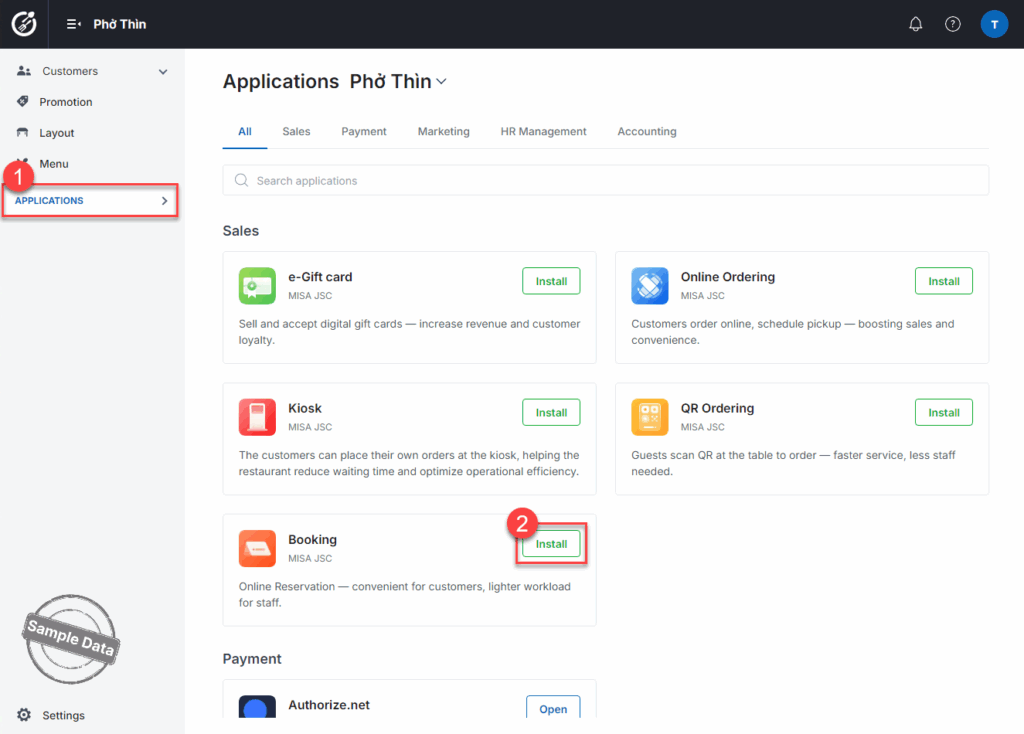
On Applications tab, click Install at Booking.
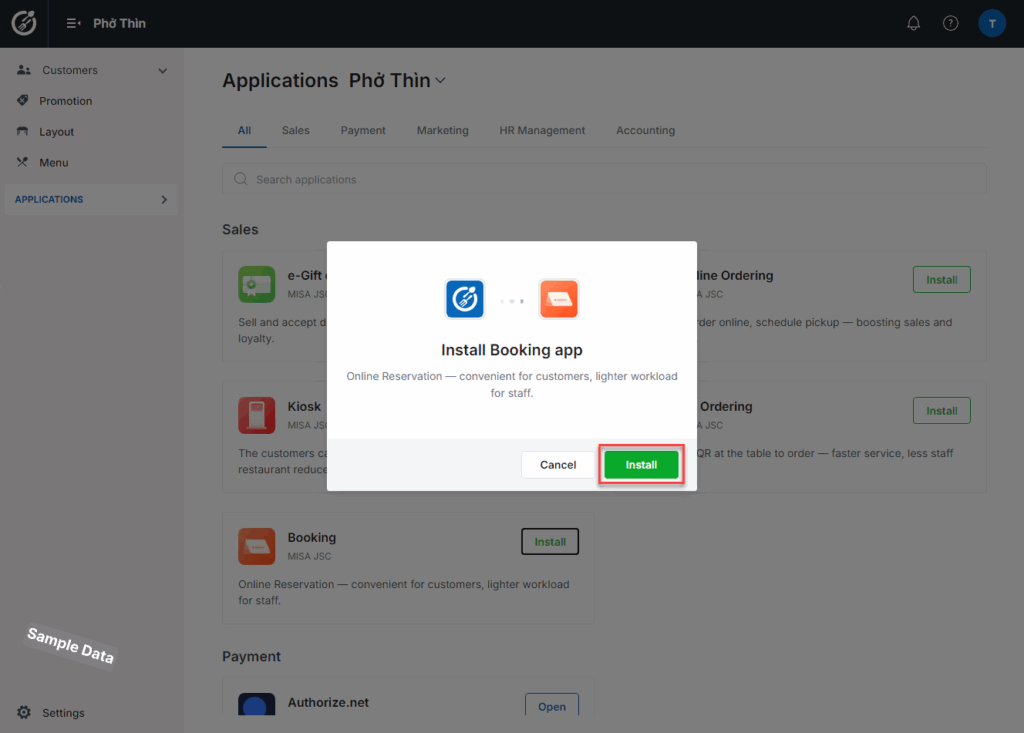
Then click Install.
2. Set up Online reservation
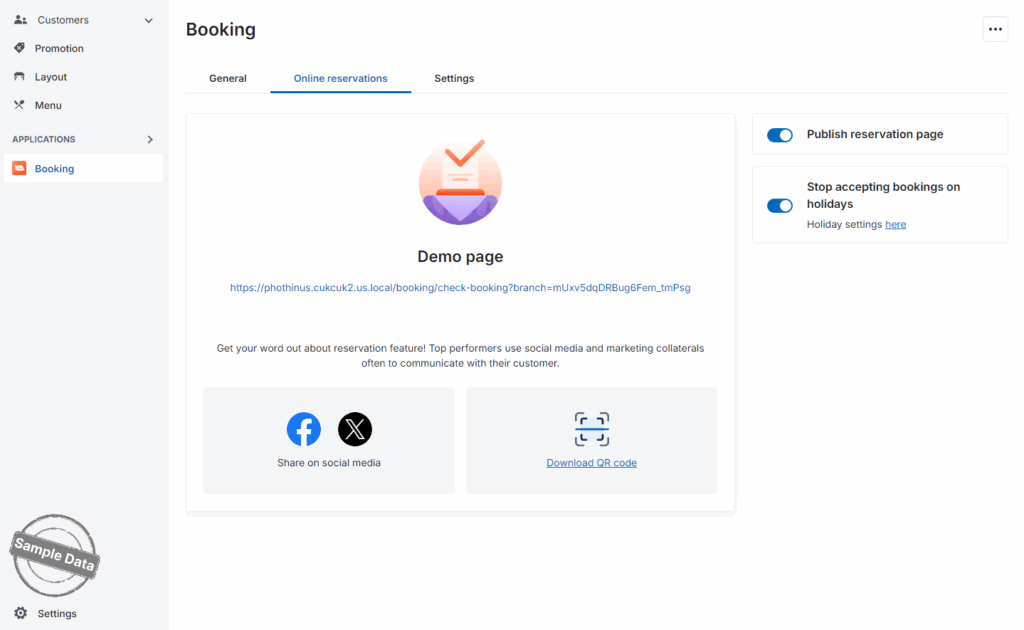
If the restaurant offers online reservation, go to Online reservation tab and turn on Publish reservation page.
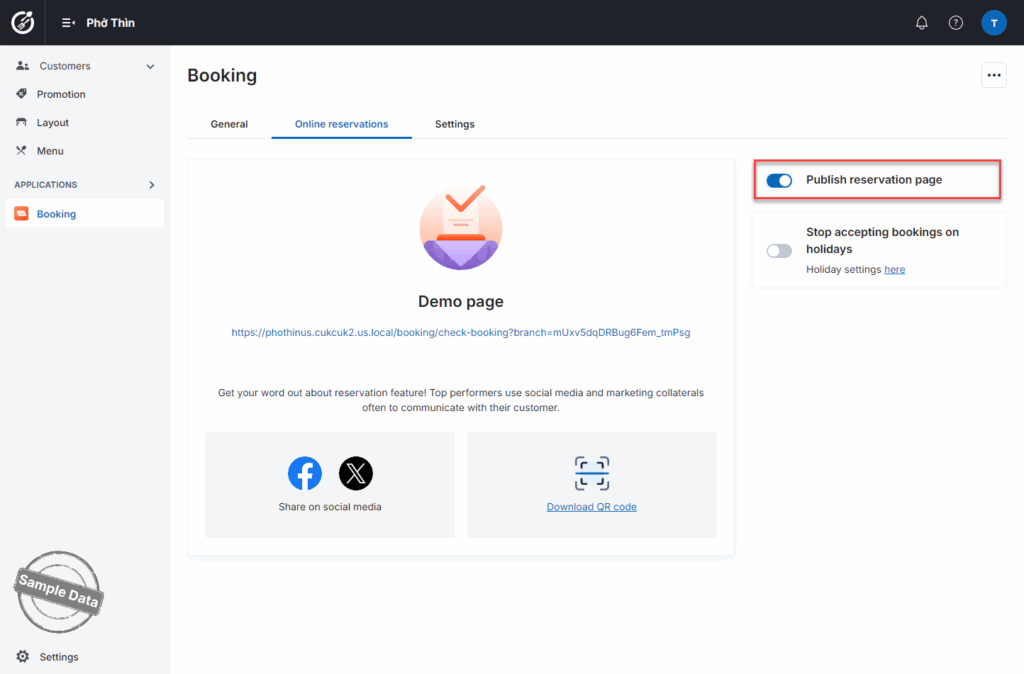
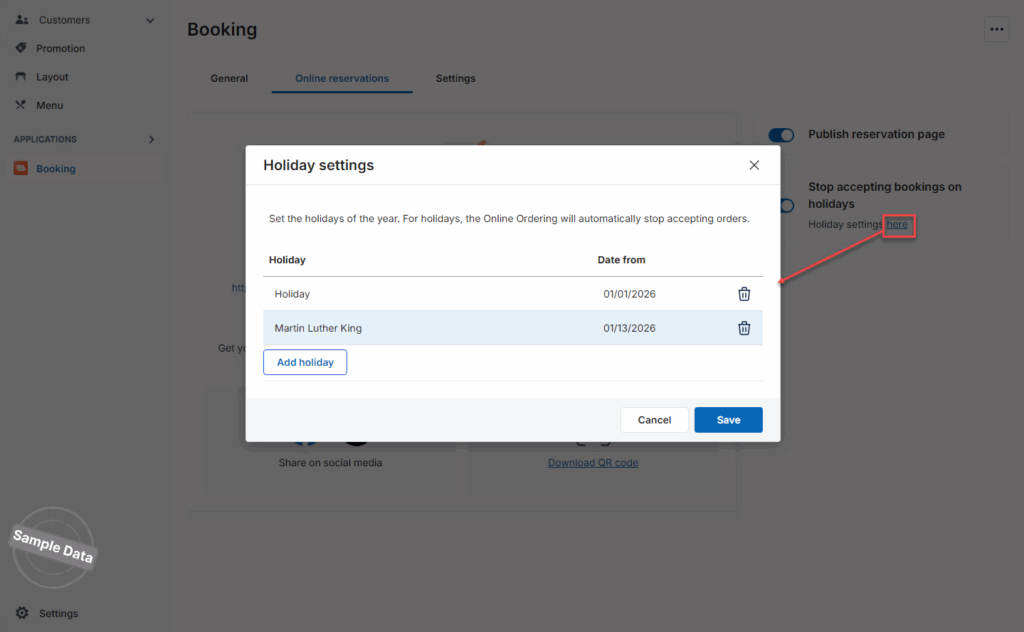
If there are any days when the restaurant does not accept online bookings, turn on Stop accepting bookings on holidays.
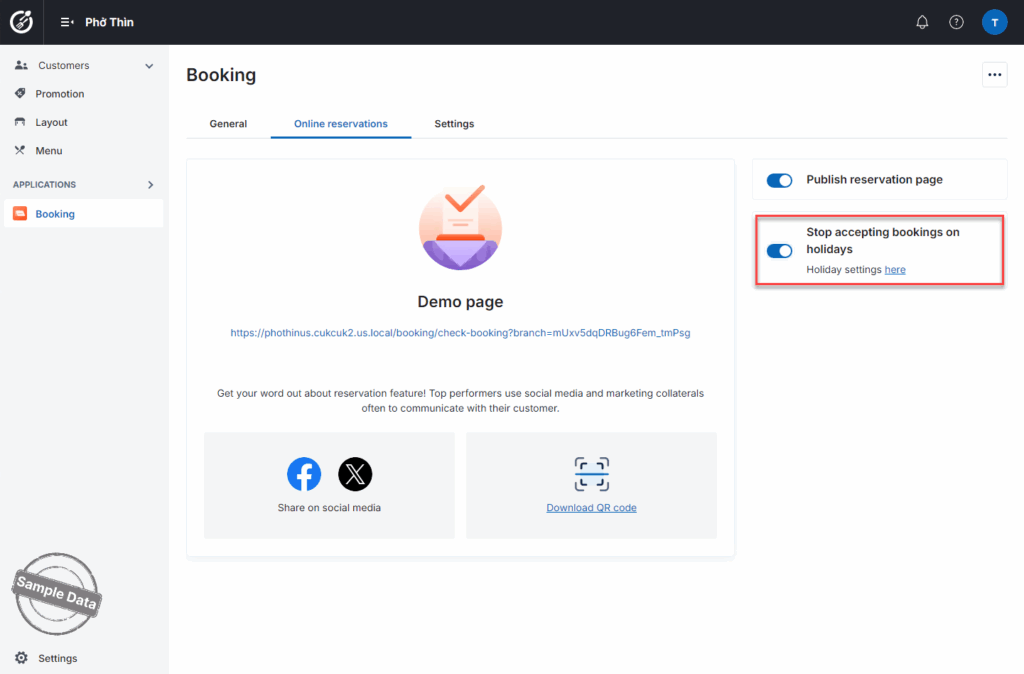
Click here and add holiday(s). Click Save to save the changes.
After that, copy the link or download QR Code and share it to the customers.
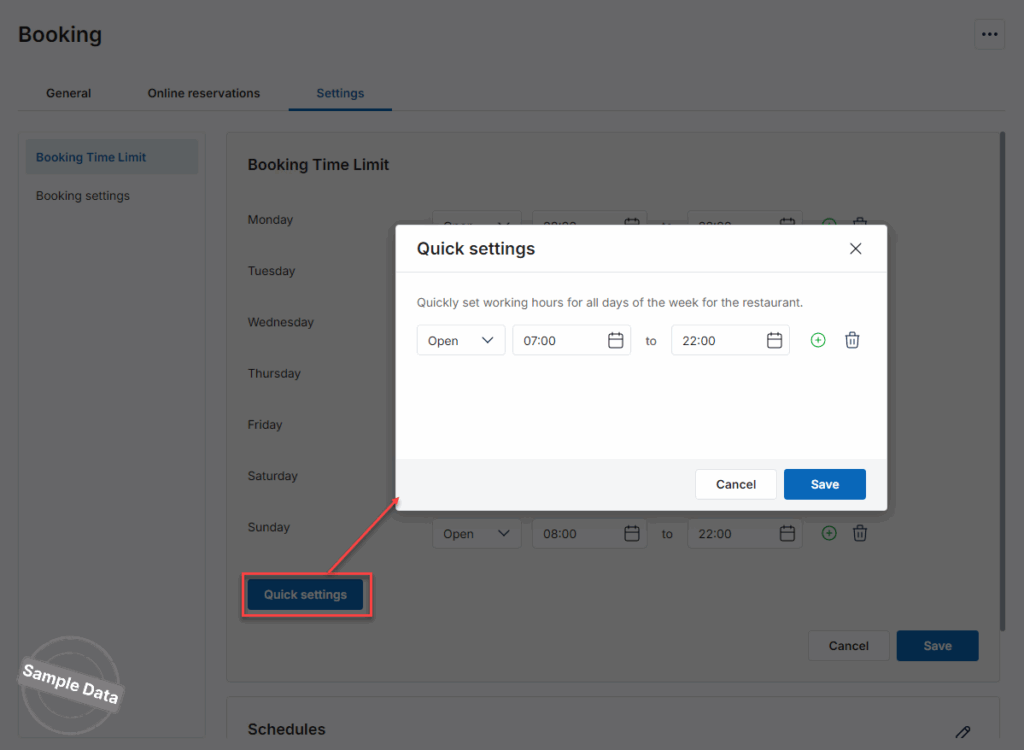
3. Set up booking time
On Setting tab, click this icon ![]() and set up booking time.
and set up booking time.
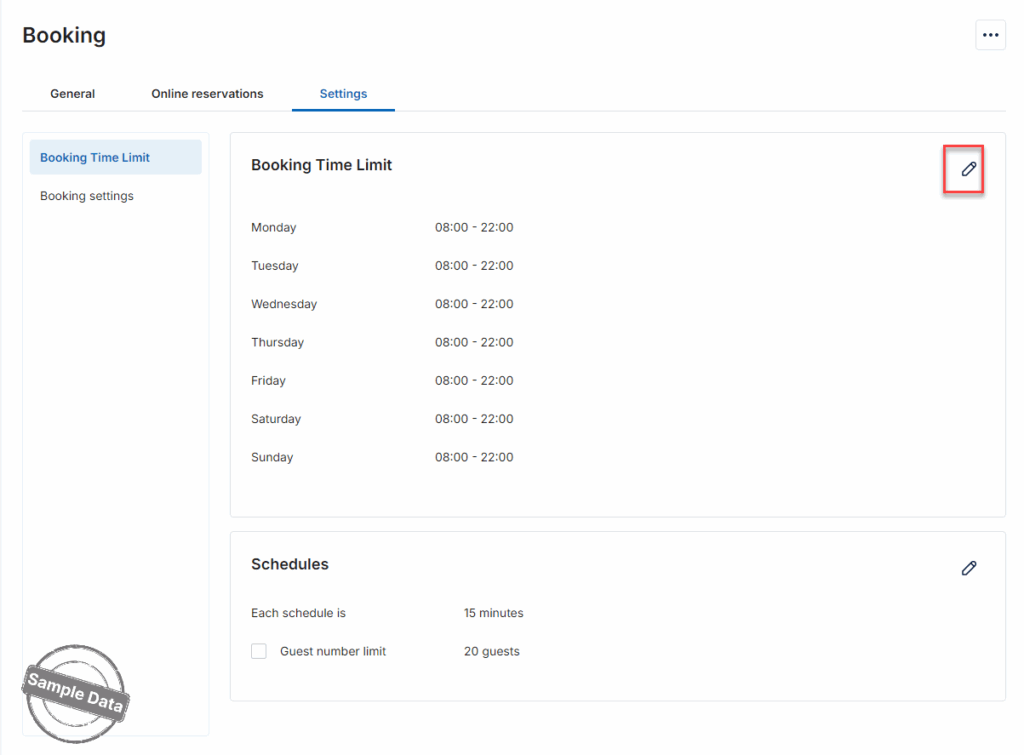
Click Quick settings and add schedule.
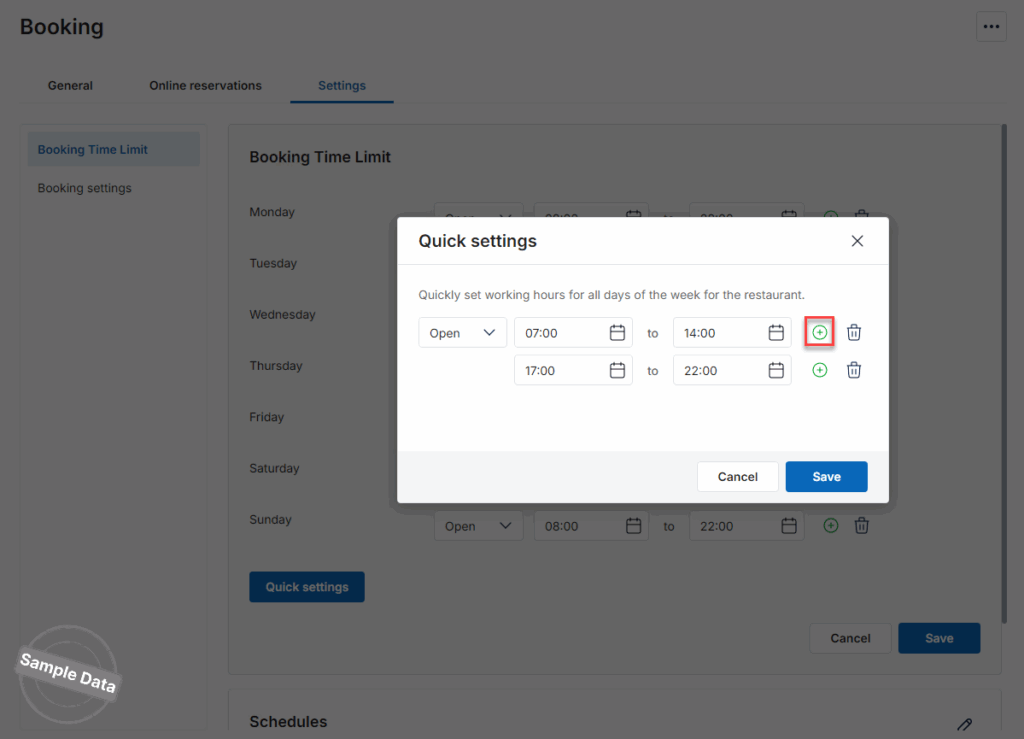
If there is more than 1 schedule, click this icon ![]() to add. Then, click Save.
to add. Then, click Save.
4. Other settings
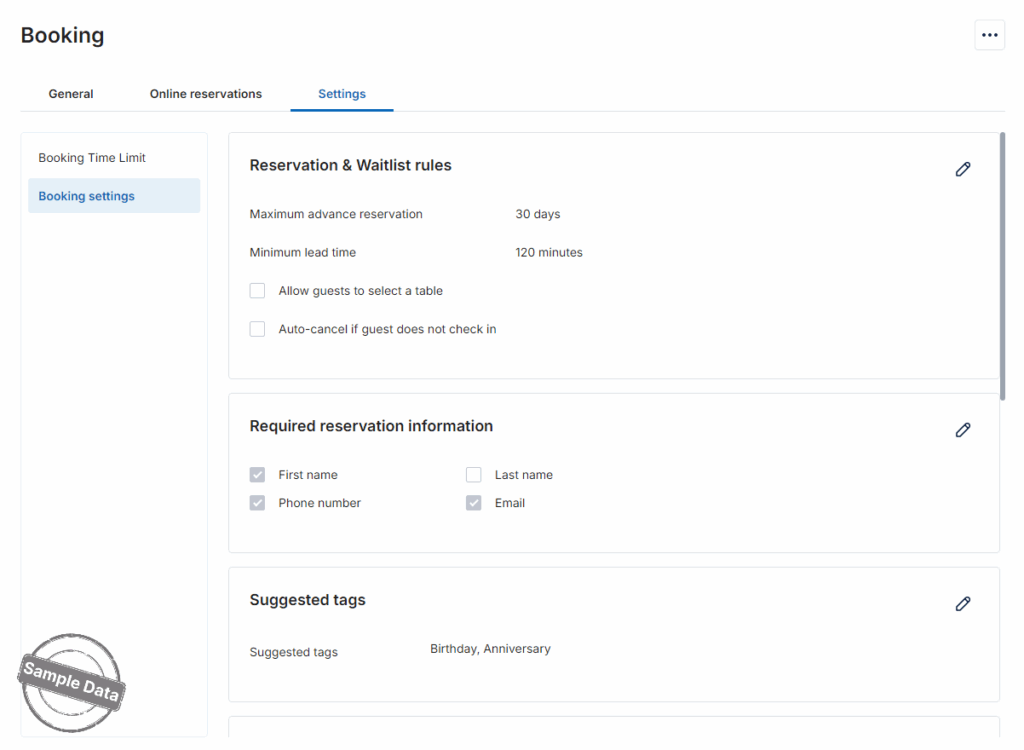
a. Reservation & Waitlist rules
Click this icon ![]() and set up rules.
and set up rules.
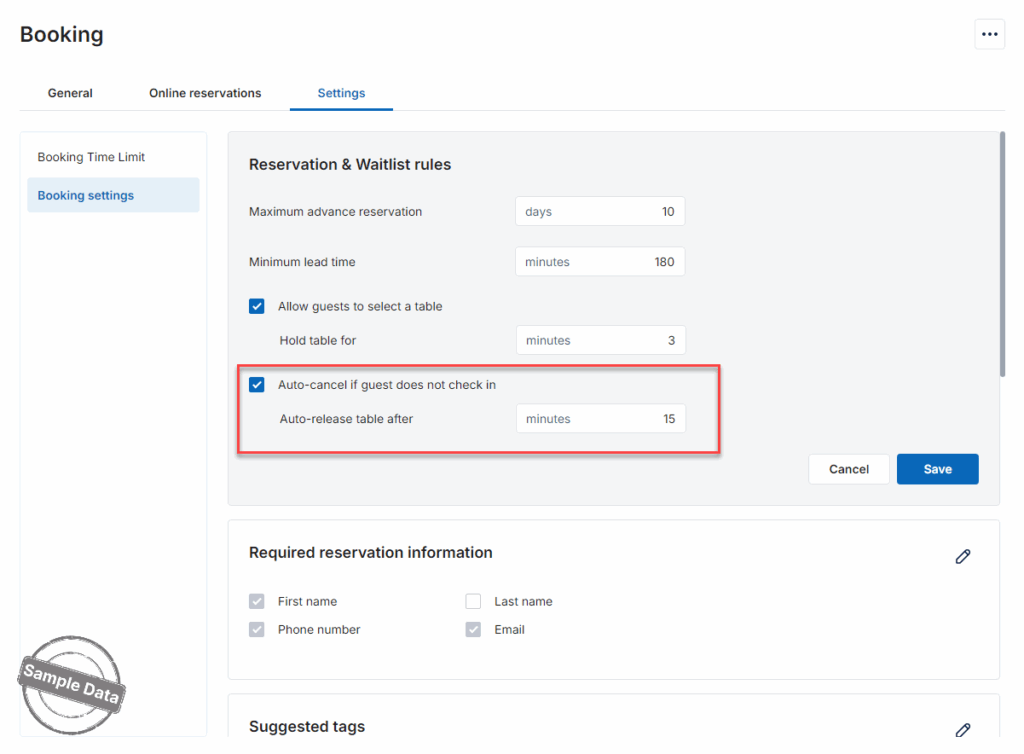
Check Allow guests to select a table and set up the time to hold the table.

Check Auto-cancel if guest does not check in and set up the auto-release time. Then, click Save.
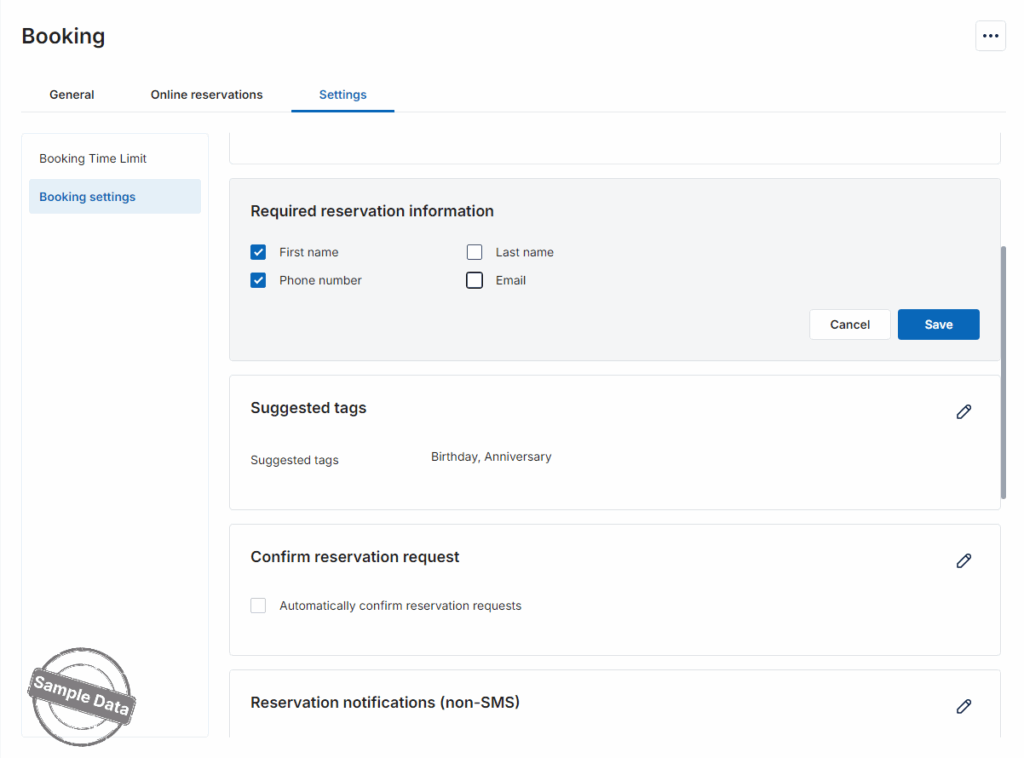
b. Required reservation information
Click this icon ![]() and check the required information. Then, click Save.
and check the required information. Then, click Save.
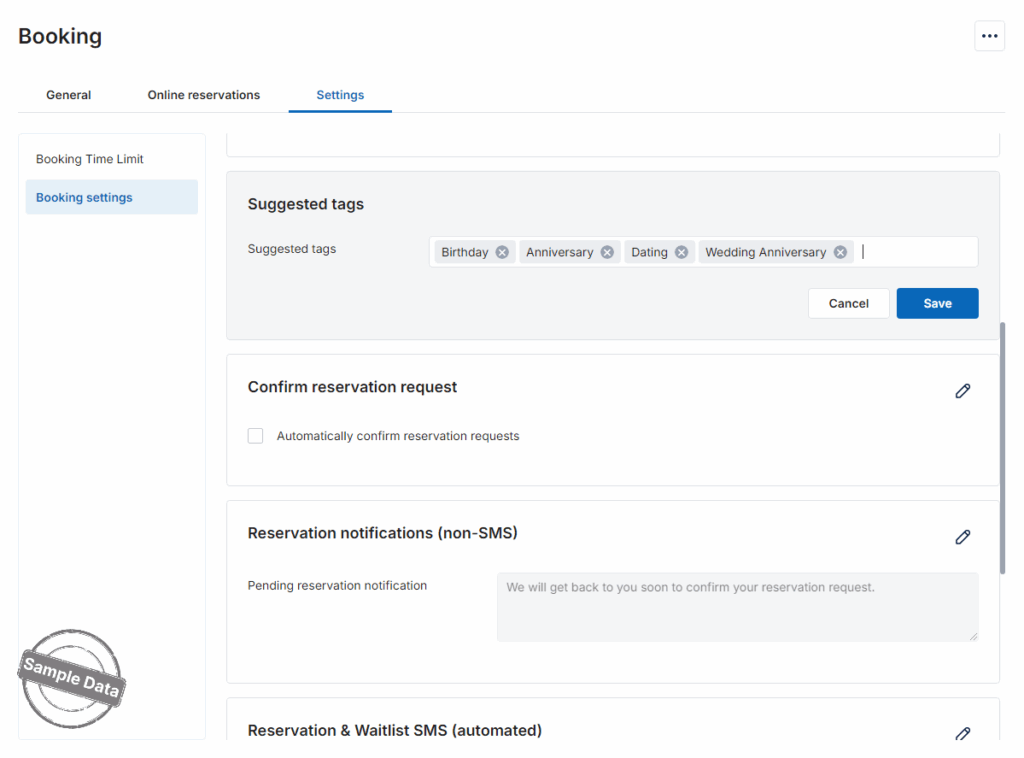
Click this icon ![]() and add tags. Then, click Save.
and add tags. Then, click Save.
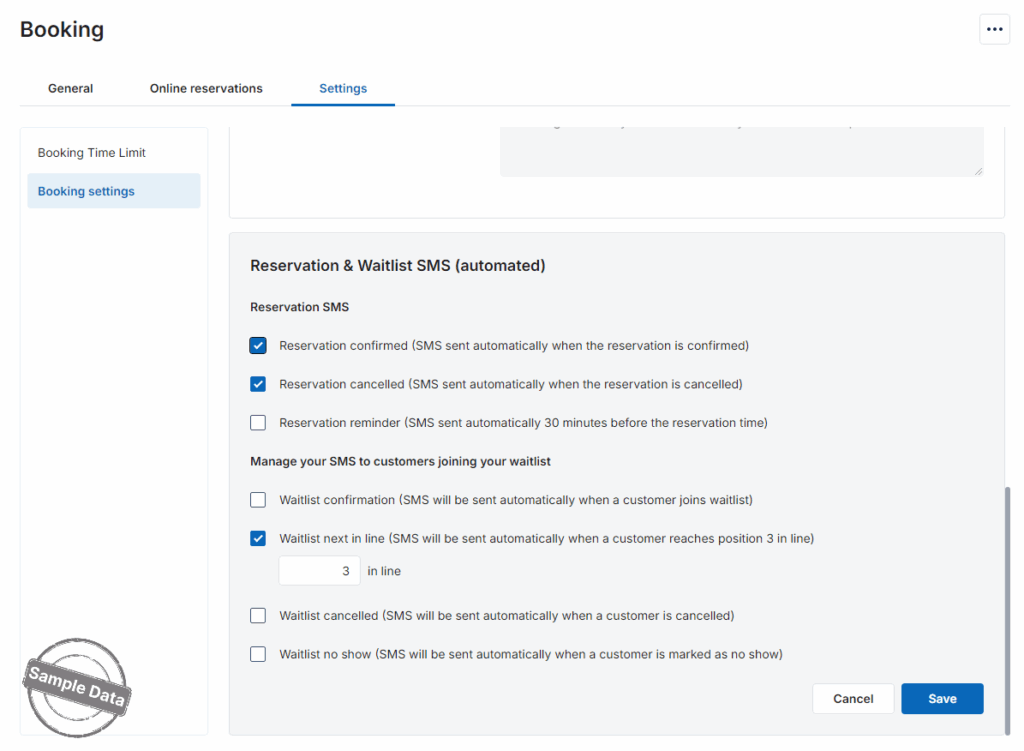
d. Notification of reservation
Click this icon ![]() and check the methods of sending SMS. Then, click Save.
and check the methods of sending SMS. Then, click Save.
Have a nice day!


