

I. Purpose
The manager can customize kitchen ticket and receipt templates directly on the management page, saving time and increasing flexibility.
II. Instruction steps
1. Customize Receipt / Bill Template
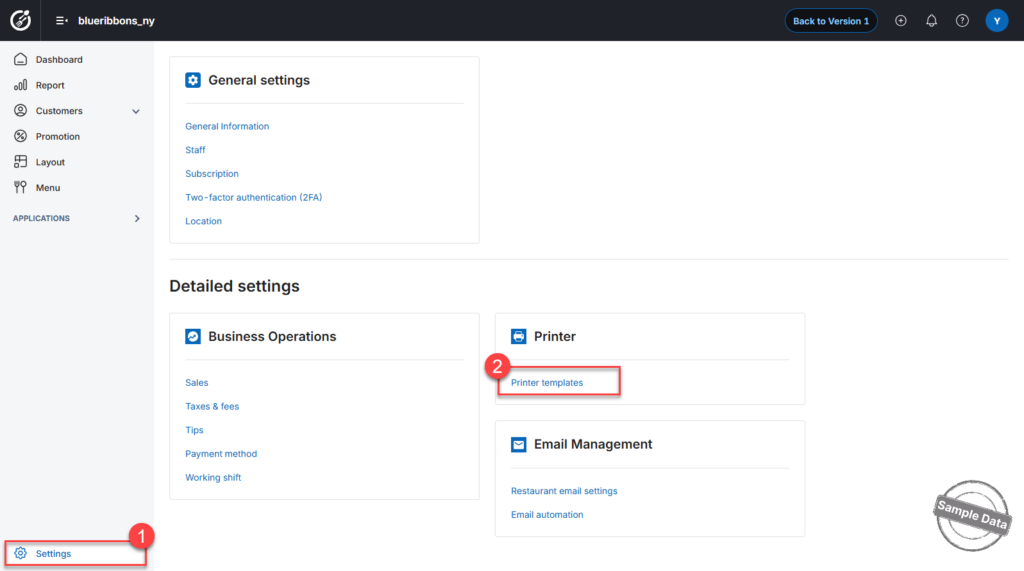
Step 1: Access Printer Templates
- Go to Settings.
- Select Printer Templates.
Step 2: Create or Edit a Receipt Template
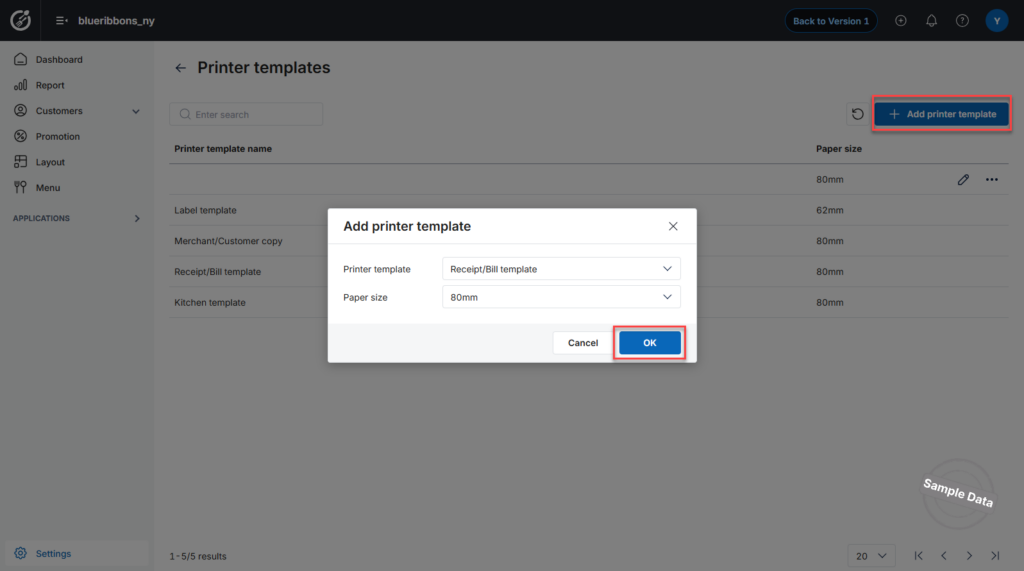
- Click Add Printer Template.
- Select Receipt / Bill Template.
- Choose the appropriate paper size.
Step 3: Add Restaurant Branding
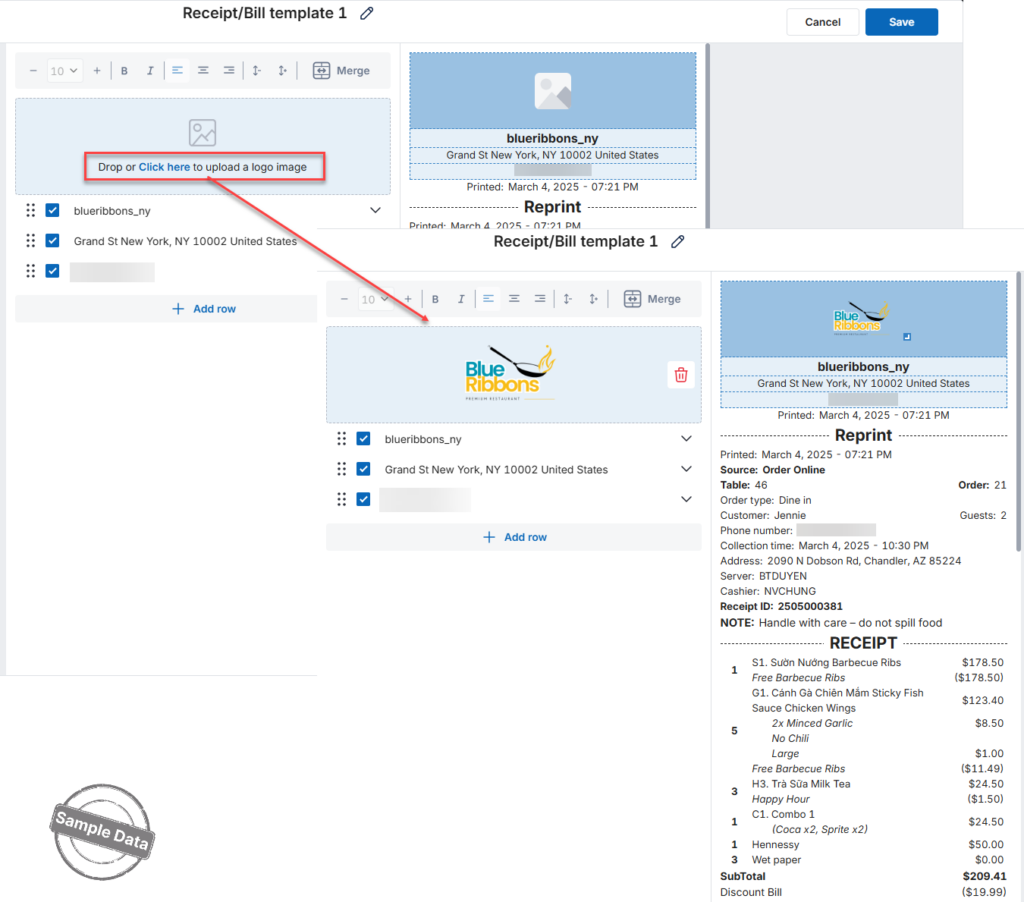
- If your restaurant has a logo, drag and drop the image into the upload area, or click “Drop or Click here to upload a logo image.”
Step 4: Edit Restaurant Information
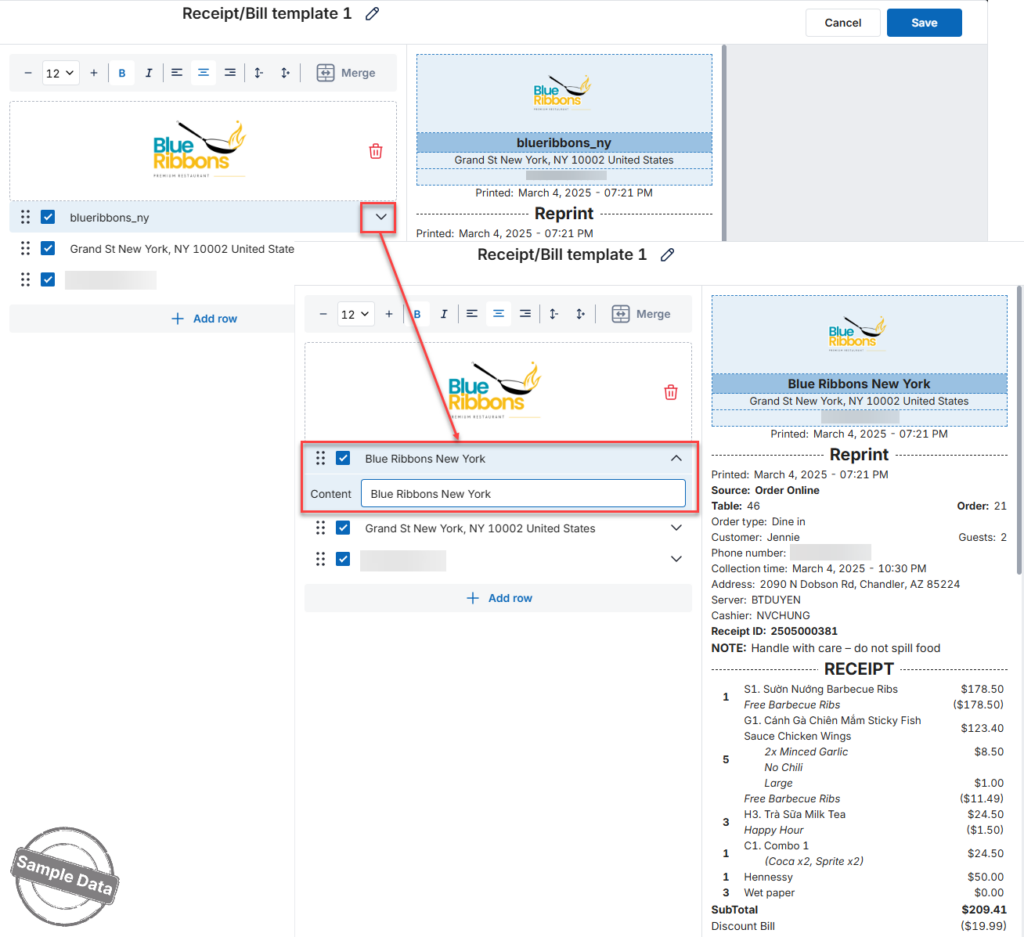
- Click the arrow icon next to the restaurant name (e.g., blueribbons_ny) to edit it.
- Click the arrow icon next to the address and phone number to update the information if needed.
Step 5: Add Additional Information (Optional)
- Click Add row to insert a new information line.
- Enter the Title and Content for the new line.
This can be used for notes such as:
- Business registration number
- Tax ID
- Thank-you message
- Return policy
Click Save to apply the updated template.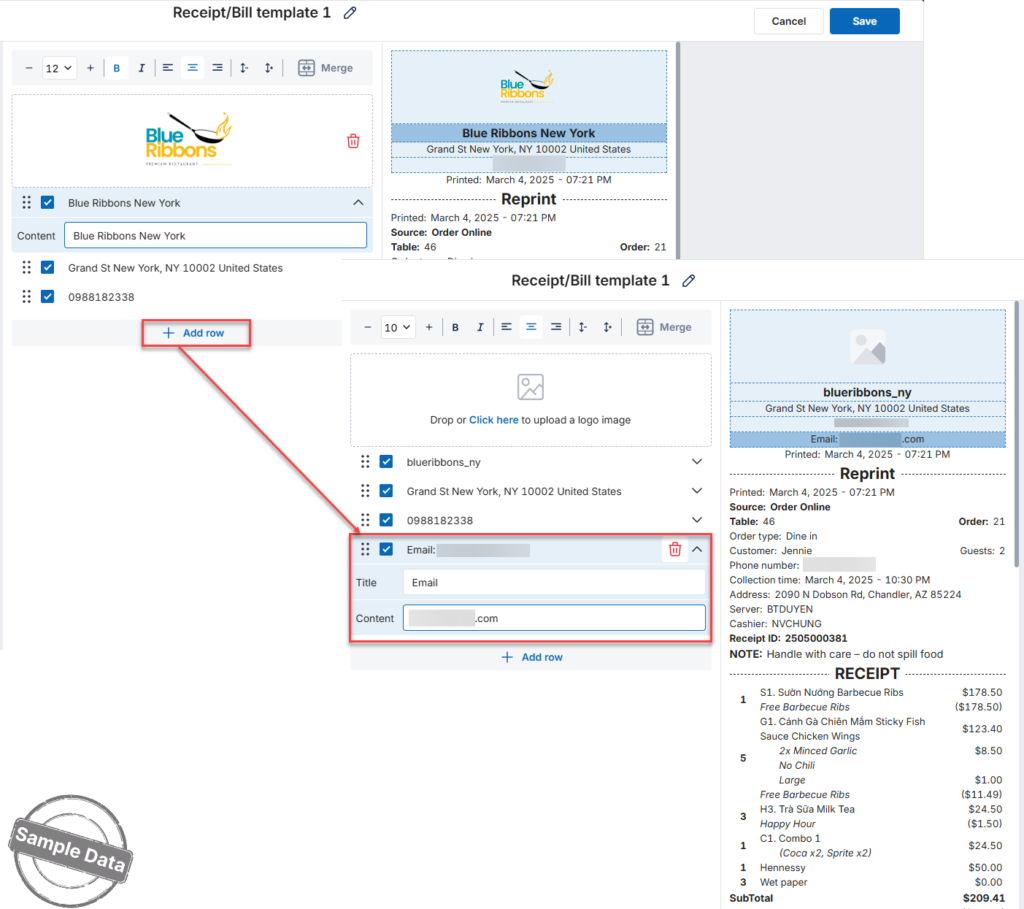 ⚠ Note:
You can deselect any information line if you do not want it to appear on the printed invoice.
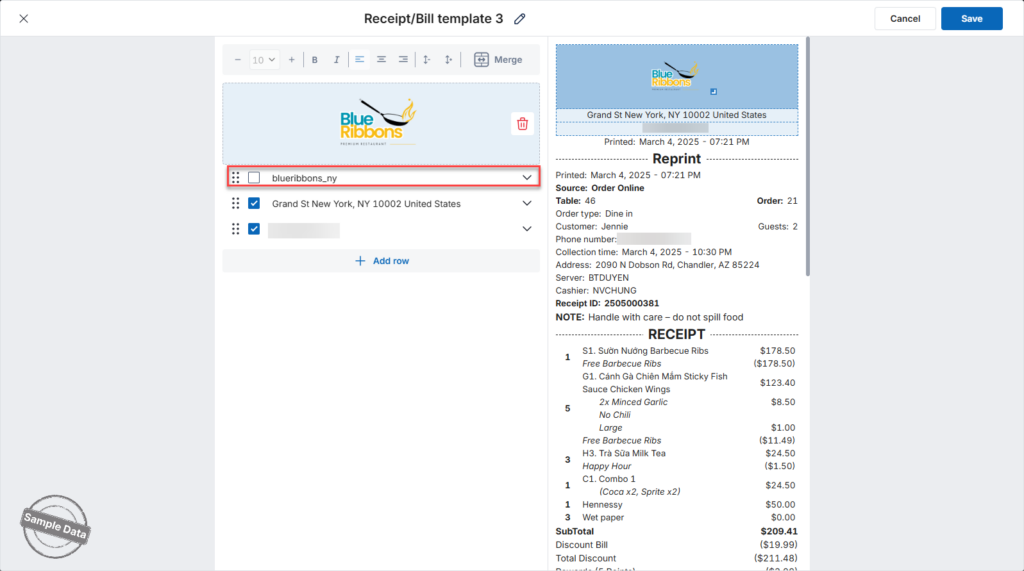
Your receipt template is now customized and ready for printing.
2. Customize kitchen template
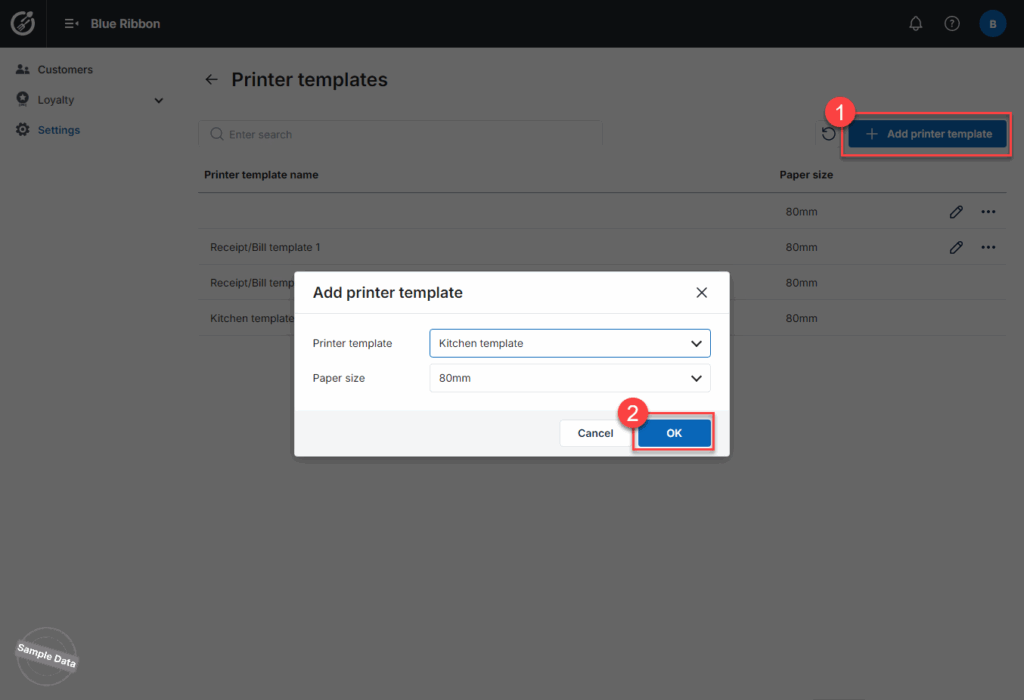
Click Add printer template, select Kitchen template and paper size.
Here, you can drag and drop to rearrange the order of information lines.
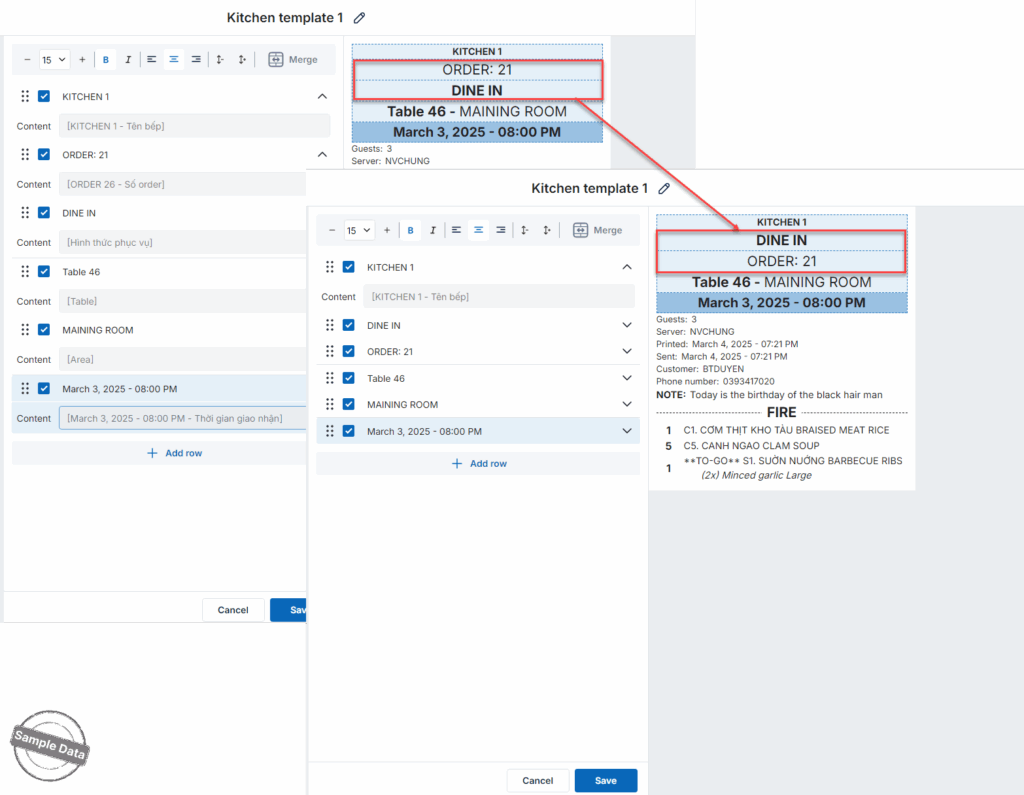
For each line, you can adjust font size, choose bold or italic, and set alignment.
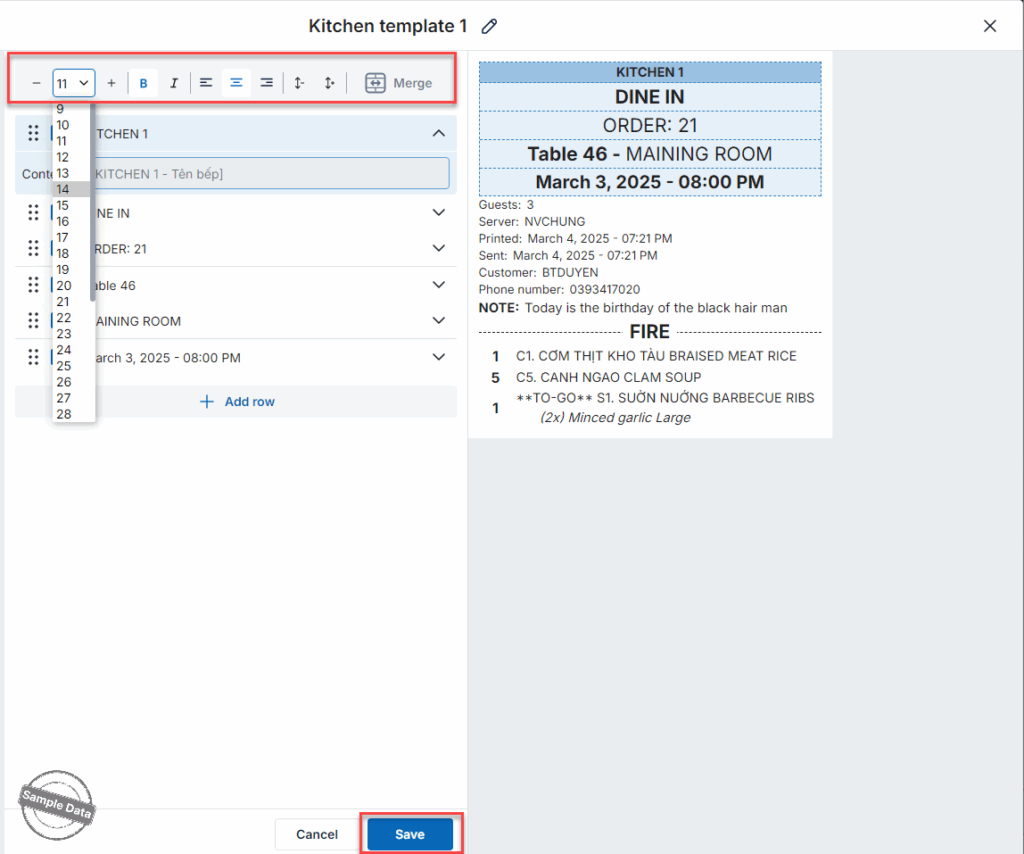
Click Save to save your changes.
3. Select a template on POS
On POS, click Settings.
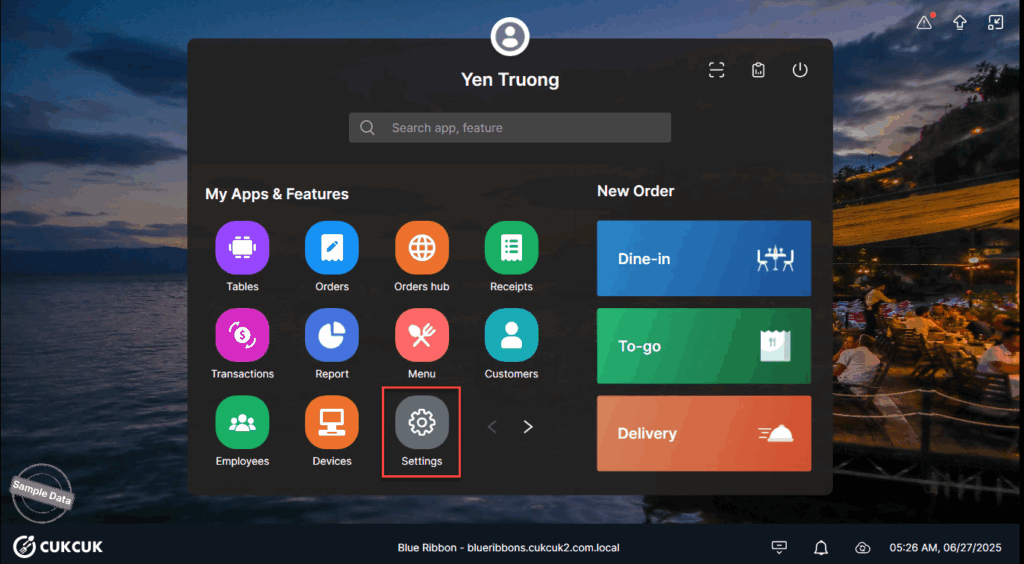
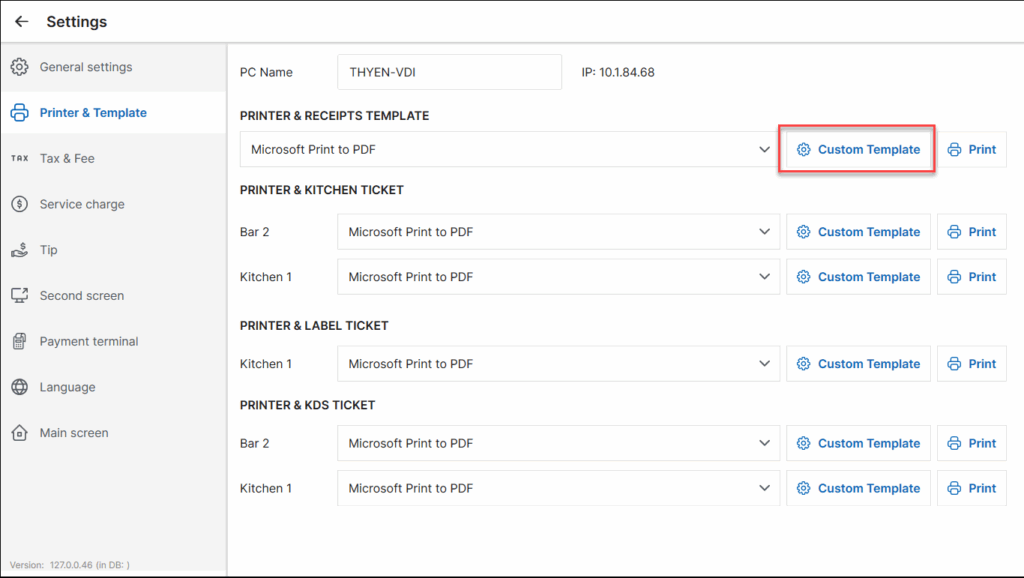
On Printer & Template/Printer & Receipts template tab, click Custom Template.
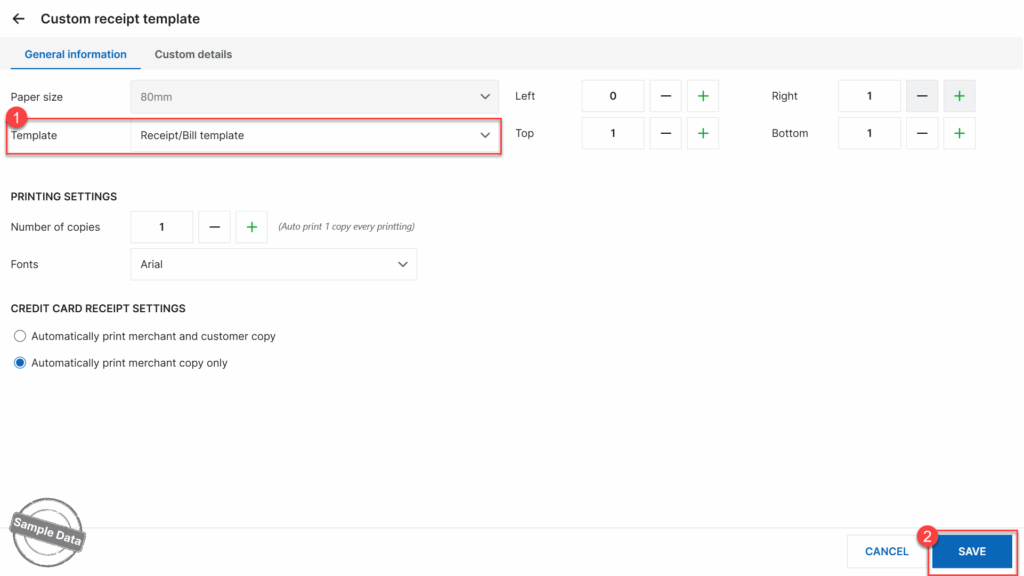
Select the template your restaurant wants to use in Template and click Save to apply.
Have a nice day!


