
I. PURPOSE
The restaurant manager can set up the restaurant layout and areas for easily recording reservations, taking orders, and processing payments for customers.
II. WATCH TUTORIAL VIDEO
Watch video here: https://youtu.be/svXJAIL7CFo
III. INSTRUCTION STEPS
1. Add areas on the management page
On the getting started screen, select Restaurant layout settings

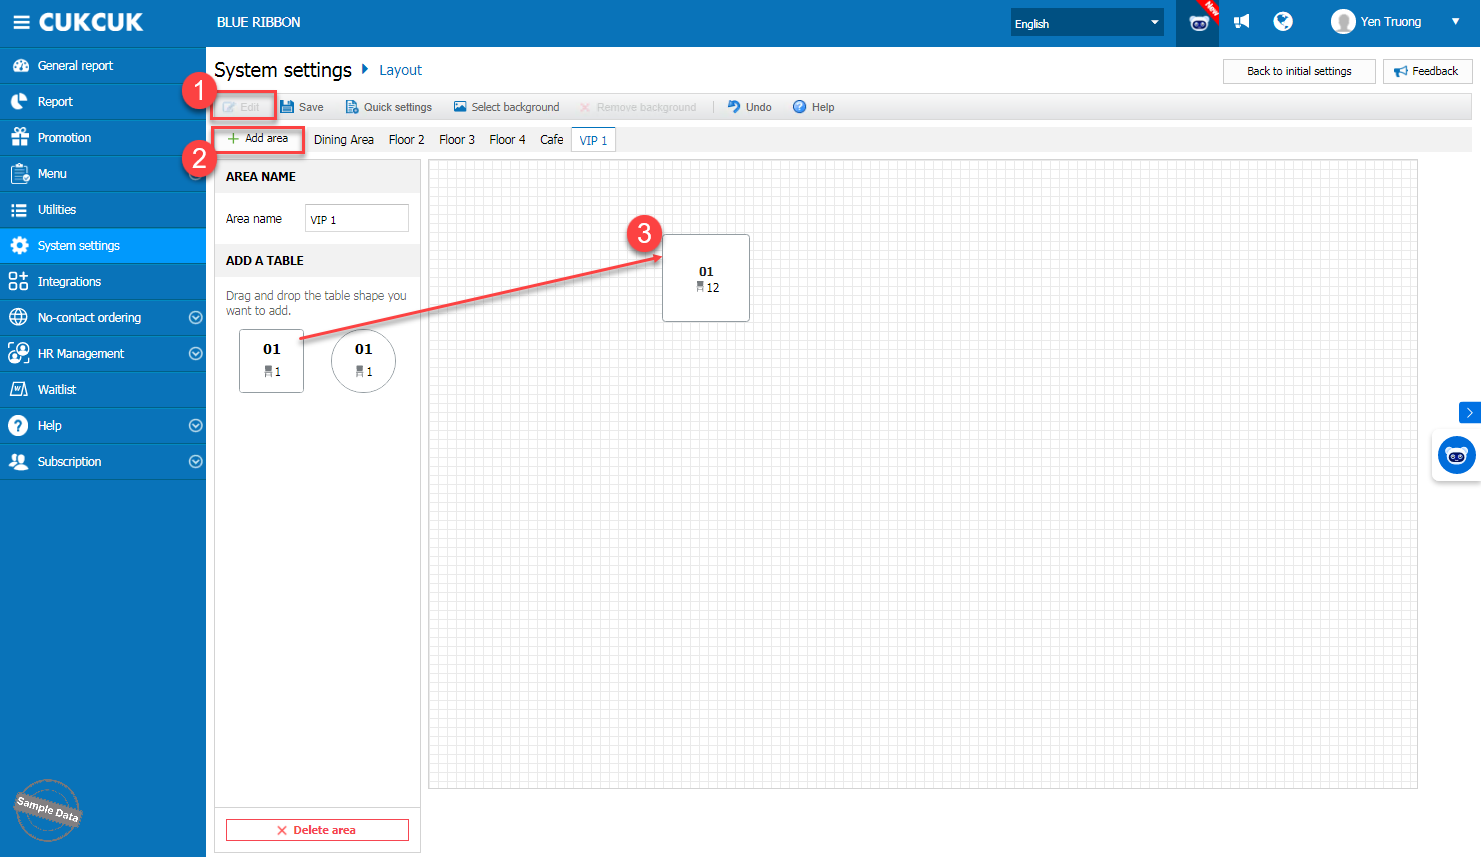
Click Edit and choose Add area to add an area in the restaurant, then enter the area name in Area name. Rename the area to match the restaurant’s terminology. Drag and drop tables into the area.
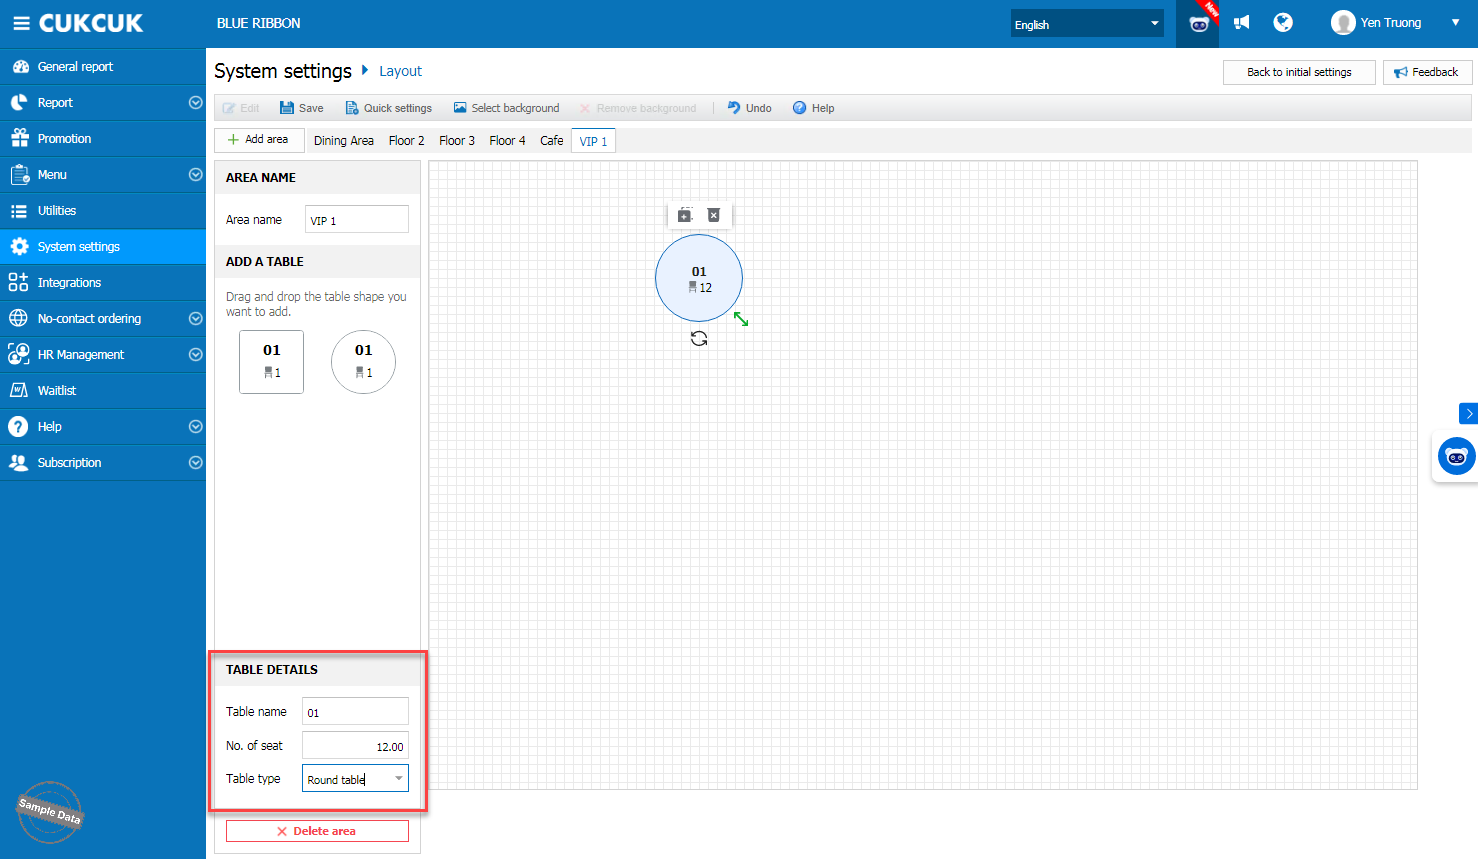
To edit a table name, number of seats, or table type, click on the table you wish to edit. Enter the Table name, Number of seats, and select the Table type.
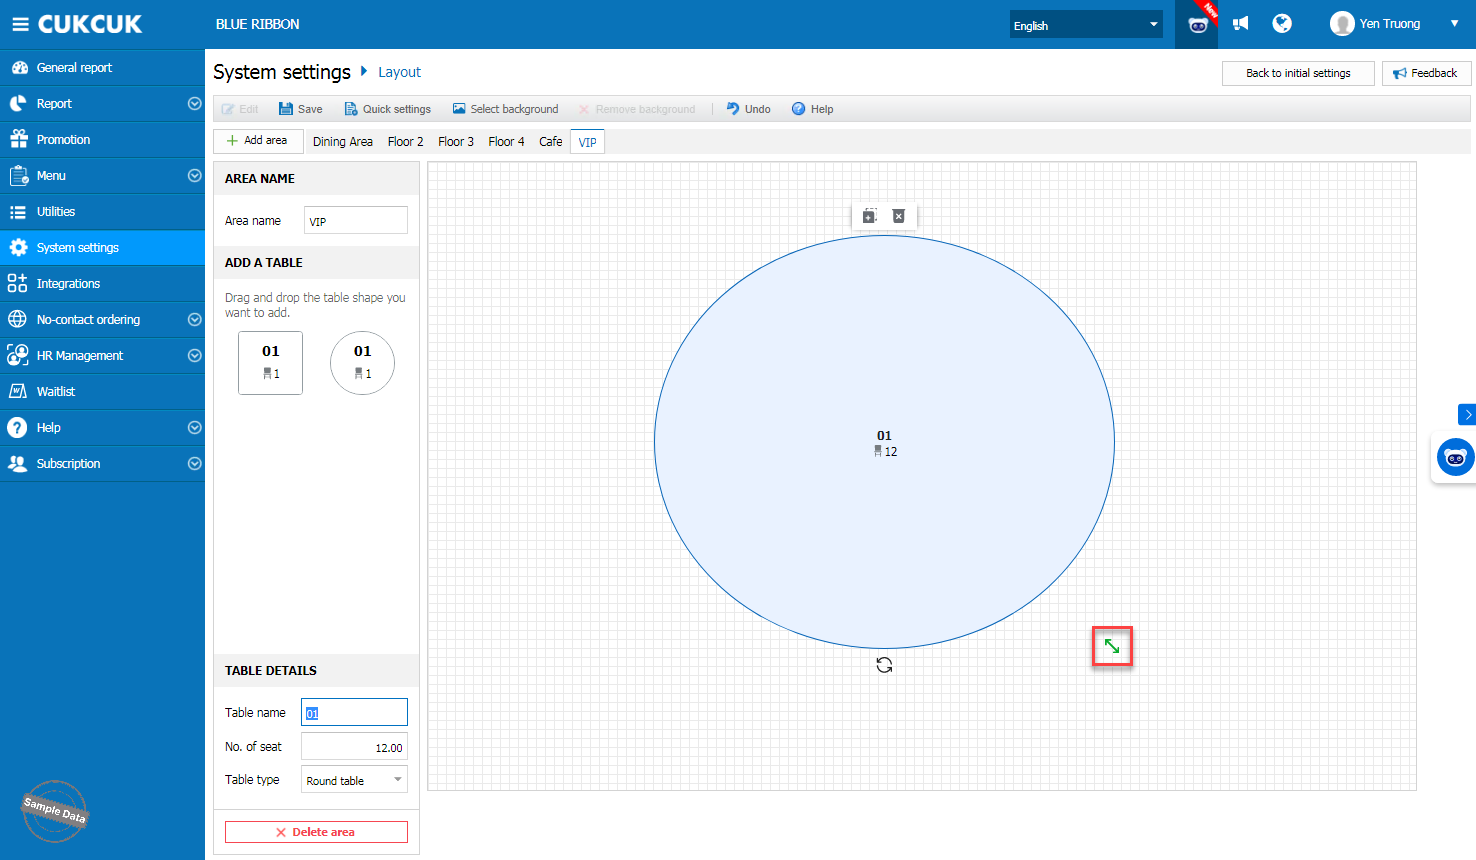
To adjust table size, hold the icon![]() and resize according to the actual layout.
and resize according to the actual layout.
To duplicate a table, press the icon
![]()
To delete a table, press the icon
![]()
The areas you just set up will display as follows:
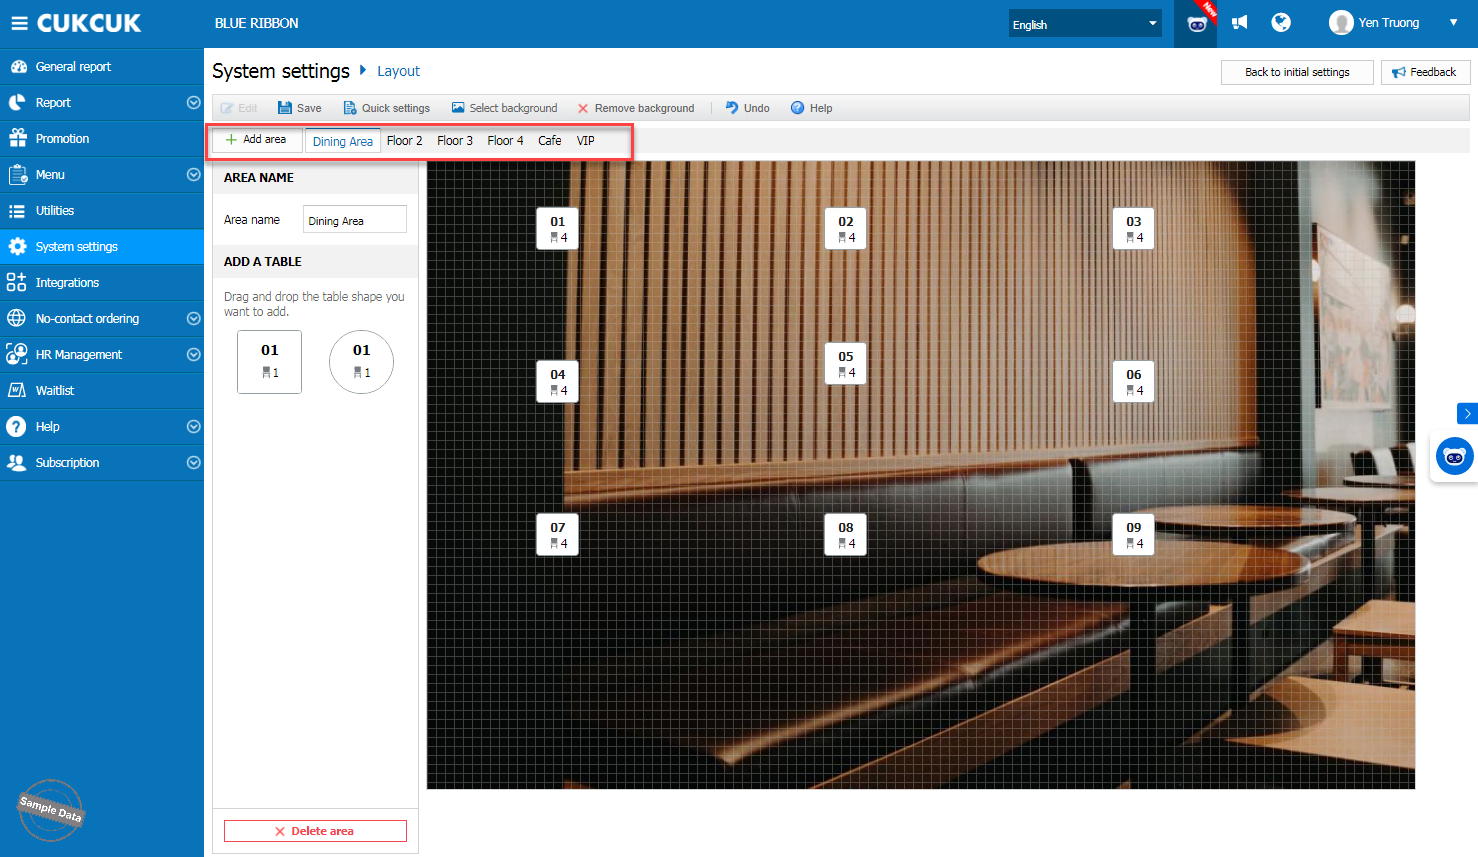
Additionally, you can select Delete area to remove any area as desired.
2. Quickly set up restaurant layout and add background image on the management page
Managers can adjust the layout to match the actual restaurant layout using the following methods:
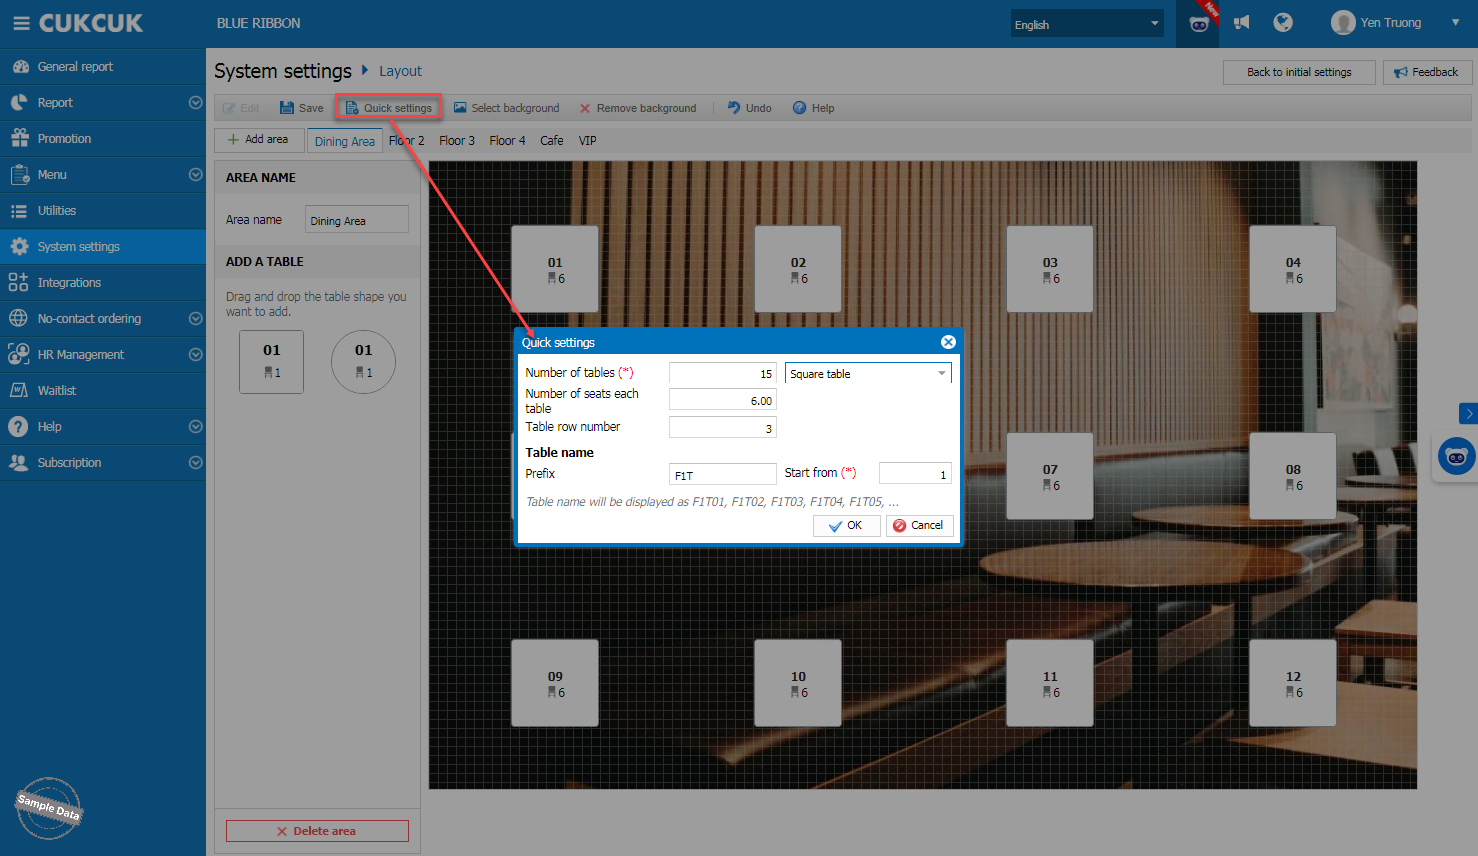
Method 1: Use the Quick settings function
- Enter the number of tables for each area (Number of tables)
- Choose the table shape (Round or Square) and the number of seats per table (Number of seats each)
- Enter the number of tables per row (Table row number)
- Add a prefix (if any) and a start number (Prefix, Start from)
Then click OK.
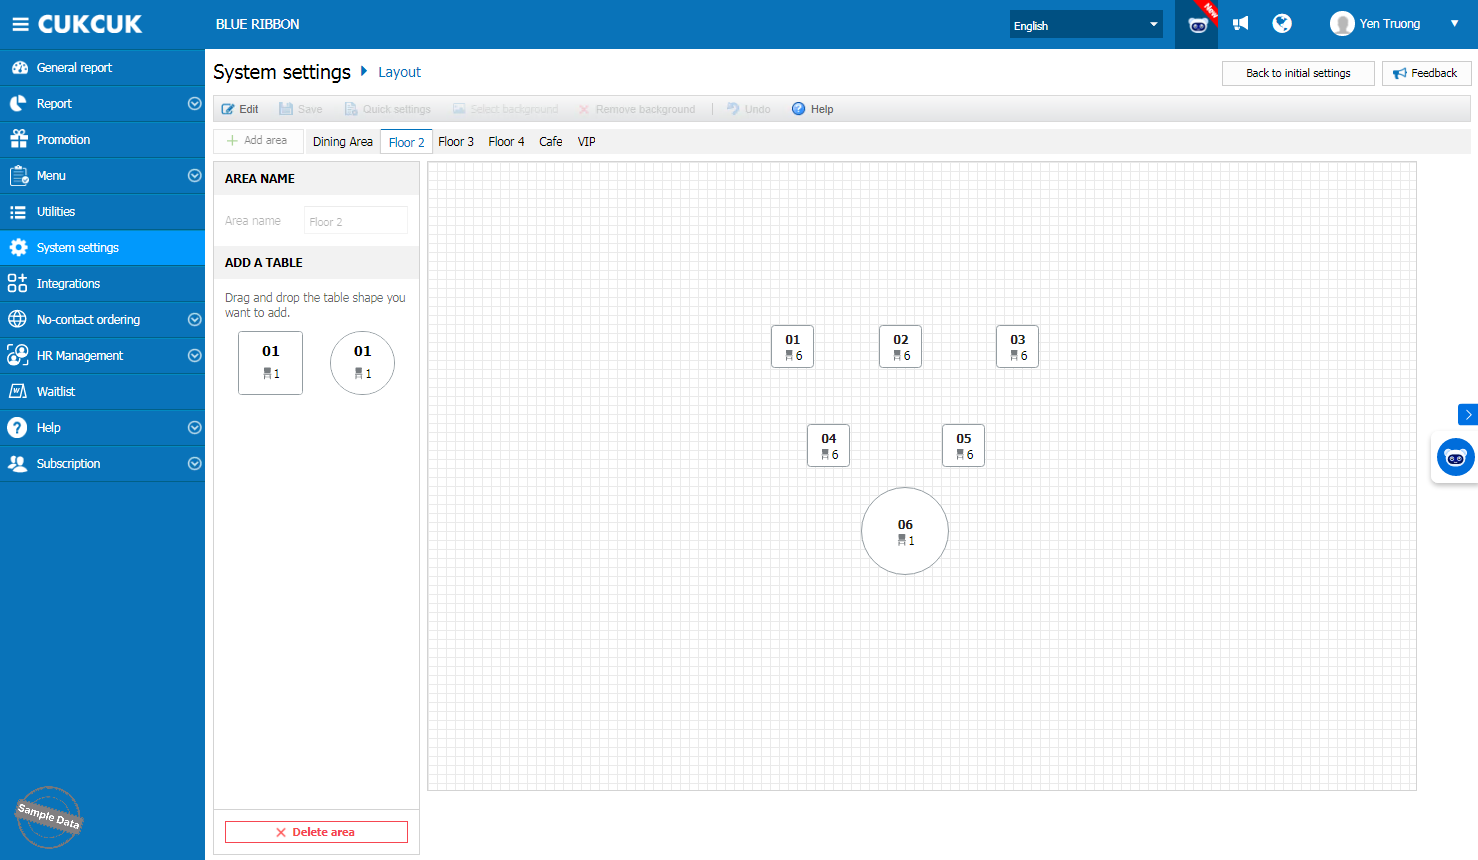
Method 2: Click and drag with the mouse to adjust table positions on the layout.
Hold the left mouse button and drag tables to desired positions. Edit tables as instructed in step 1.
You can also select a background image for the layout to help staff easily visualize when arranging tables for guests: click Select background to upload an image. To remove the background image, click Remove background.
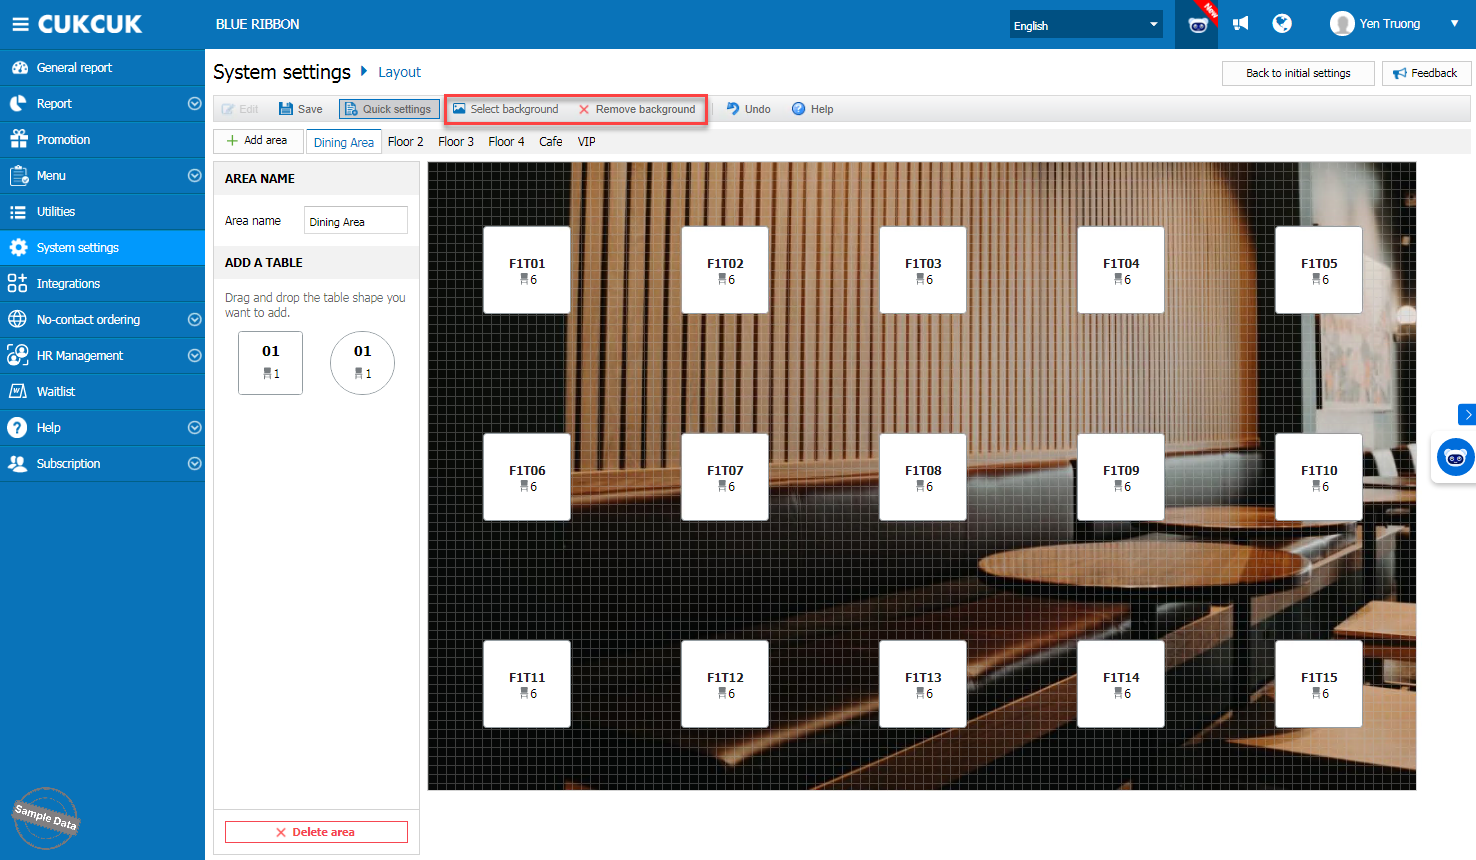
Click Save.
Once finished, table information will be displayed on all devices as follows:

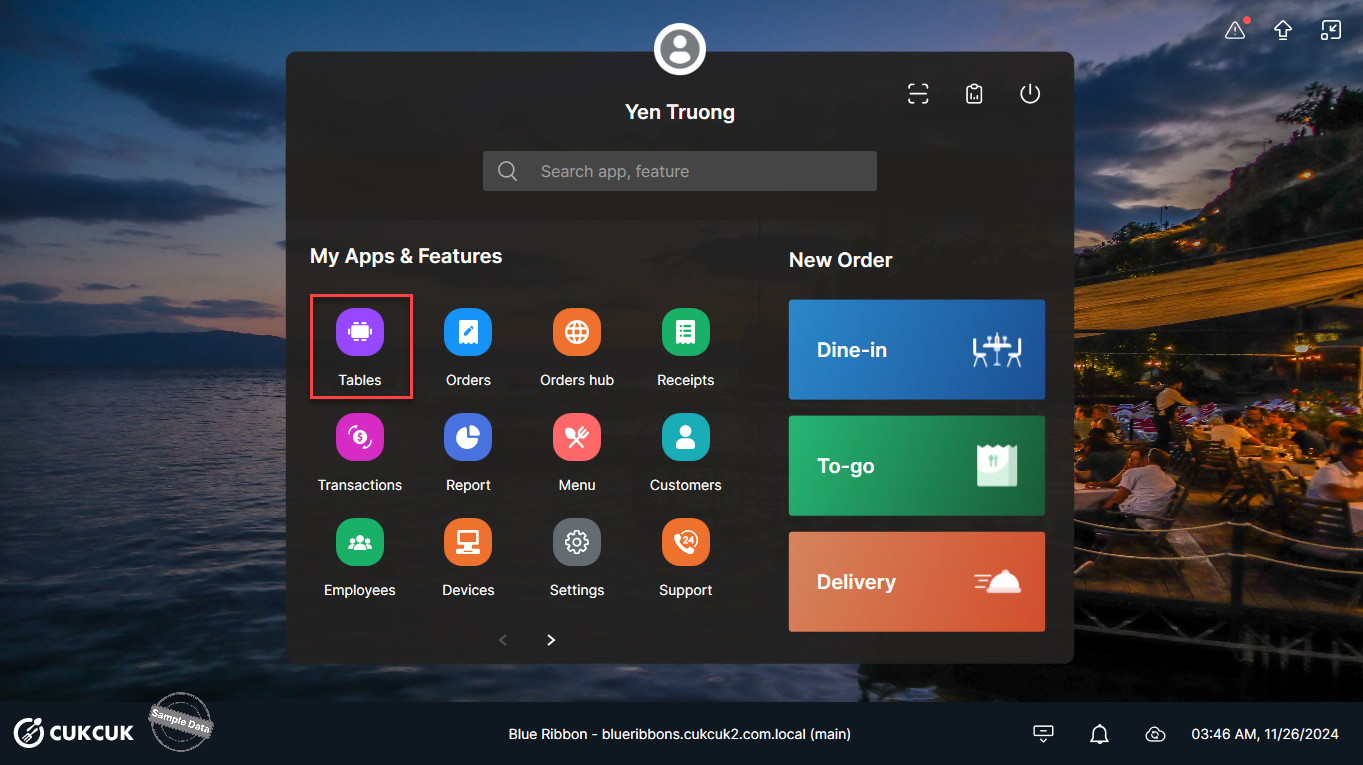
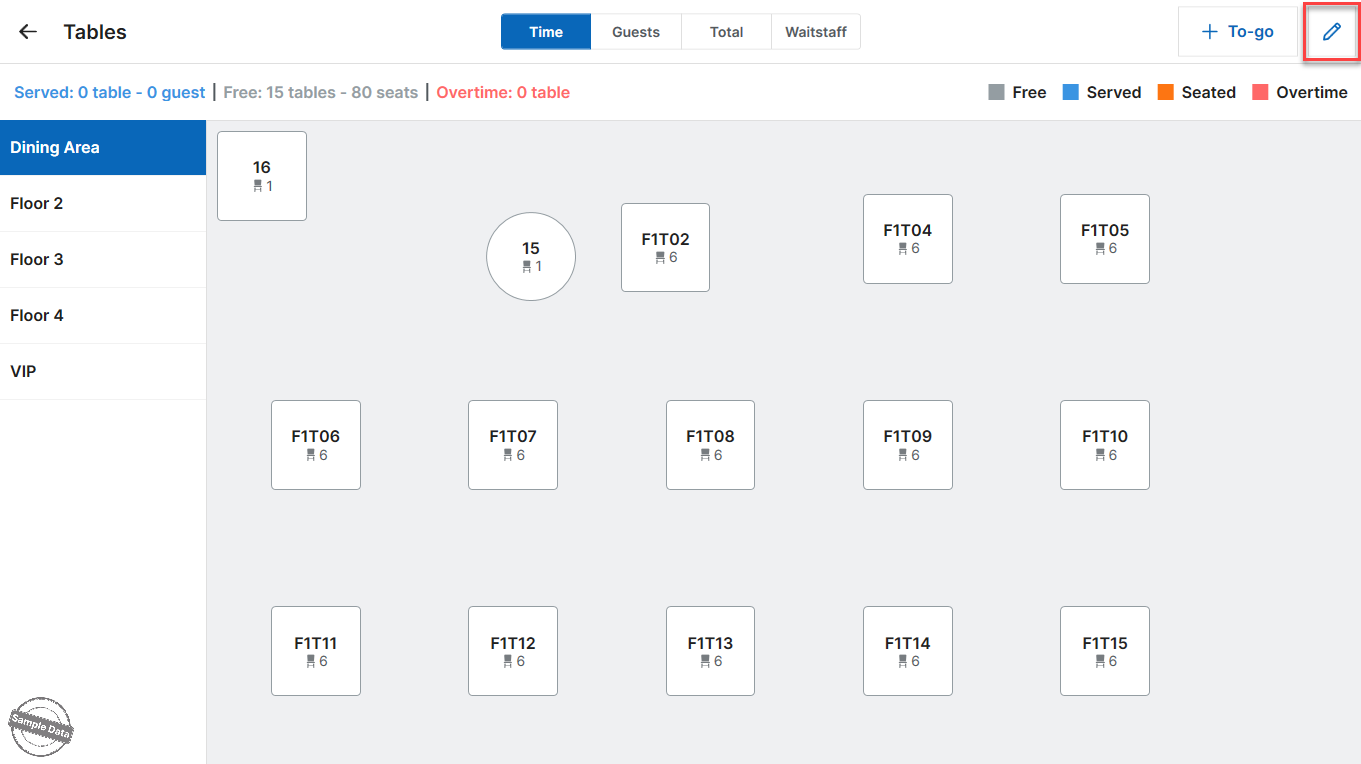
3. Set up and edit restaurant layout on POS
Go to Tables.
Click the icon
![]() to edit the layout.
to edit the layout.
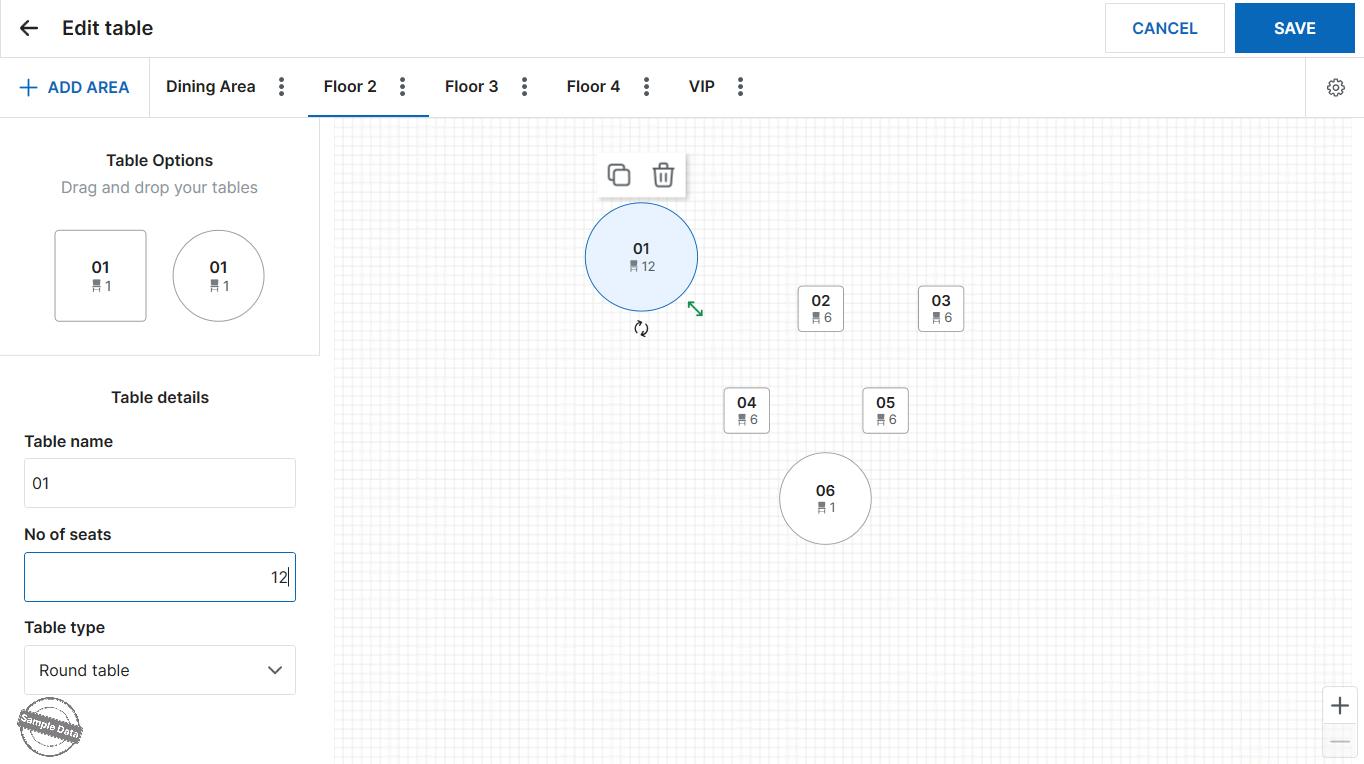
Select the area you want to edit. Click the table you want to change. Here you can edit:
- Table name: name of the table
- Number of seats: number of seats
- Table type: round or square table

To resize a table to match reality, hold the icon
![]() and drag to the desired size.
and drag to the desired size.
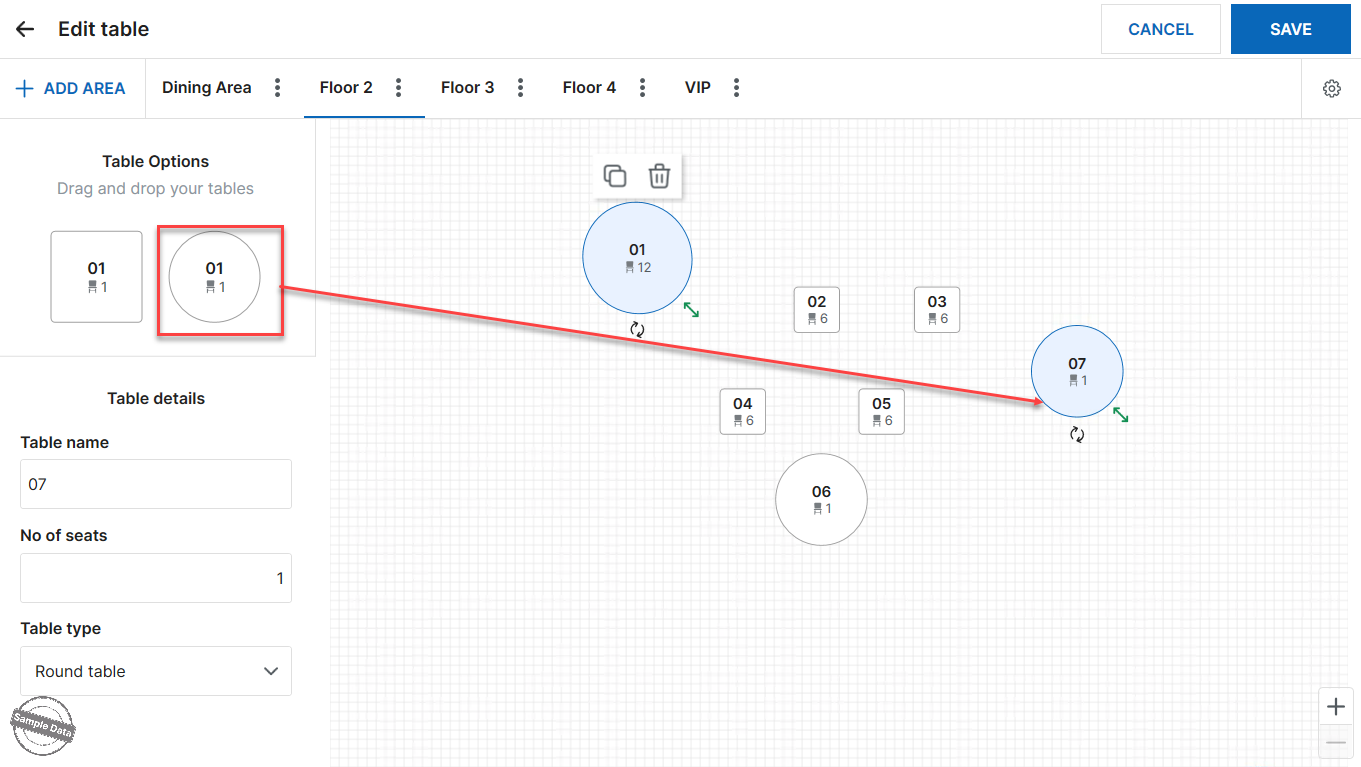
To move a table, hold and drag the table to the appropriate position on the layout.
Click the icon
![]() to duplicate a table.
to duplicate a table.
Click the icon
![]() to delete a table.
to delete a table.
To add a new table, click the desired table type and drag it to the appropriate position. Edit the table information as described above.
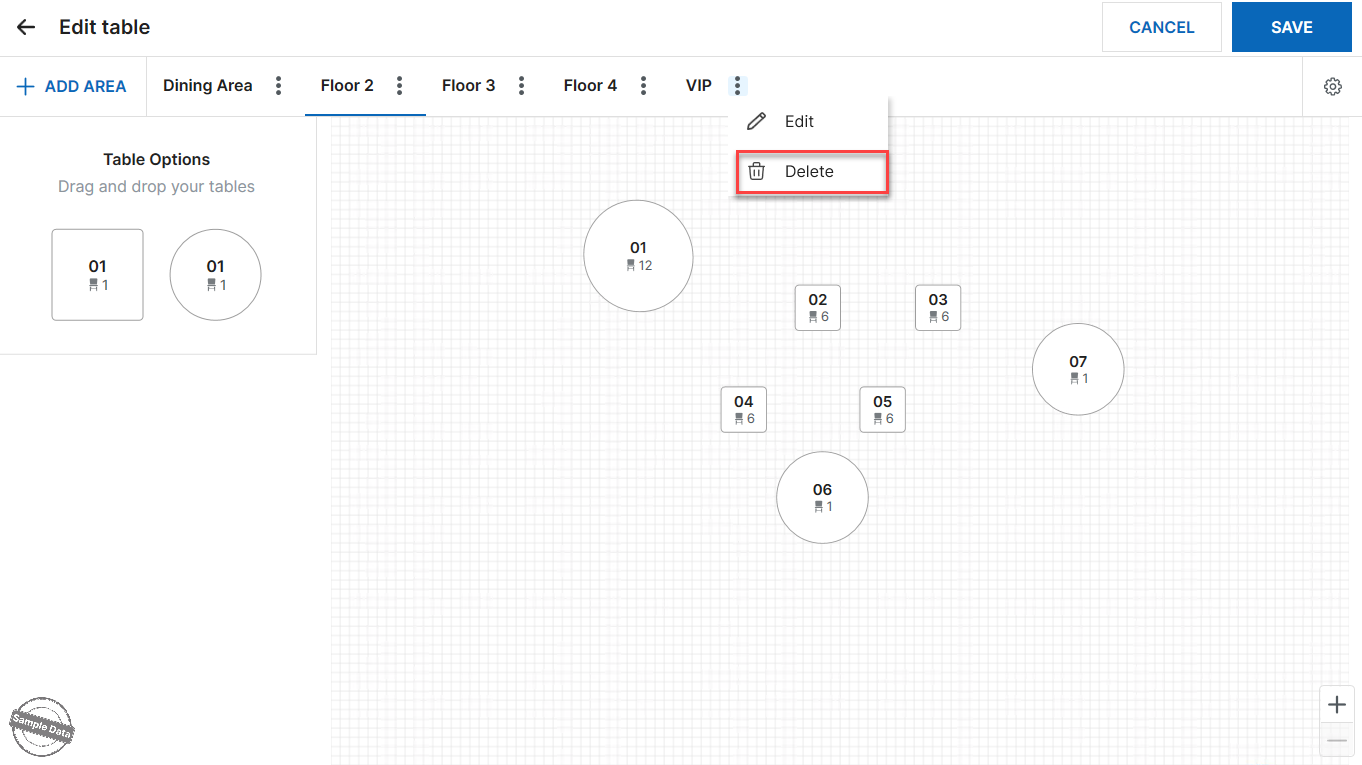
To delete an area, click the icon![]() in the area you want to delete and select Delete. Then click Save to apply the changes.
in the area you want to delete and select Delete. Then click Save to apply the changes.
IV. FREQUENTLY ASKED QUESTIONS
1. After starting sales, can the manager edit the table layout?
Yes, the table layout can be edited, but it’s recommended to do so during off-peak hours to avoid errors or disruptions.
2. What is the maximum number of tables allowed per area?
The system allows up to 100 tables per area.
3. If the restaurant uses 7-inch tablets for staff, what is the recommended maximum number of tables per area?
It is recommended to set a maximum of 50 tables per area.
4. If the number of tables in one area exceeds 50, what should the manager do?
It is recommended to split the area and manage on multiple layouts.
Example:
If the first floor has 100 tables, create 2 areas:
- First Floor (Left), code T1-1 with 50 tables
- First Floor (Right), code T1-2 with 50 tables
Then, rename tables in these areas to match reality.
Have a nice day!


