

I. Purpose
This feature is designed to support large-scale restaurants that organize catering services and events (10+ guests) while continuing daily operations.
II. Instruction steps
1. Configure Catering on the Dashboard
a. Enable Catering Feature
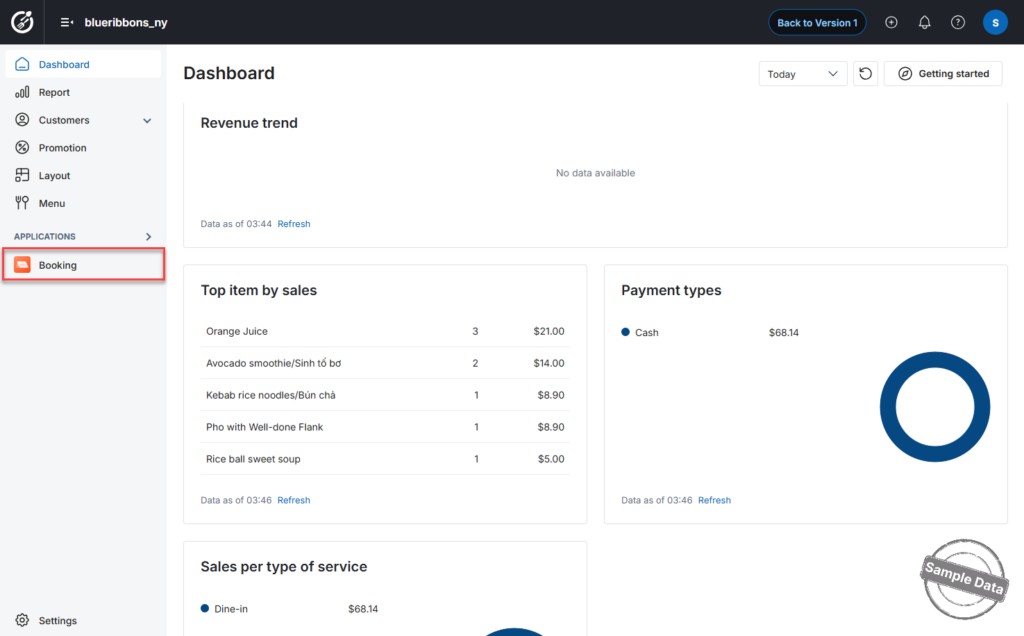
- Go to the Booking app on the Dashboard.
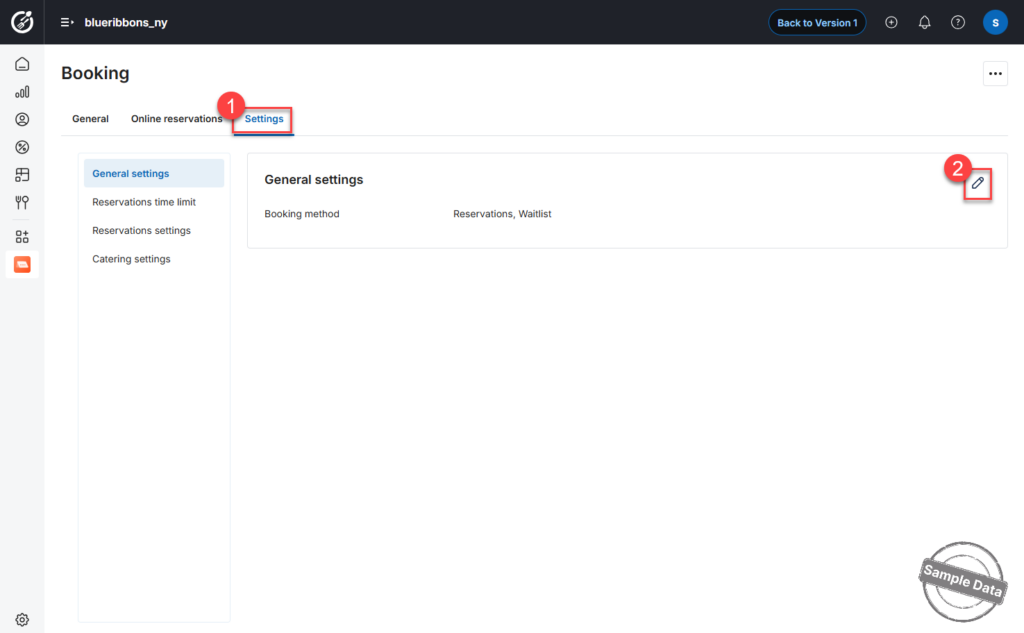
- Open the Settings tab.
- Select General Settings and click the Edit icon.
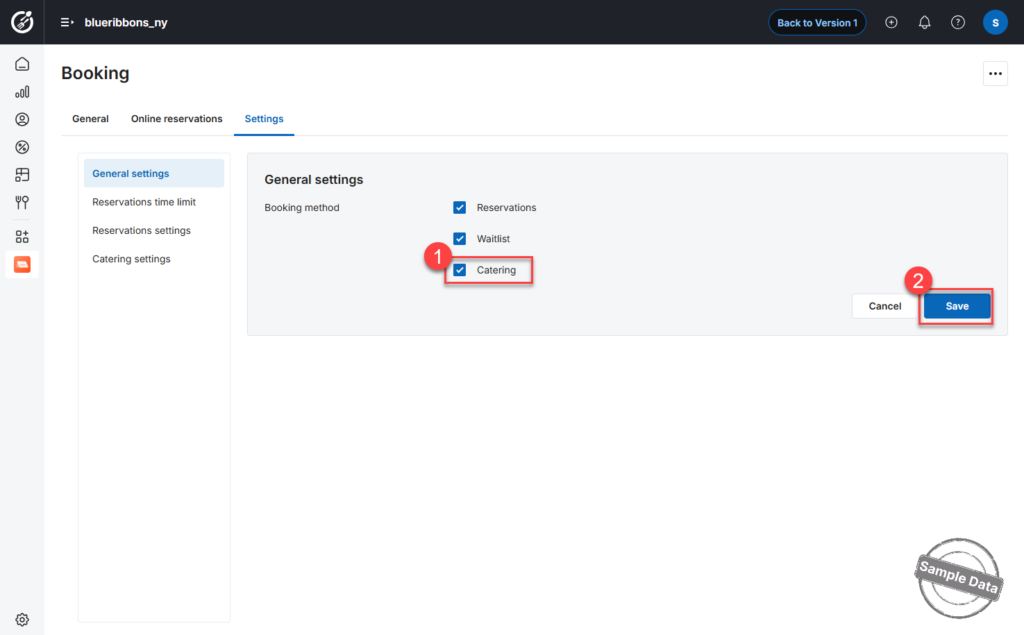
- Check Catering to activate the feature.
- Click Save.
Catering is now enabled in the system.
b. Configure Deposit Settings
- Go to Catering Settings.
- In the Deposit section, click the Edit icon.
Choose one of the following deposit options:
- Open amount
Allows you to manually enter the required deposit amount for each event. - By % of item total amount
Enter the percentage of the order total that the customer must pay in advance.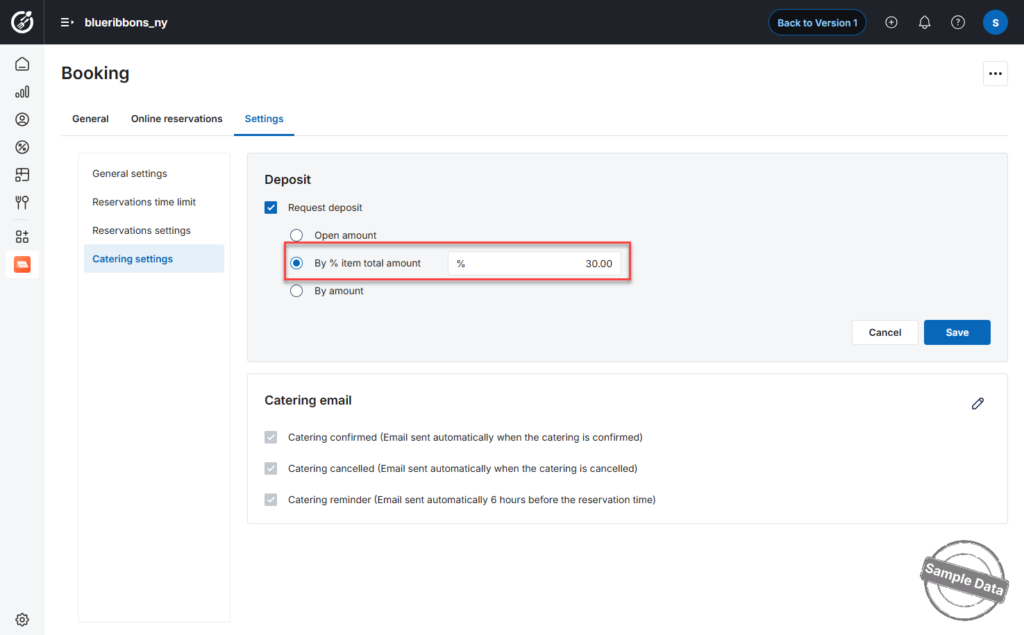
- By amount
Enter a fixed deposit amount required for each order.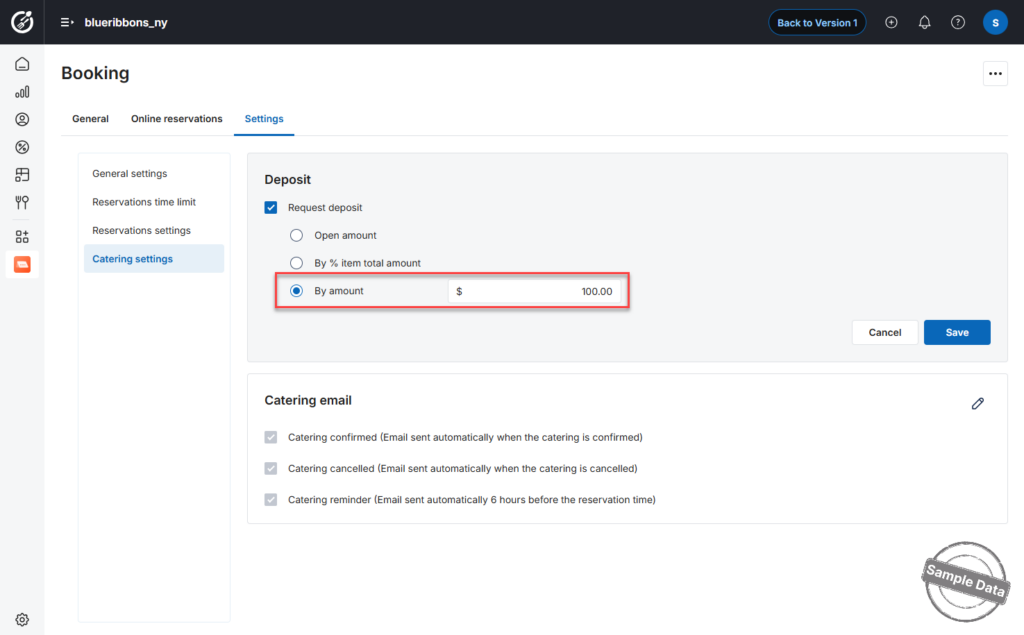
After configuring your preferred option, click Save.
c. Configure Catering Email Notifications
- In Catering Settings, click the Edit icon next to Catering Email.
- Select the types of emails to be sent (e.g., confirmation, cancellation, reminder).
- Enter the number of hours before the event to send reminder emails.
- Click Save.
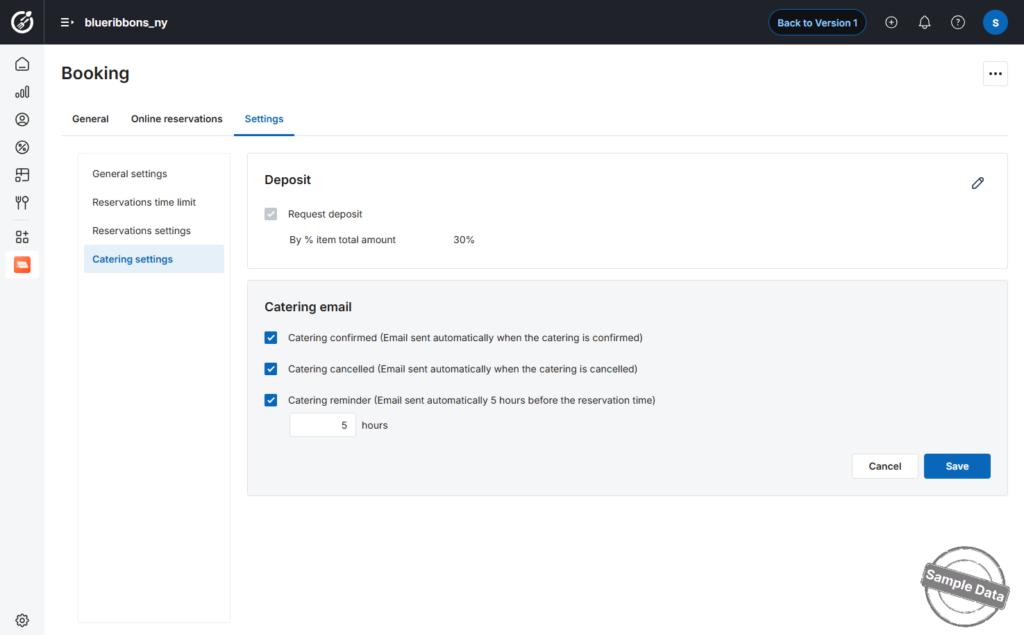 Catering deposits and automated email notifications are now properly configured.
2. Configure Menu Items for Catering
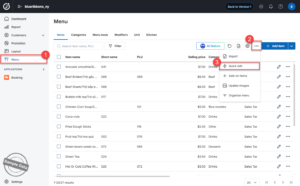
Step 1: Open Quick Edit
- Go to Menu.
- Click the icon
 and select Quick Edit.
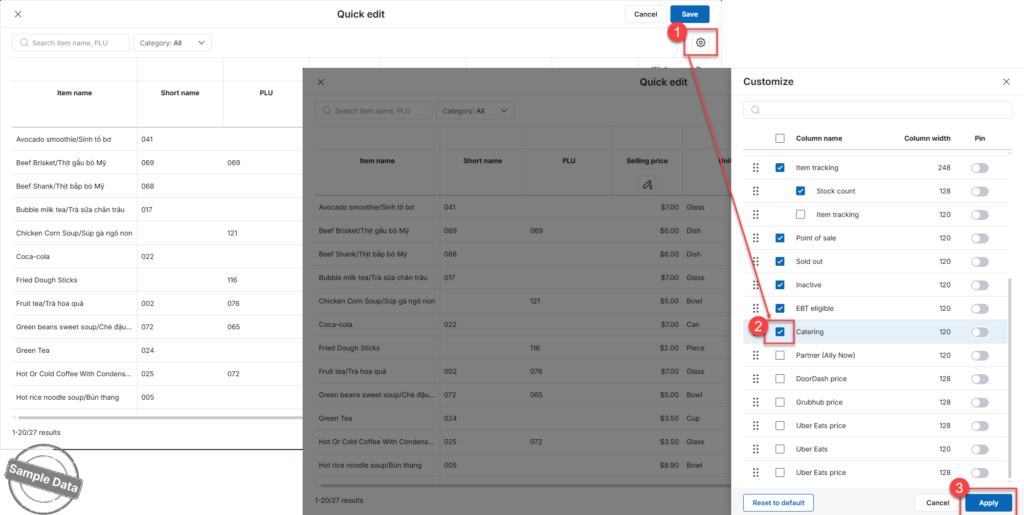
Step 2: Enable Catering Channel
- Click the settings icon

- Scroll down to Catering.
- Check Catering to enable this sales channel.
- Click Apply.
Step 3: Select Items for Catering
- Scroll to the right to locate the Catering column.
- Check the items that should be available for catering orders.
- Click Save to apply the changes.
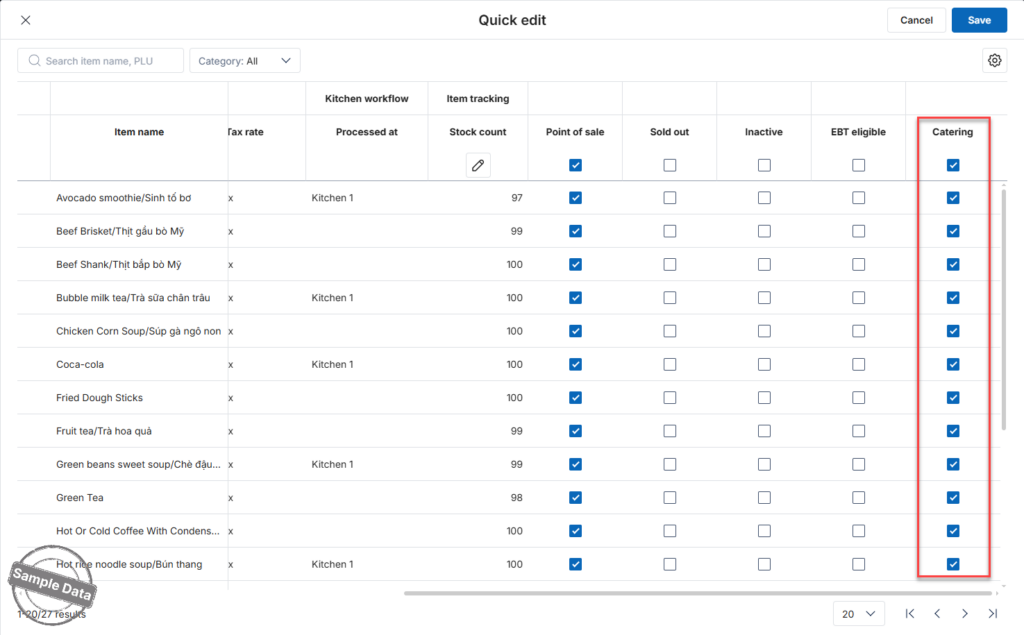
The selected items are now available for Catering orders.
3. Create a Catering Order on Tablet
Step 1: Access Catering
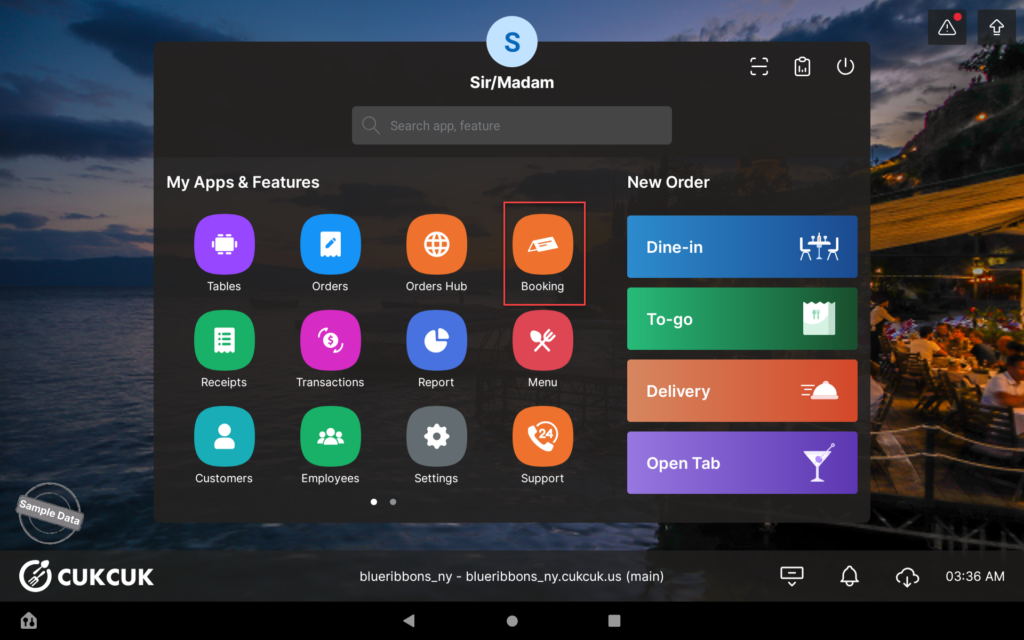
- Open the app and select Booking.
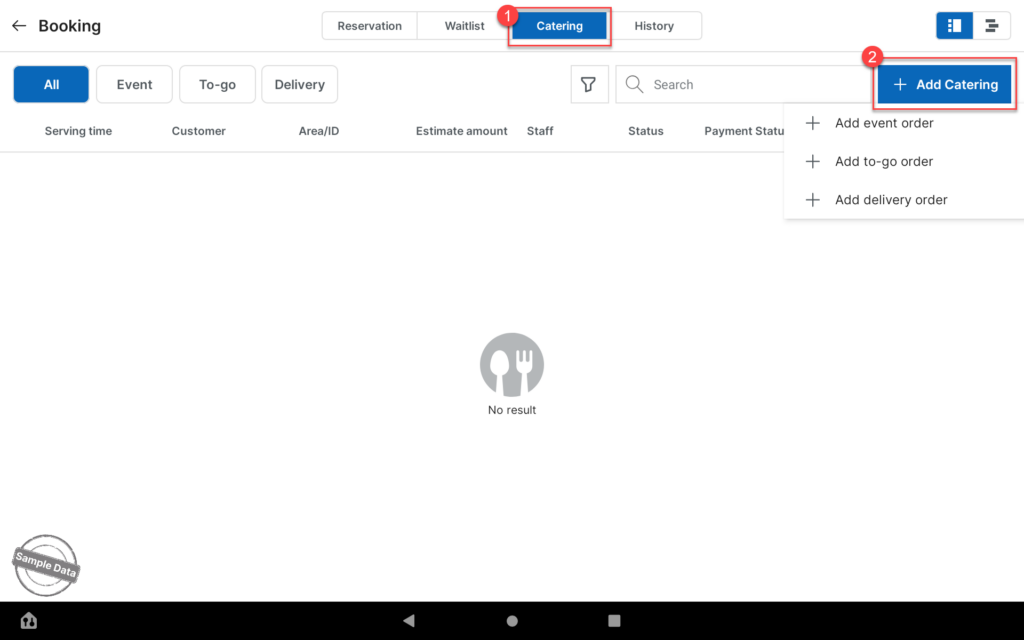
- Go to the Catering tab.
- Click Add Catering.
Choose the appropriate order type:
- Event
- To-go
- Delivery
Step 2: Enter Customer Information
Fill in the required customer details.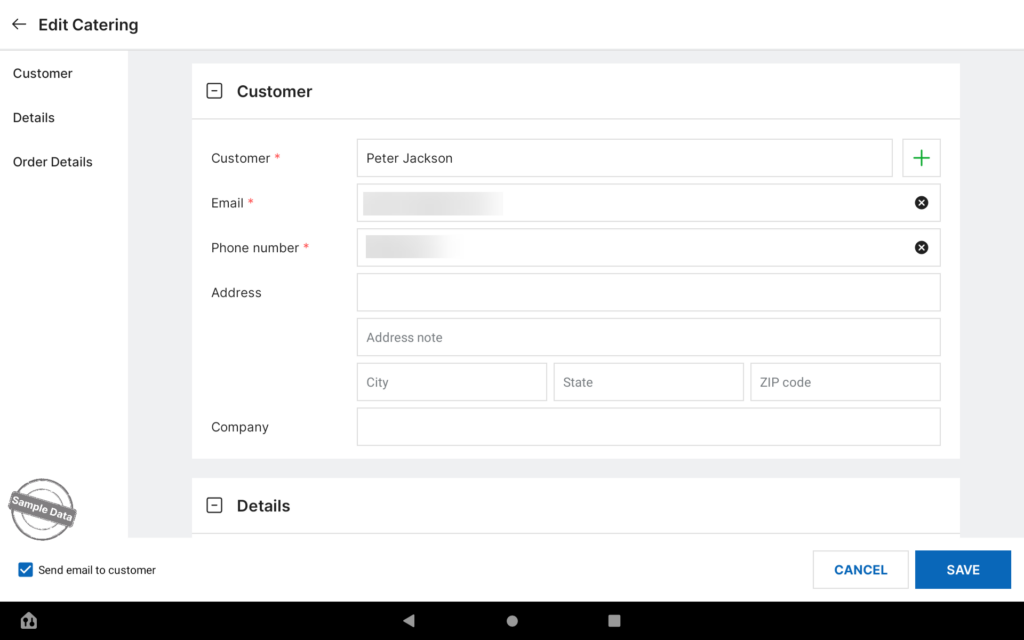
Step 3: Configure Event Details
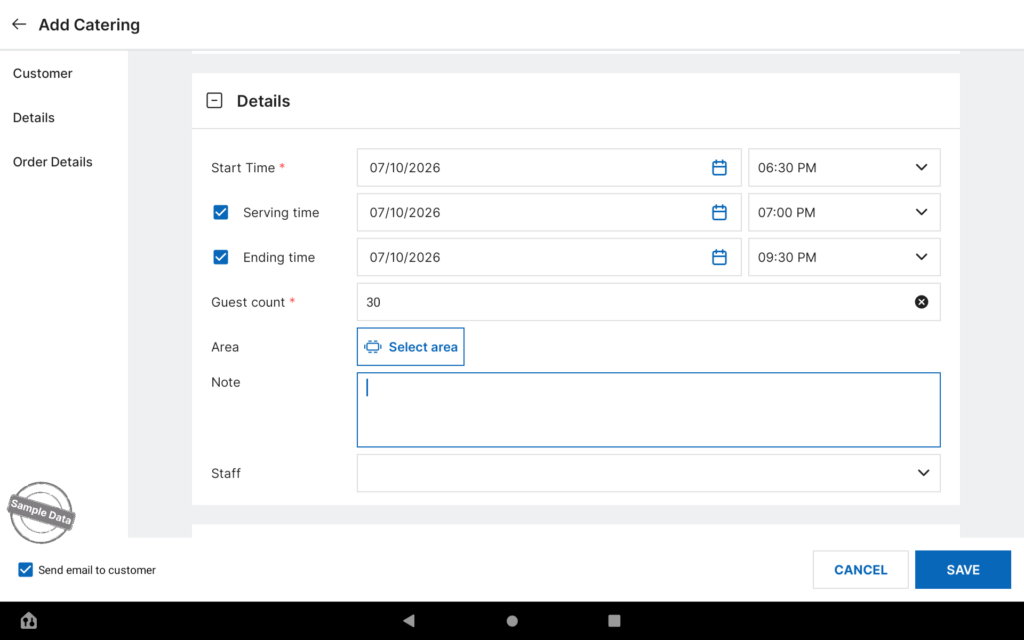
- Go to the Details section.
- Set the Start Time.
- Enable Serving Time and select the serving time.
- Enable Ending Time if applicable.
- Enter the Guest Count.
Step 4: Select Serving Area
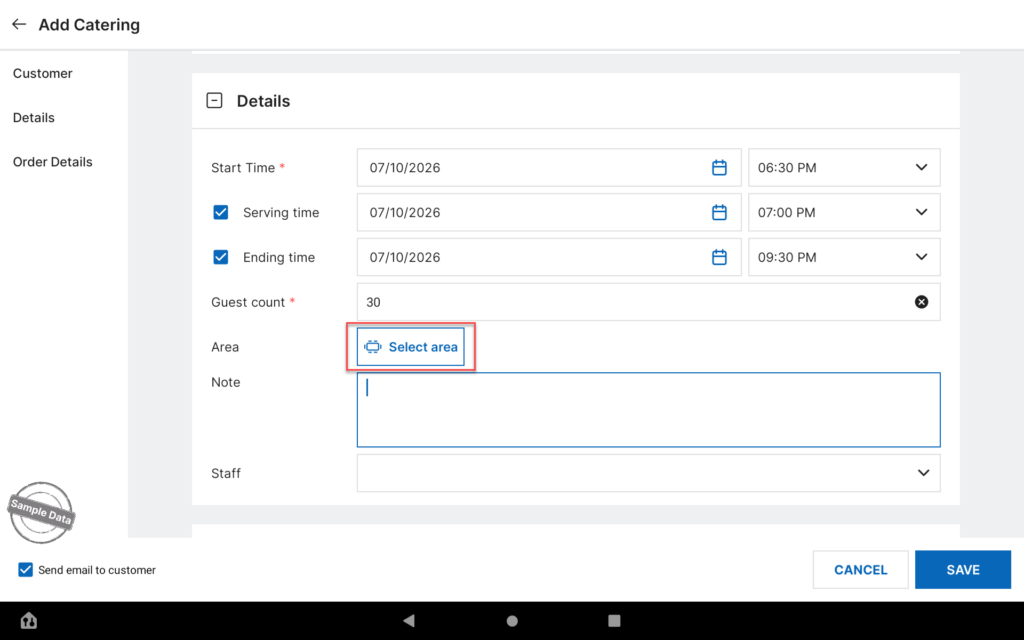
- Click Select Area to choose the serving location.
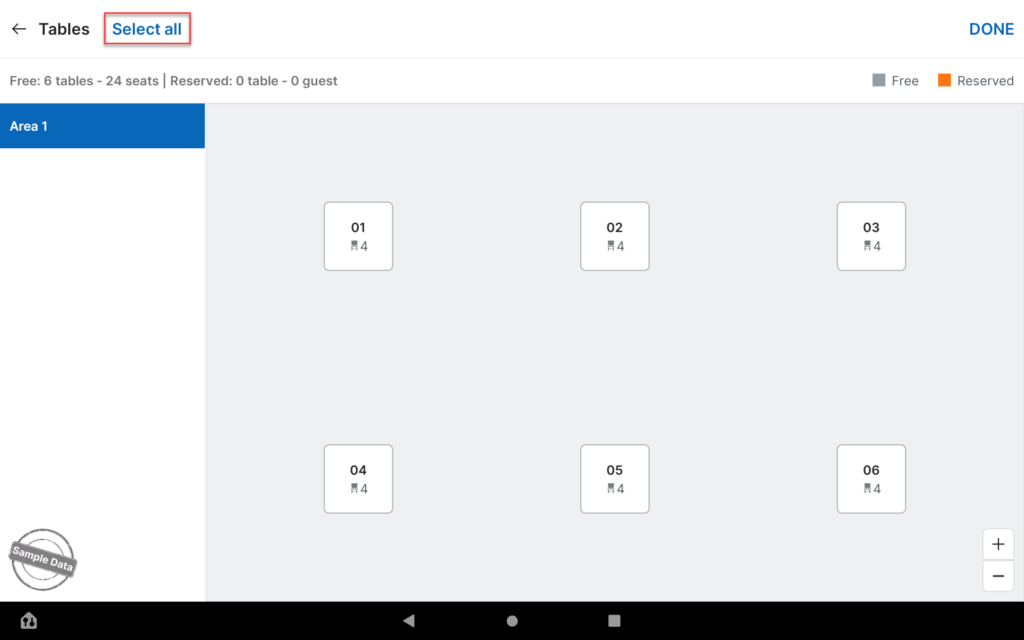
- Select tables:
- Click Select All to reserve all tables in the area, or
- Manually select specific tables.
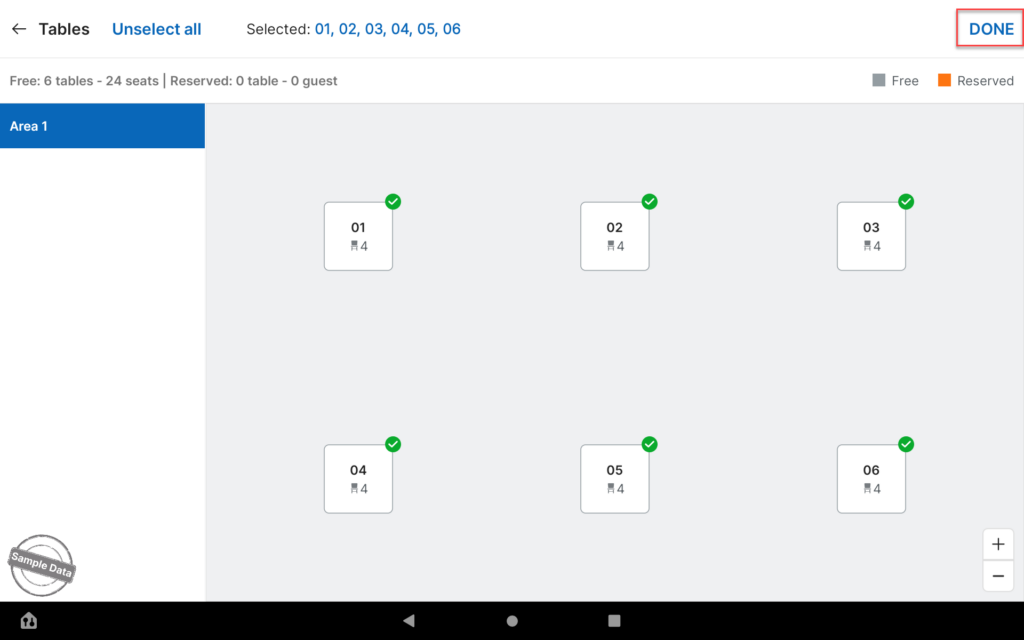
- Click Done to confirm.
Step 5: Add Special Notes
Enter any special requests provided by the customer (if any).
Step 6: Add Menu Items
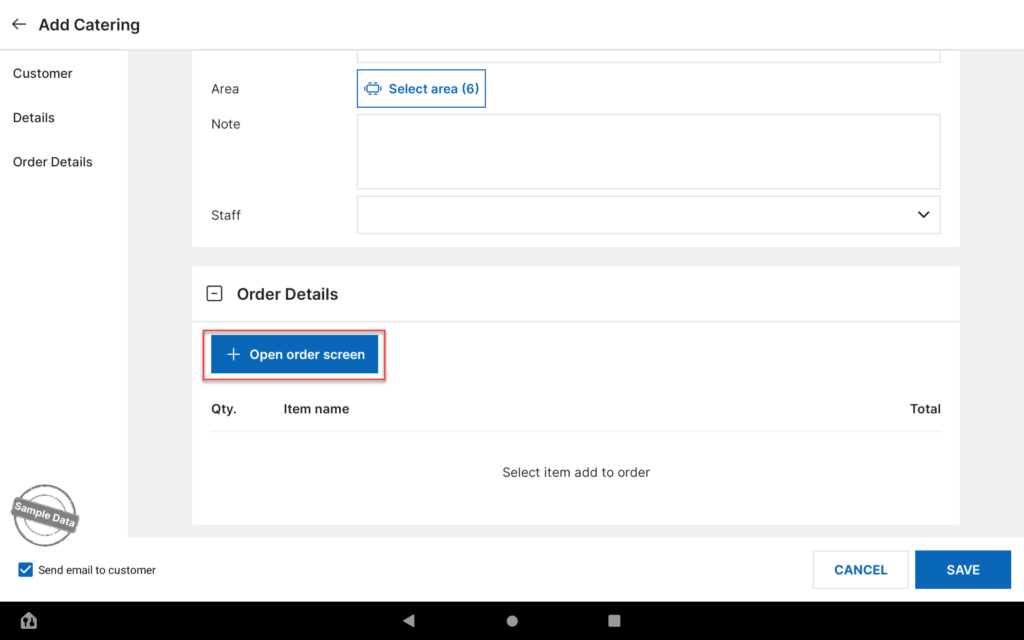
- Go to Order Details.
- Click Open Order Screen to add items in advance (if required).
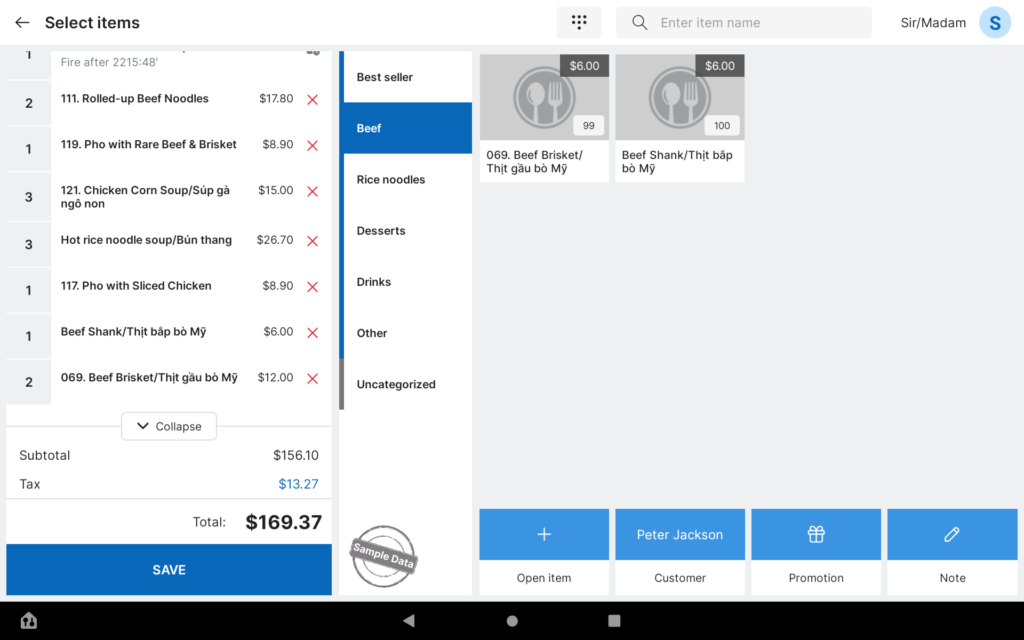
- Select the items.
- Click Save.
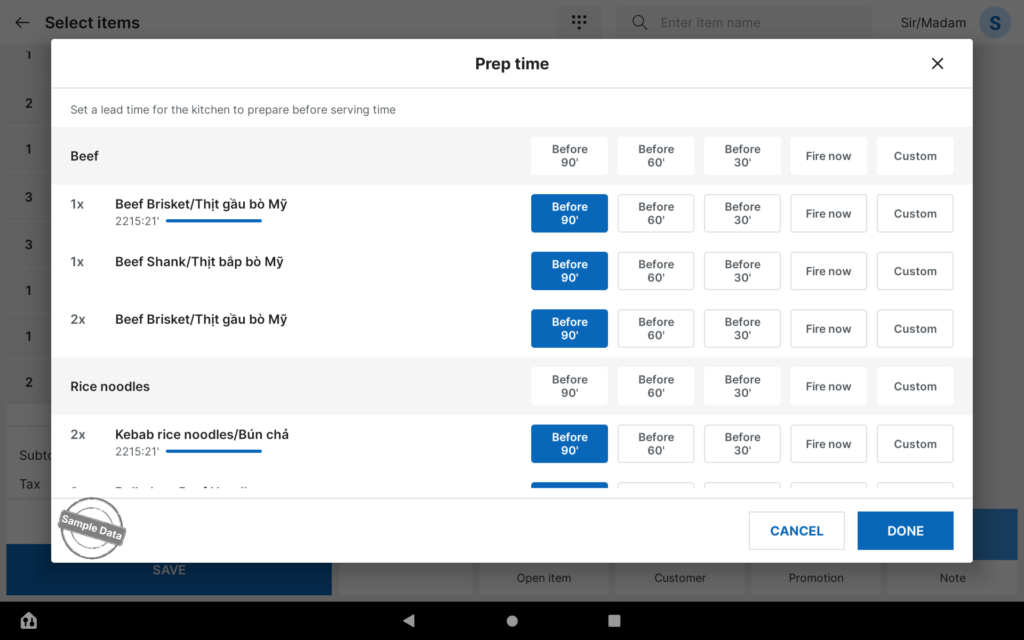
Step 7: Set Preparation Time
- Configure the Prep Time.
- Click Done.
Step 8: Review and Confirm
Review:
- Selected items
- Deposit amount to be collected
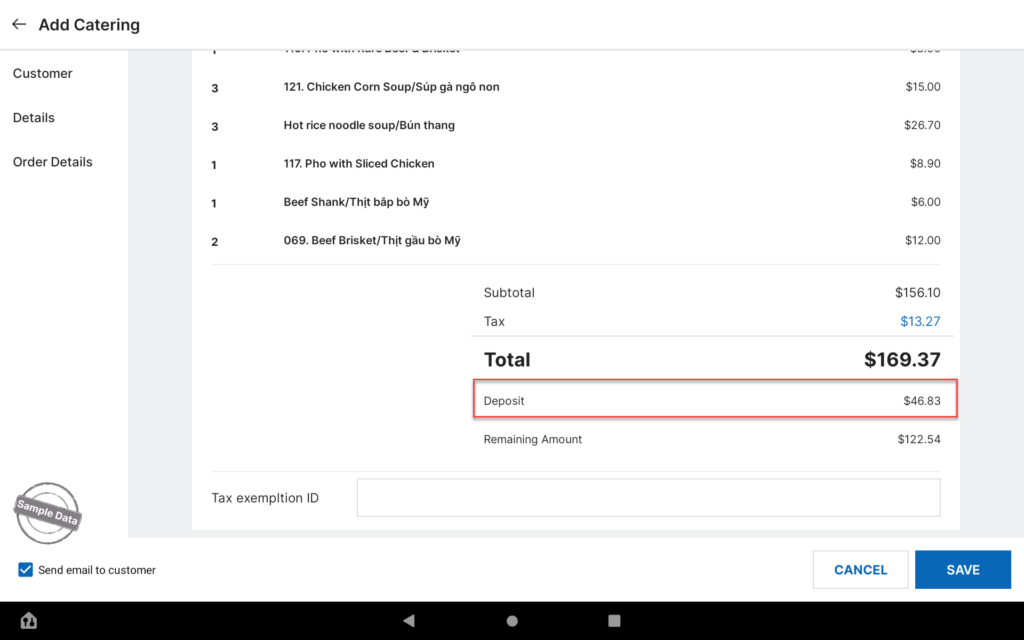
Click Save to finalize the catering order.
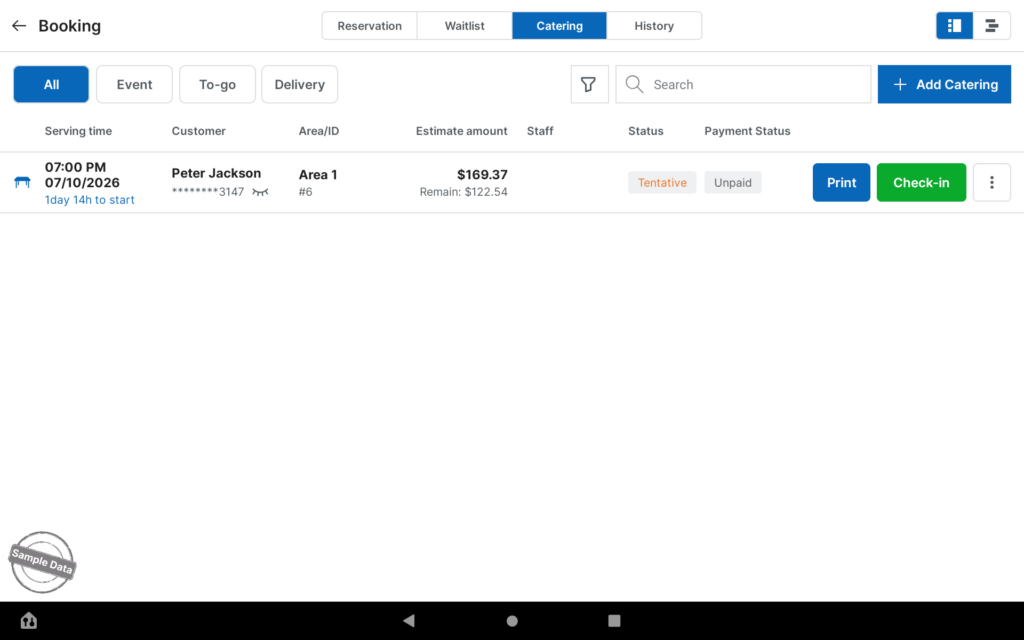
The catering order is now successfully created.
Have a nice day!


