

I. Purpose
The self-service waitlist feature allows the restaurant to:
- Let guests add themselves to the waitlist without staff assistance.
- Reduce front-desk workload, eliminate data-entry mistakes, and show an accurate ETA (Estimated Time of Arrival) based on your table-turn and cleaning times.
- Enable POS staff to monitor, reorder, and send “Table ready” notifications directly from the POS device.
II. Instruction steps
1. Configure self-service waitlist on the dashboard
- On the dashboard, go to Booking app → Settings → Waitlist settings
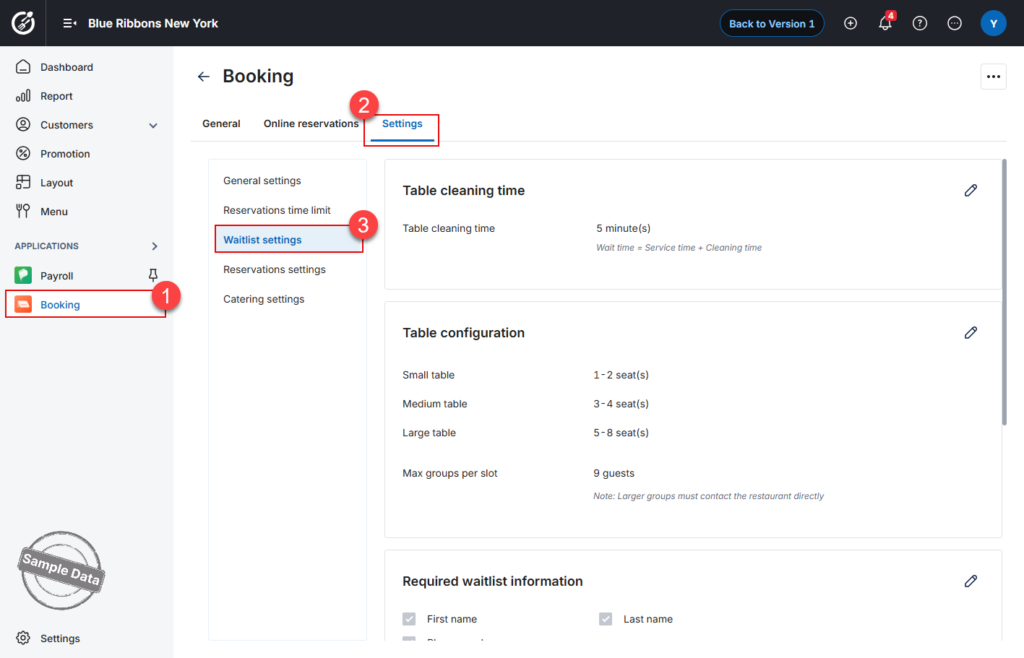
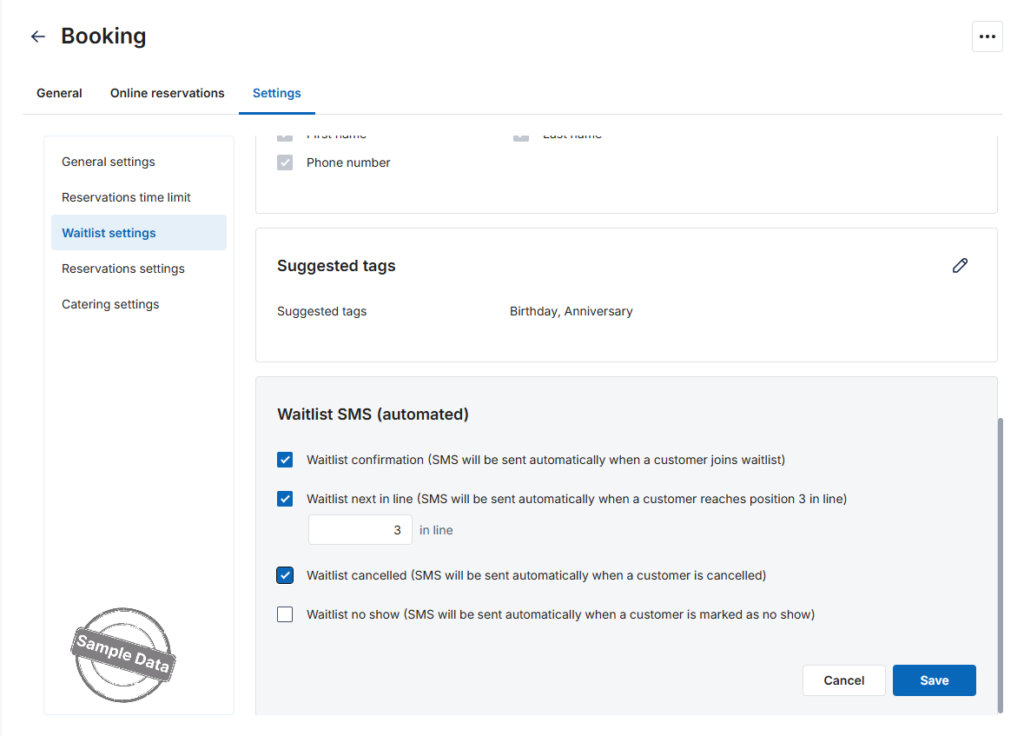
- Configure Table cleaning time, Table configuration, Required information, Suggested tags, and Automatic SMS
- Click Save.
2. Add a Guest to the Waitlist (POS – Guest View)
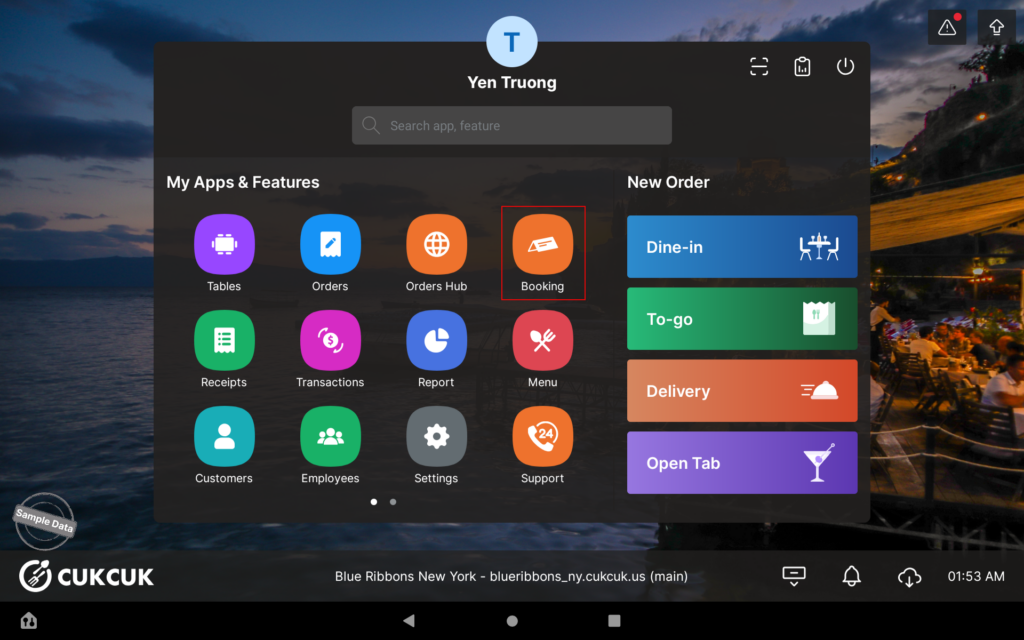
- Go to Booking
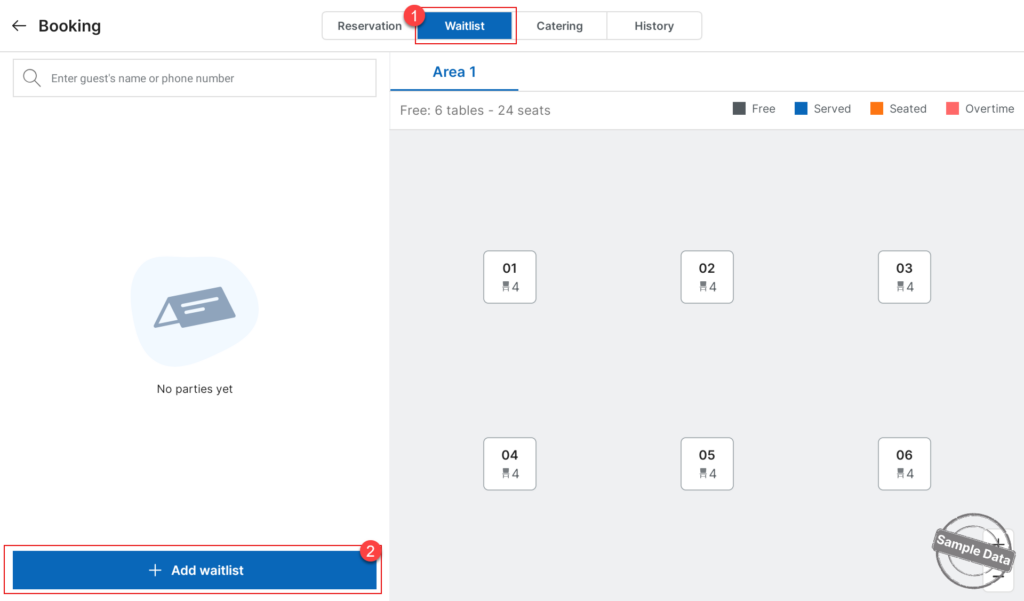
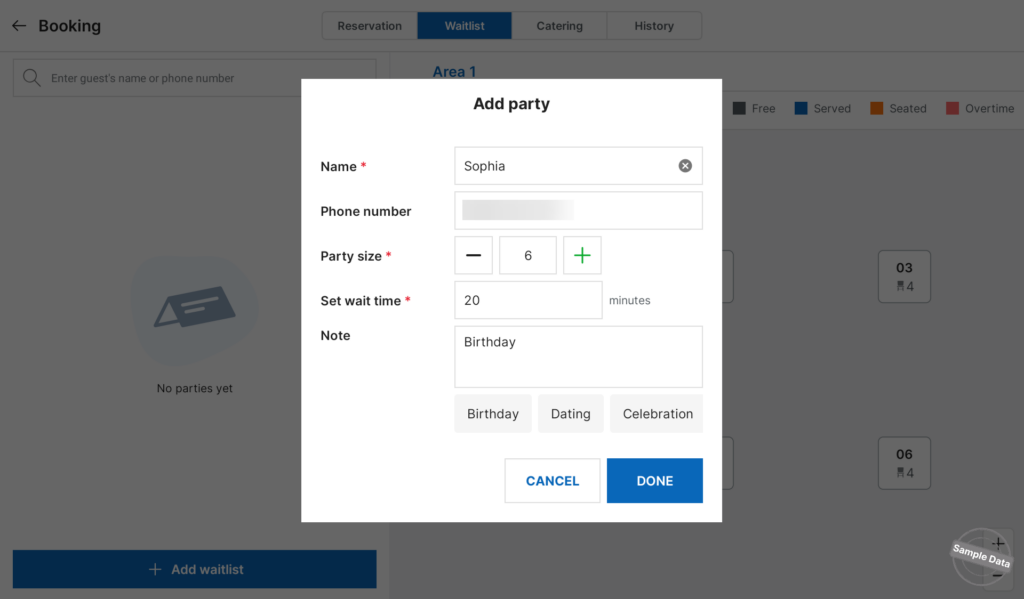
- On Waitlist tab, click Add waitlist.
- Fill in the information: Name, phone number, party size, wait time, and leave note if any.
- Then click Done.
3. Manage the Waitlist (POS – Staff View)
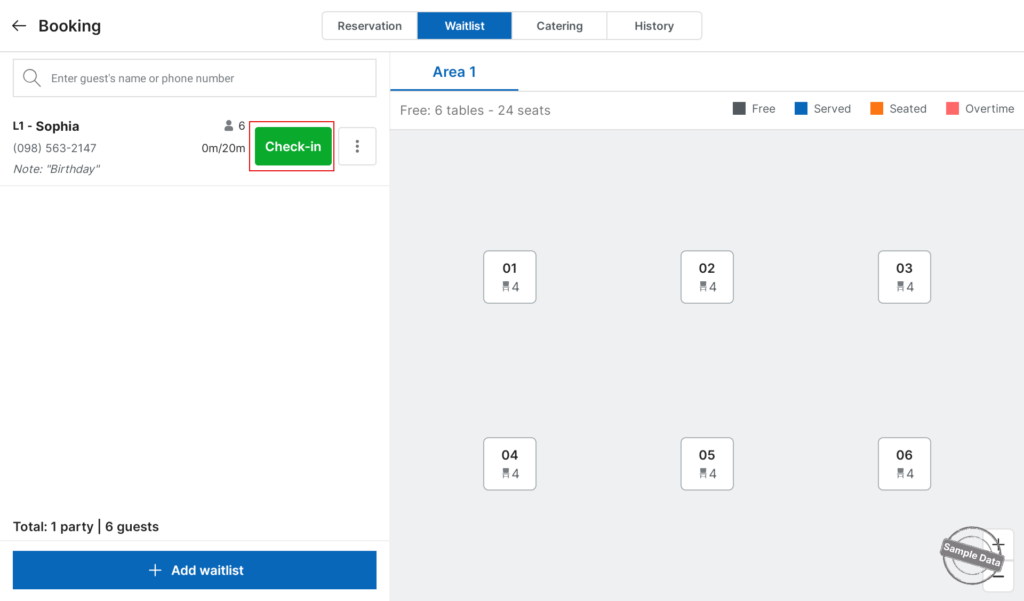
a. Seat a party
- When the guest checks in, click Check in.
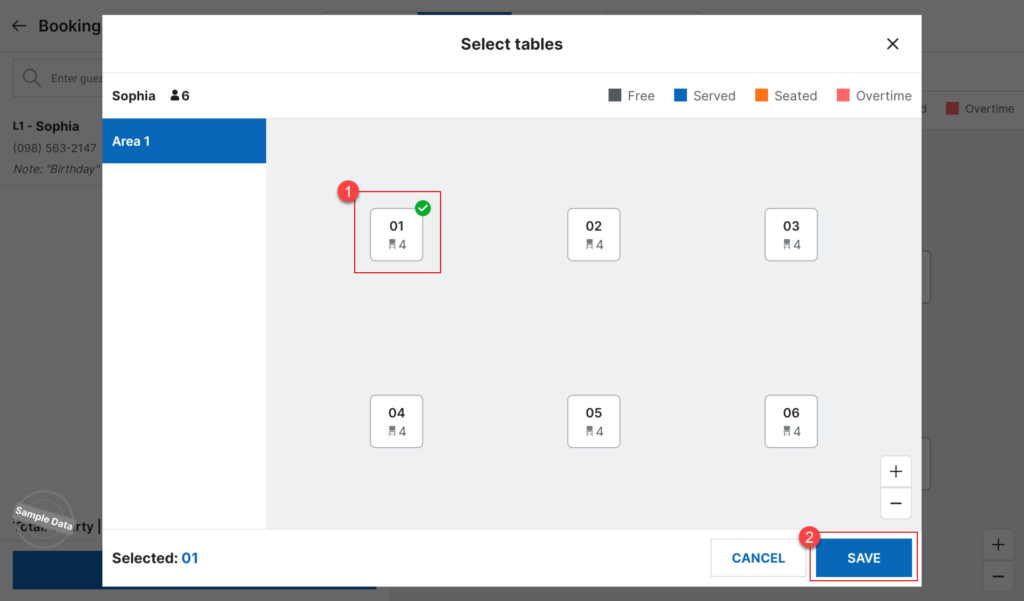
- Choose a table and click Save.
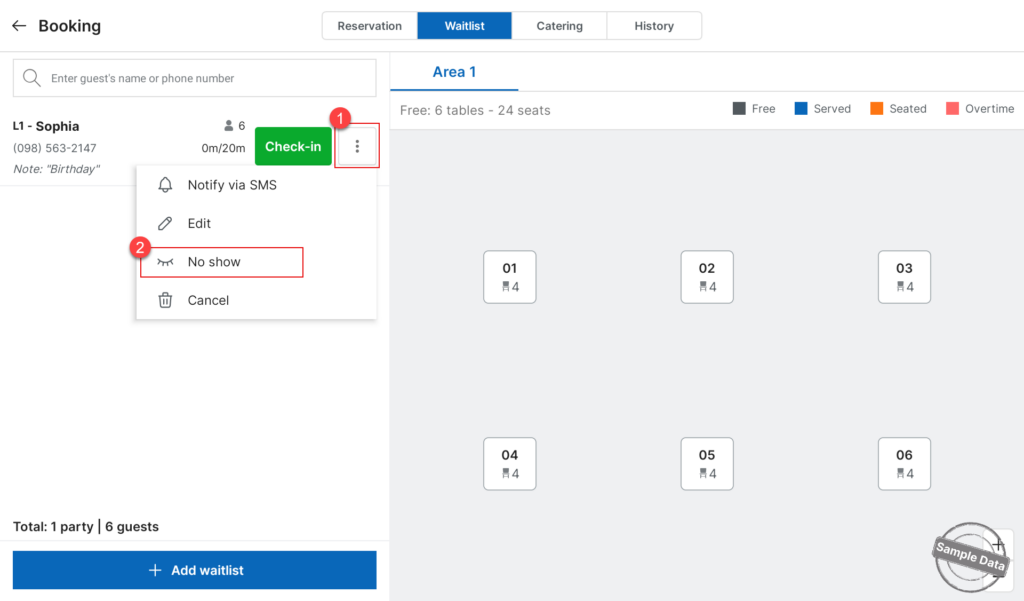
b. Mark no-show
- If the guest does not come, click three-dot icon and select No show.
Have a nice day!


