

Nội dung có trong bài
Ẩn
I. Purpose
This feature lets multi-location restaurants quickly build a master menu and import items, categories, and modifiers to any branch—saving hours of manual data entry and keeping menus consistent chain-wide.
II. Instruction Steps
1. Create the Menu
- Open Menu in the left panel and select the branch that will receive the new menu.
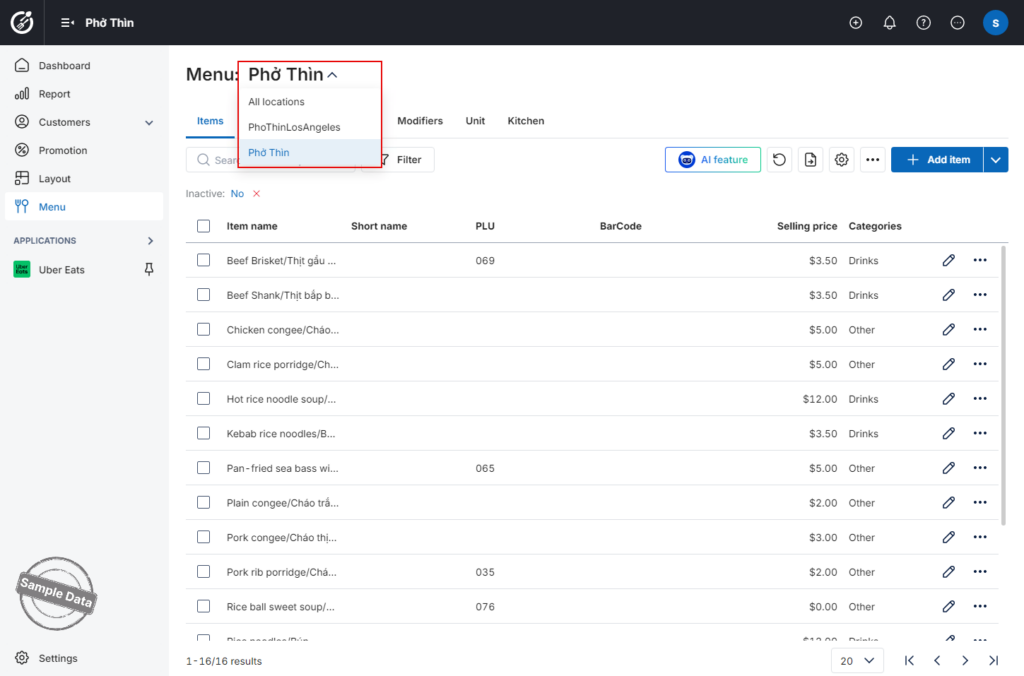
- Choose one of three creation methods:
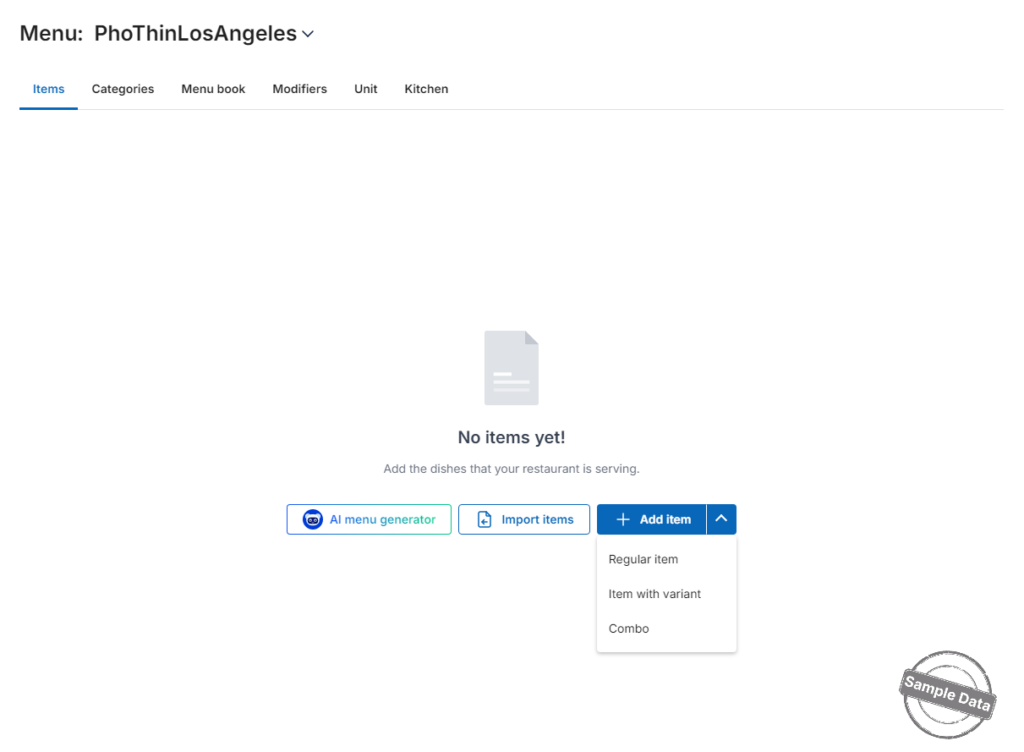
Option When to Use AI menu generator Instantly generate a full menu from AI suggestions—ideal for new branches. Import from Excel file Upload your existing menu via the Excel template. See detailed import guide here. Add item Manually add individual dishes.
2. Add a new item
- Click Add item.
- Enter the dish details.
- To sell this item at other branches, tick Copy to another location and check the applicable branch.
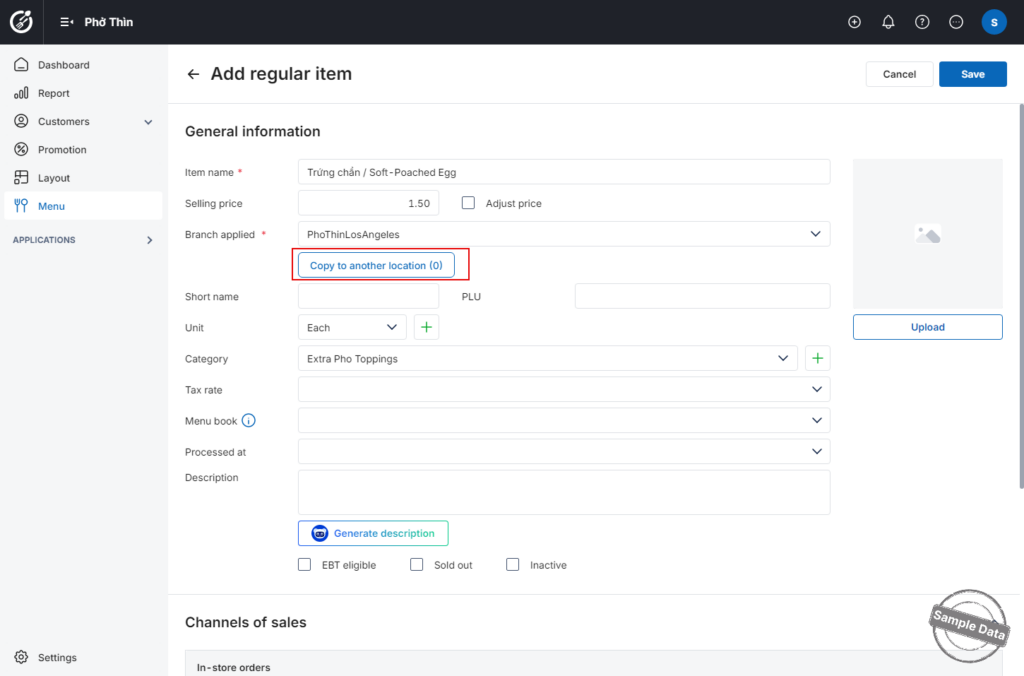
- Click Done.
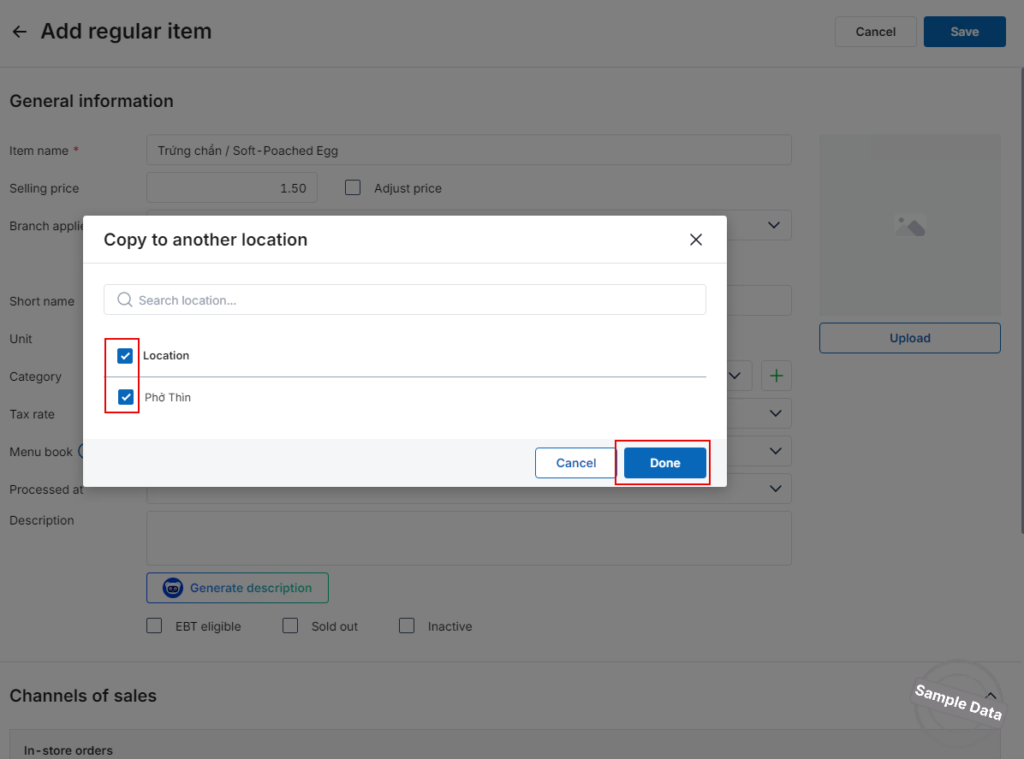
- Click Save to apply the settings.
3. Add a category
- Switch to the Categories tab and click Add category.
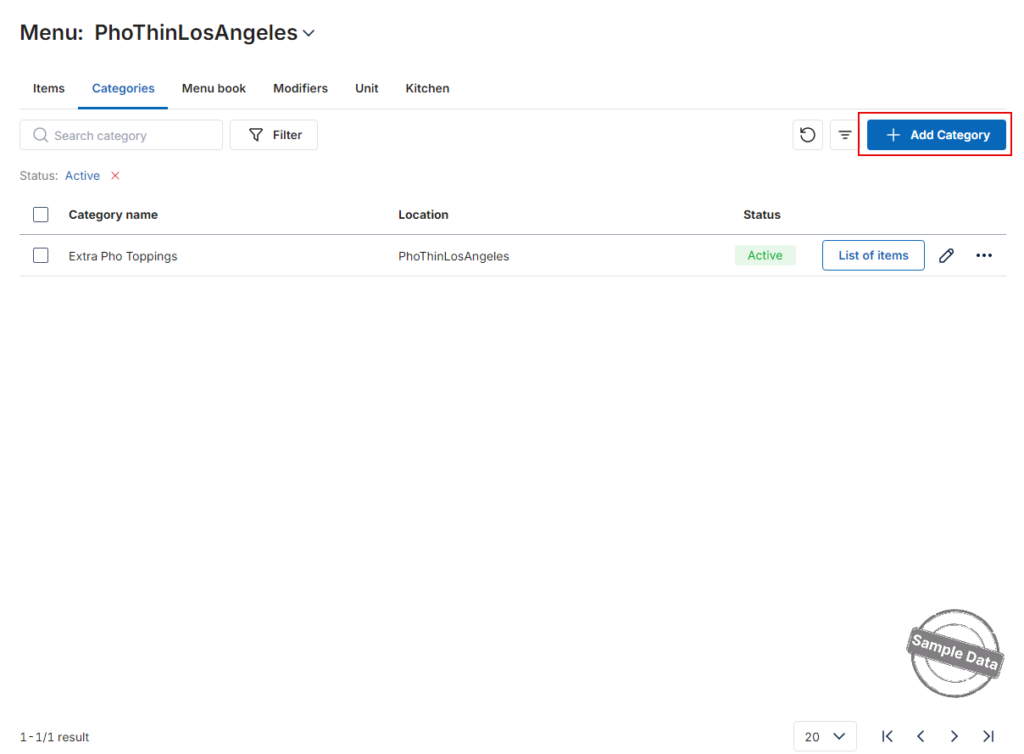
- Fill in the category details.
- (Optional) Tick Copy to another location to share the category with other branches, then choose the locations.
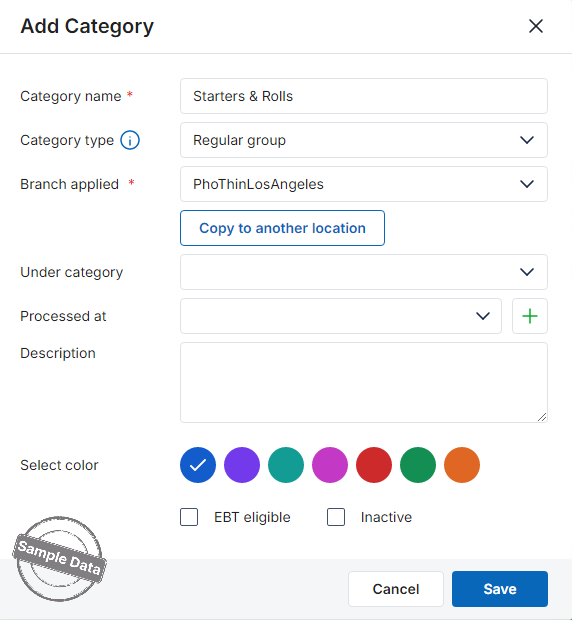
- Click Save.
4. Add a modifier
- Go to the Modifiers tab and click Add modifier category.
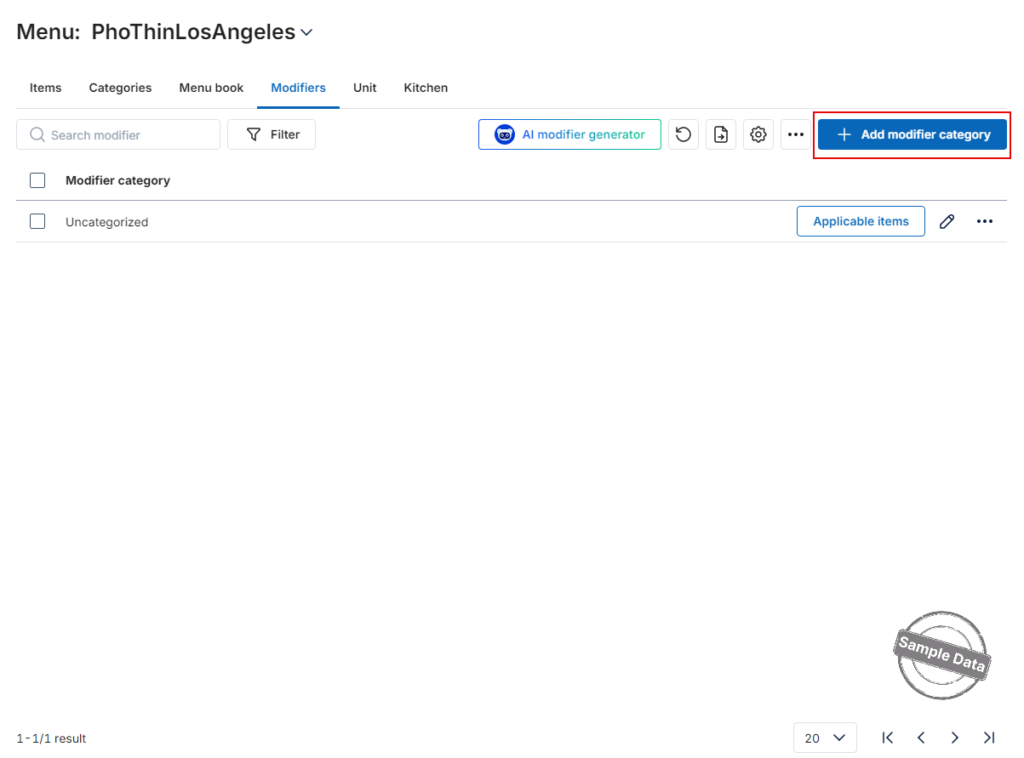
- Enter the modifier name.
- (Optional) Tick Copy to another location and select the branches:
- If the destination branch lacks the related Category or Modifier group, the system will auto-create them.
- Enter the modifier options (e.g., Extra meat, No onion, Less spicy).
- Set the price for each modifier if applicable.
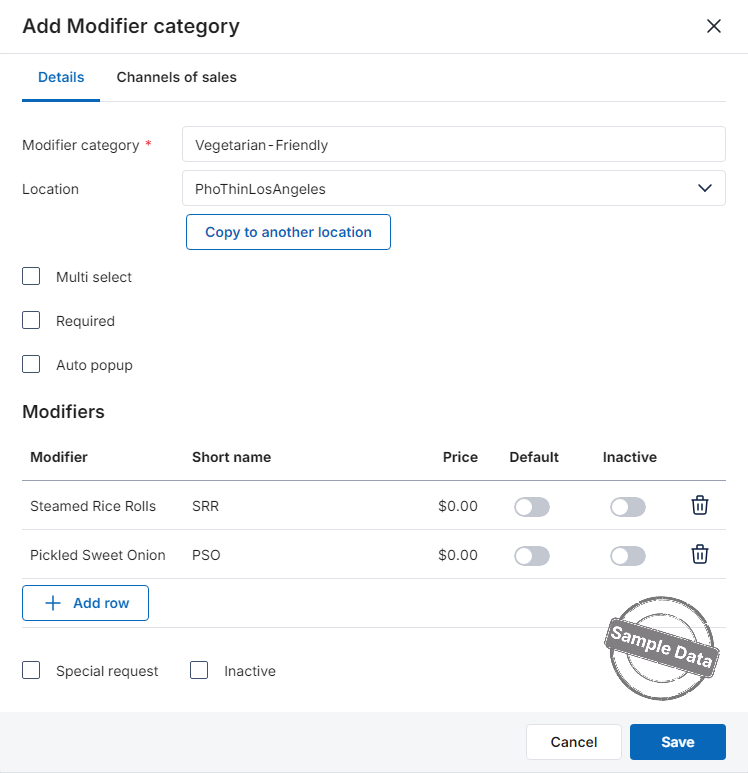
- Configure Selection Rules: Read here for details.
- Click Save.
Notes
- When you tick Copy to another location, missing Categories or Modifiers are created automatically in the target branches, but processing stations and tax rates must be set separately.
- You can import additional items anytime with Import from Excel file or add them one by one with Add item.


