

Nội dung có trong bài
Ẩn
I. Purpose
The restaurant can categorize food and beverage items into appropriate menu groups. This helps staff easily search for items and assist customers when taking orders.
II. Instruction steps
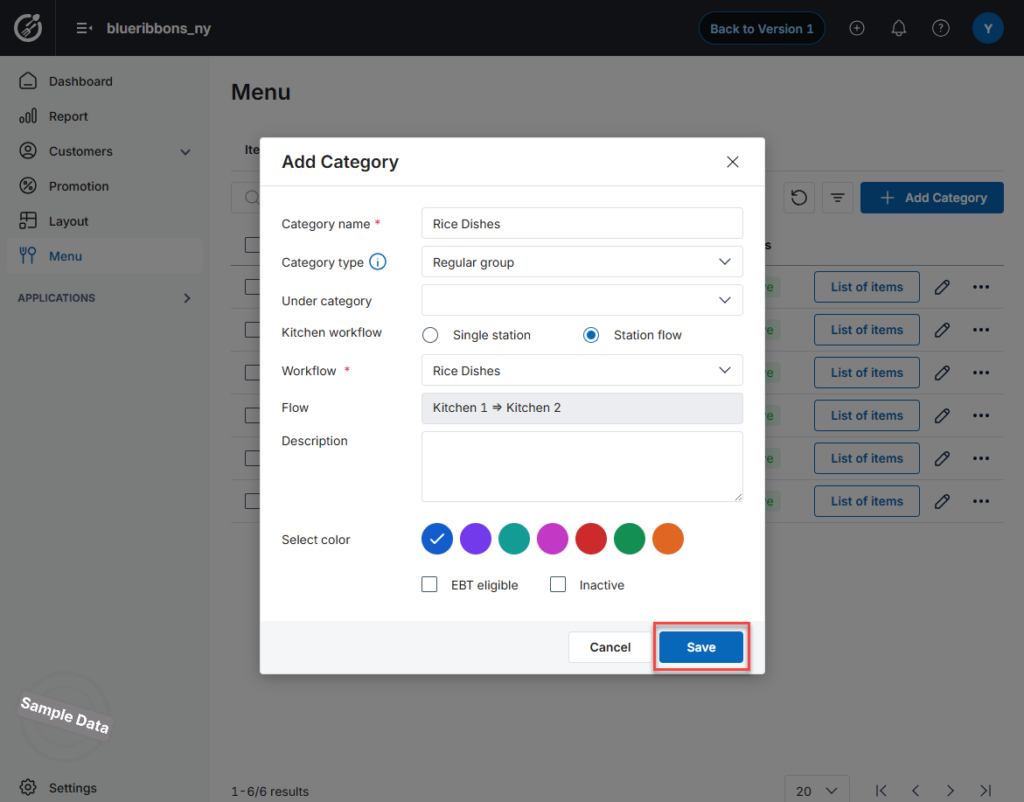
Step 1: Add a New Category
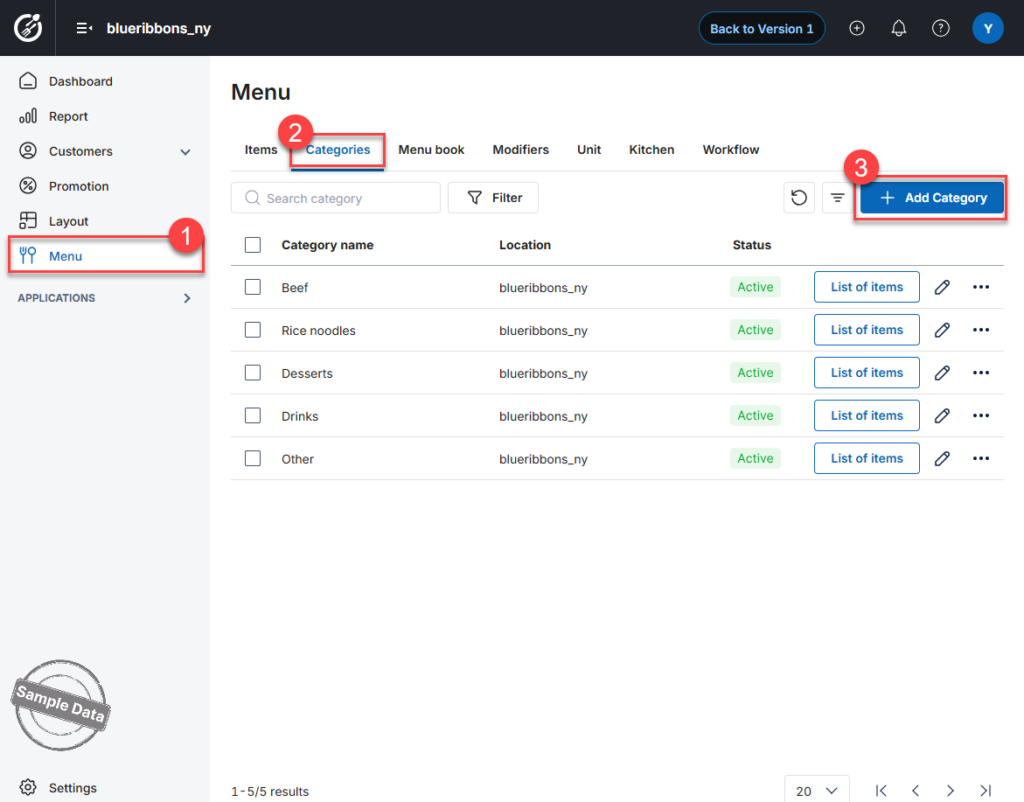
- On the Dashboard, go to Menu.
- Open the Categories tab.
- Click Add Category.
Step 2: Enter Category Information
- Enter the Category Name.
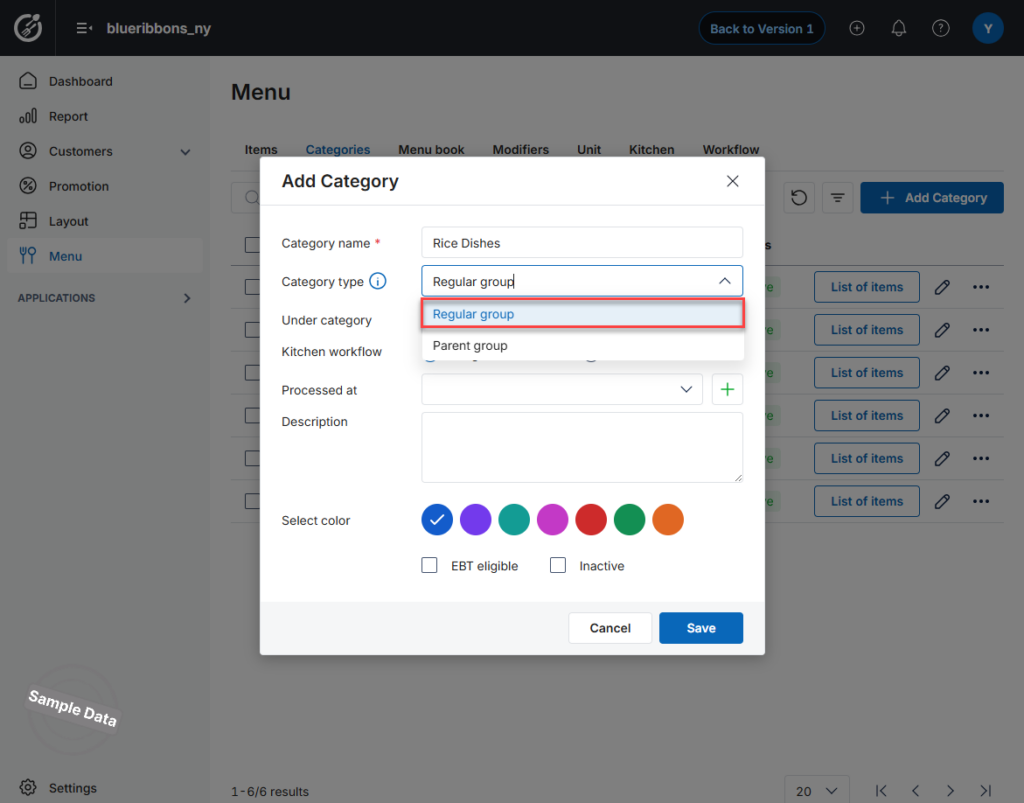
- Select the Category Type:
- Regular group – Standard menu category
- Parent Group – Used to group multiple categories under one heading
- Select the Kitchen Workflow:
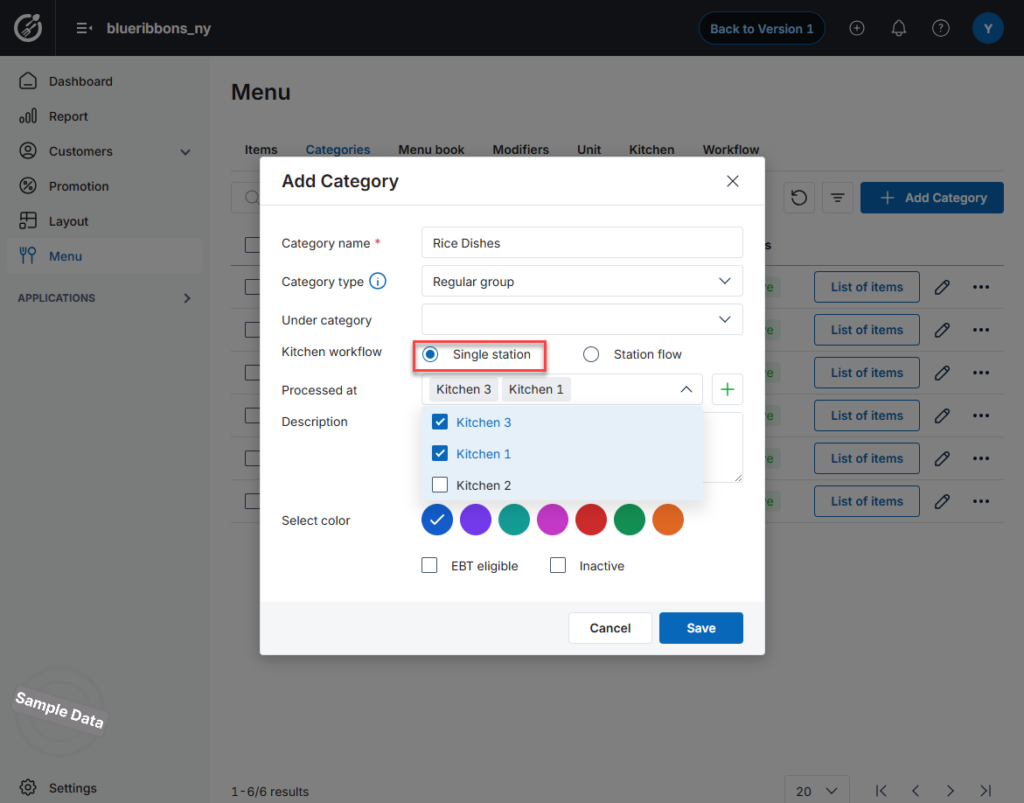
- Single Station – Items are processed in specific kitchen(s).
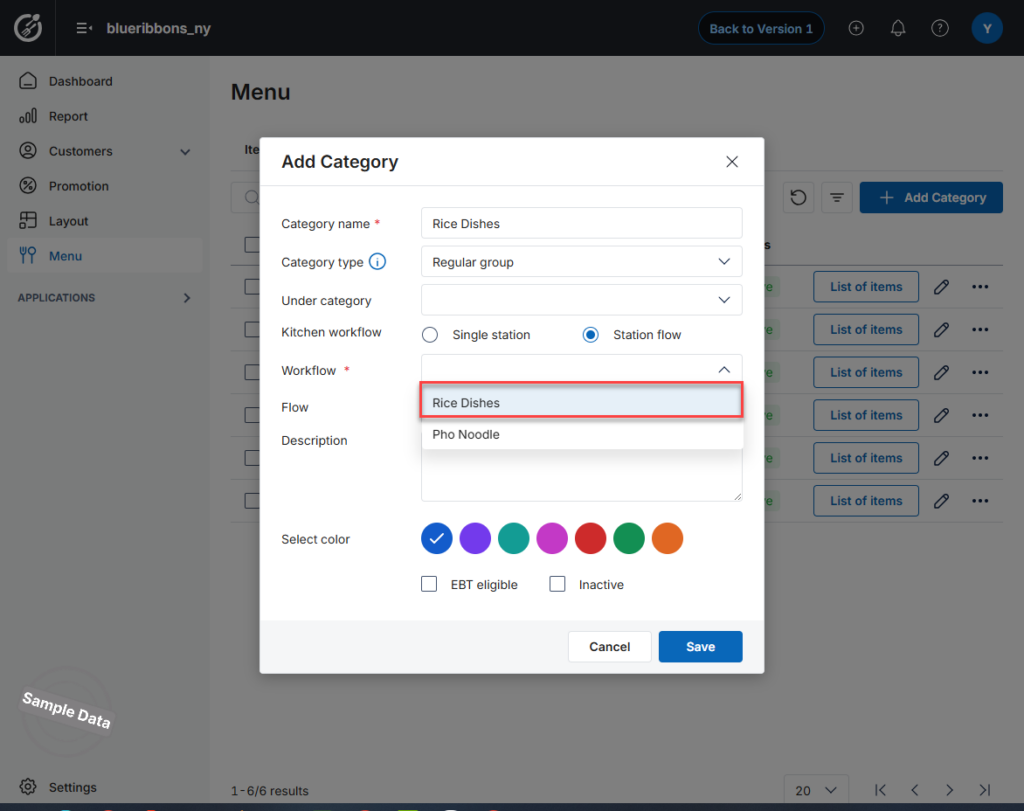
- Station Flow – Items are processed across multiple kitchens based on a defined workflow.
If selecting Single Station
- Choose the applicable Kitchen(s) where items in this category will be prepared.
If selecting Station Flow
- Select the predefined Workflow for this category.
Step 3: Save
Click Save to apply the settings.
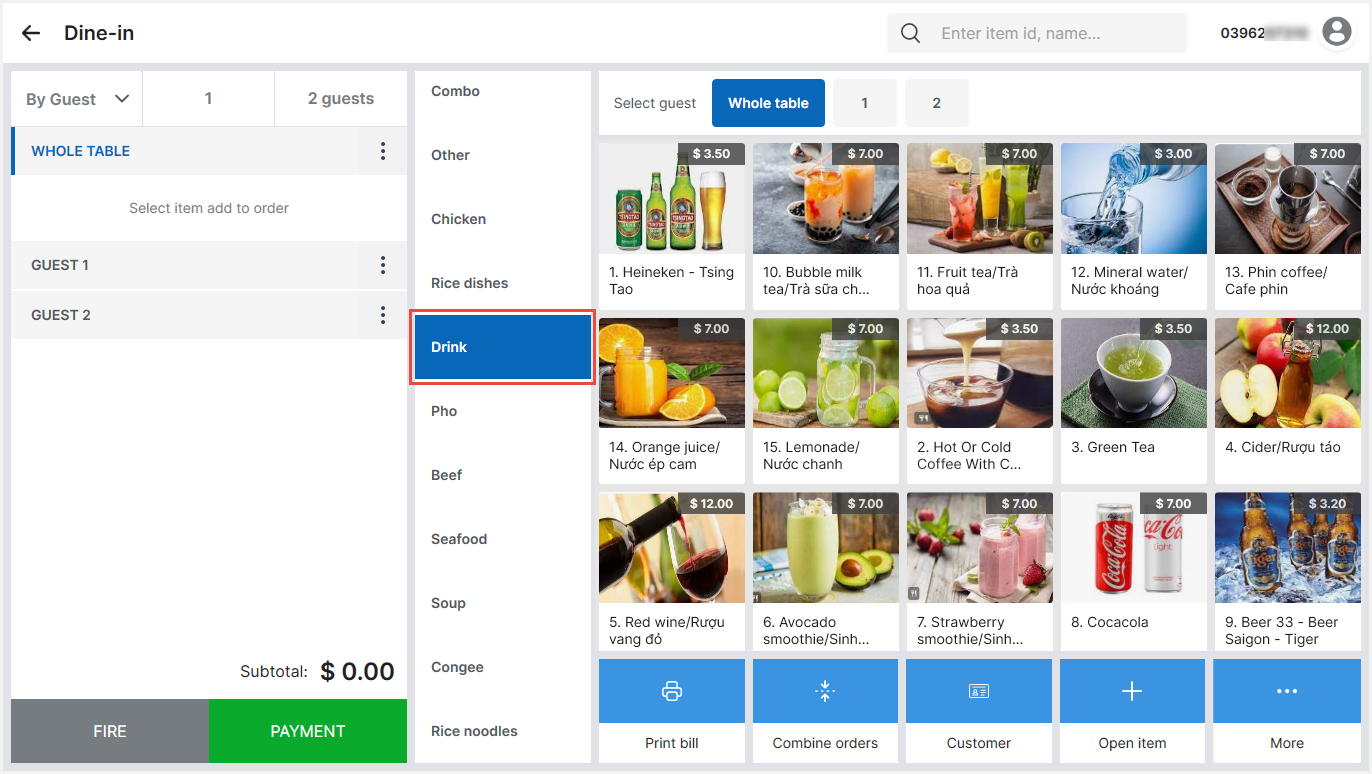
Once created successfully, menu items will be displayed by category on the POS, making it easier for staff to search and take orders.
Notes
- To edit or delete a category:
- On the category to be edited, click edit button.
- On the category to be deleted, click this button and select Delete.
- Use the Up/Down buttons to rearrange items within a category.
- Menu categories can also be created directly on the PC/POS device.
After successfully creating the category, sales staff will see menu items displayed by group, making it easier to search and serve customers.
Have a nice day!


