

I. Purpose
This feature allows guests to browse the menu, place orders, and pay directly from their own devices by scanning a table-side QR code.
II. Instruction steps
1. Install the QR Ordering App
On the dashboard, navigate to Applications → QR Ordering.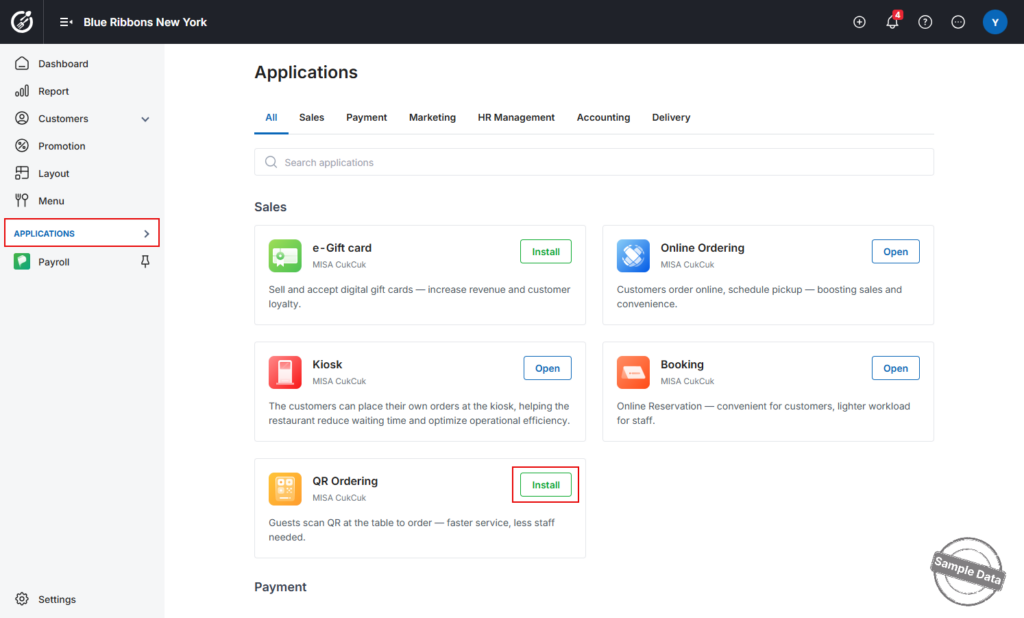
Click Install → confirm Install again when prompted.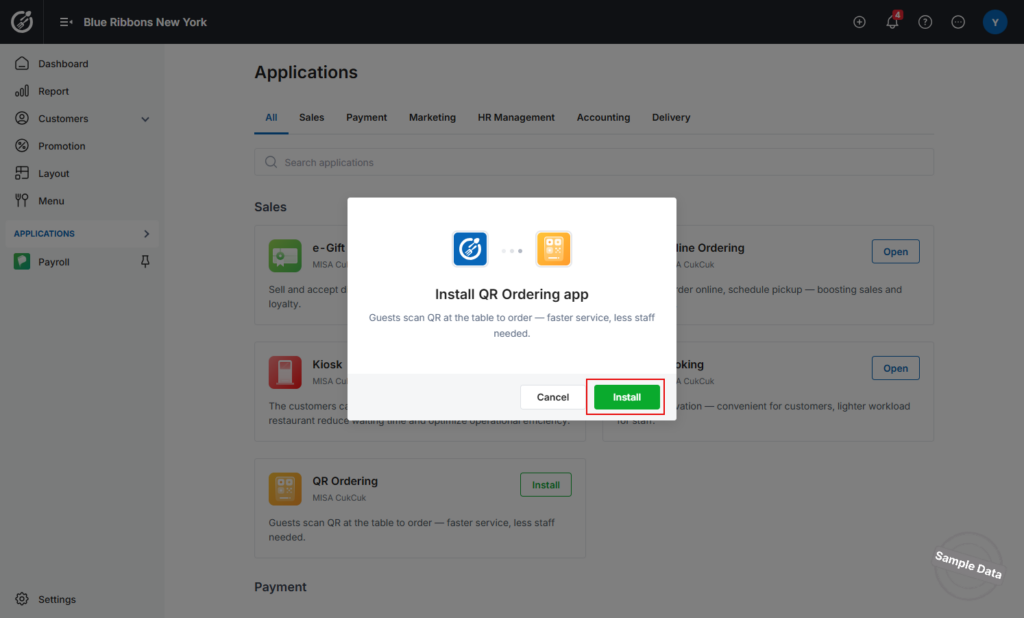
2. Publish the Ordering Site
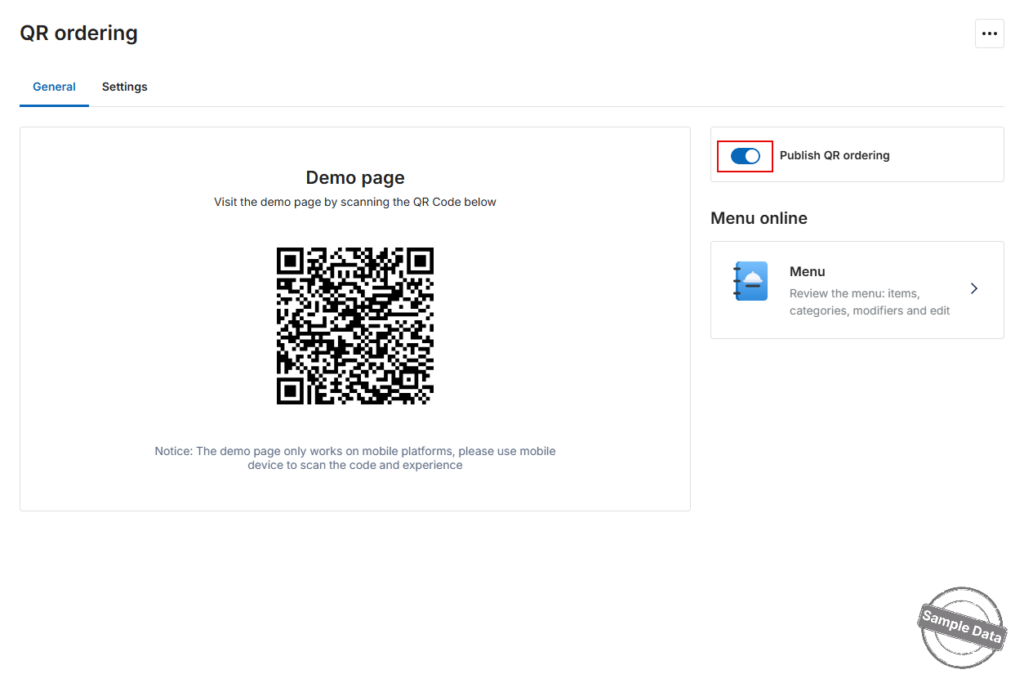
- In the QR Ordering settings screen, switch on Publish Online Ordering.
- The system generates a unique QR code for your restaurant.Guests can now access the ordering site only by scanning this QR code.
Note:
- QR-only access: Guests cannot reach the “Order at Table” site via a direct URL; access is restricted to the QR code.
- Preview mode for staff: Staff may scan the QR code to preview the site, but ordering and payment are disabled in this demo view.
3. Set up Table layout
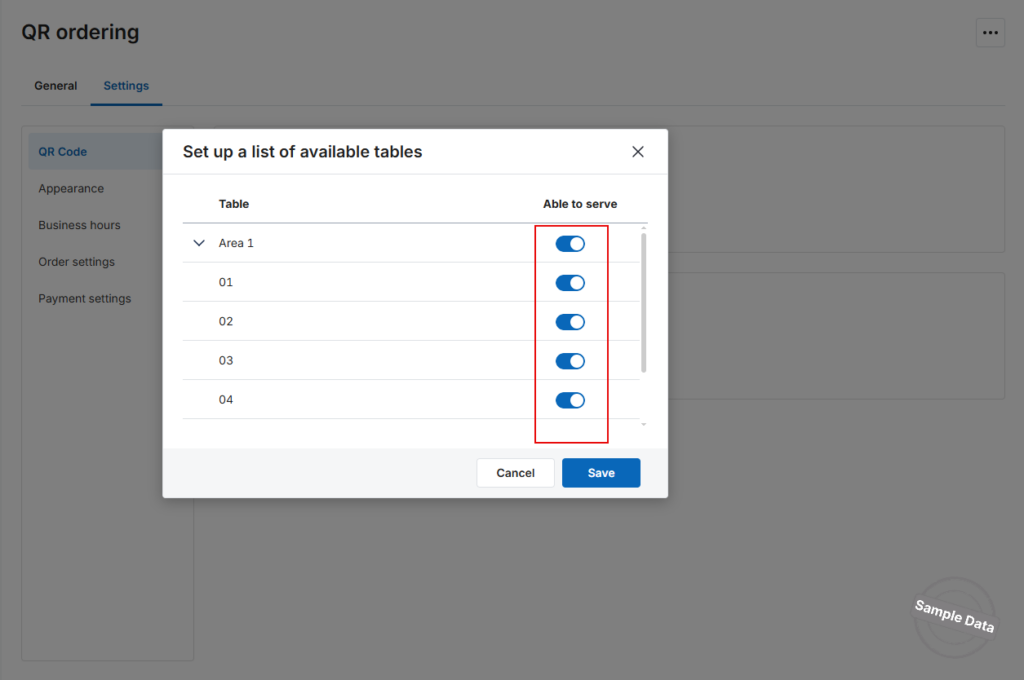
- On Settings tab, locate QR Code. In the Table layout block, click Set up.
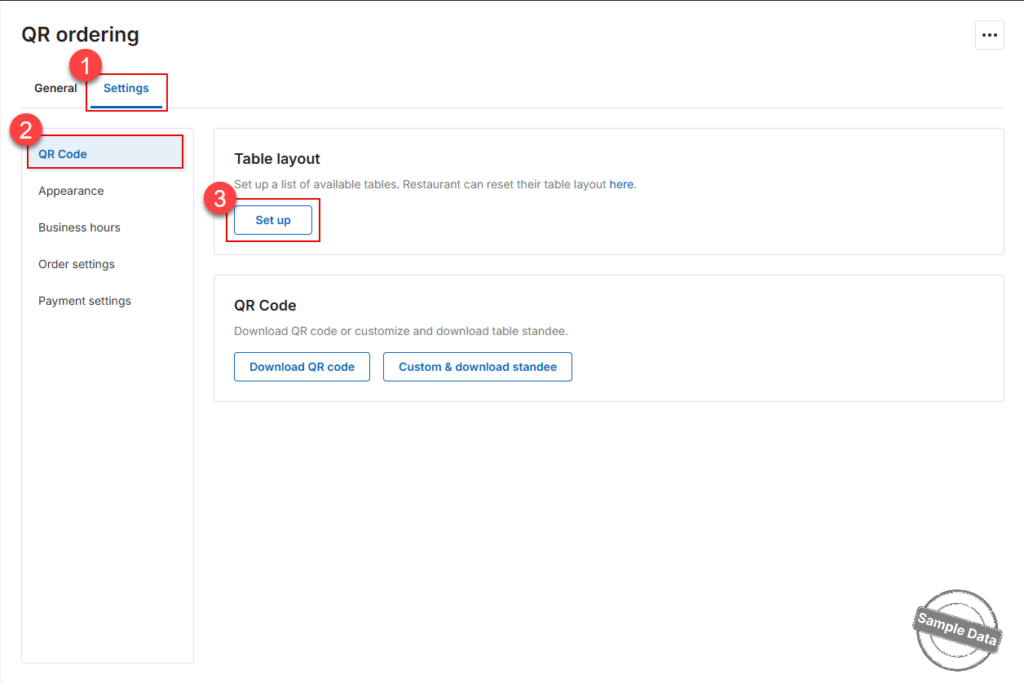
- A pop-up lists every table already defined in the POS.
- By default, the system sets Able to serve to ON for every table.
- If a table is not in service, simply switch Able to serve to OFF to hide it from guests.
- Click Save to apply changes.
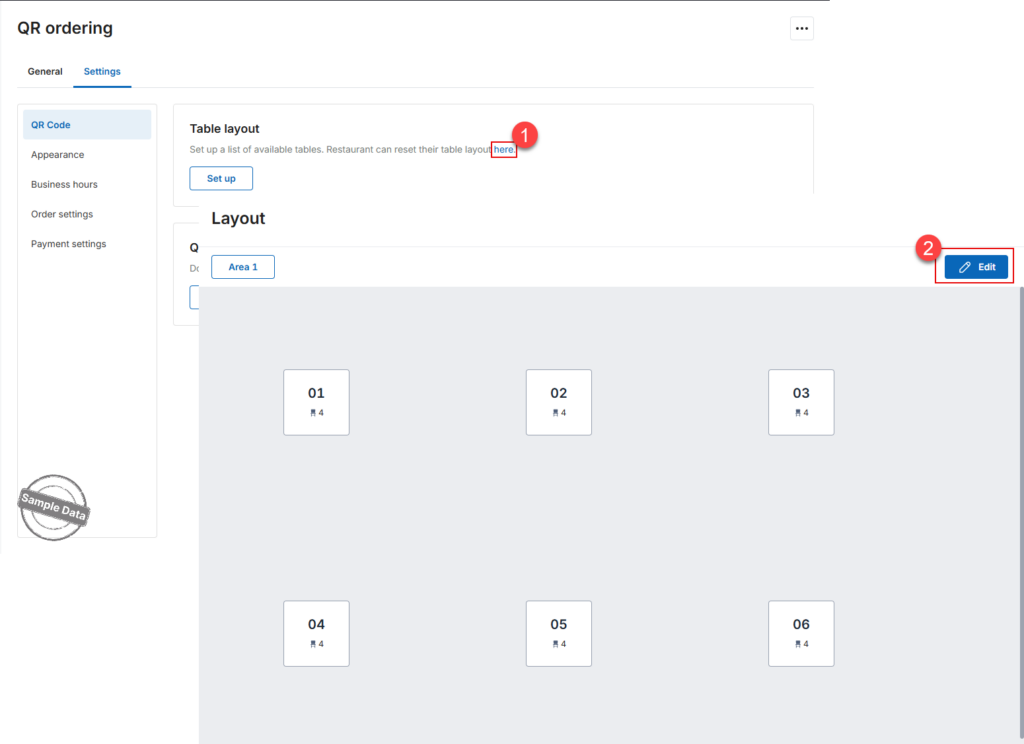
- To modify your floor plan, click here in the Restaurant can reset their table layout part. Then press Edit. For a step-by-step guide to designing your restaurant layout, refer to this article.
4. Download or Customise Your Table QR Codes
- Download QR Code:
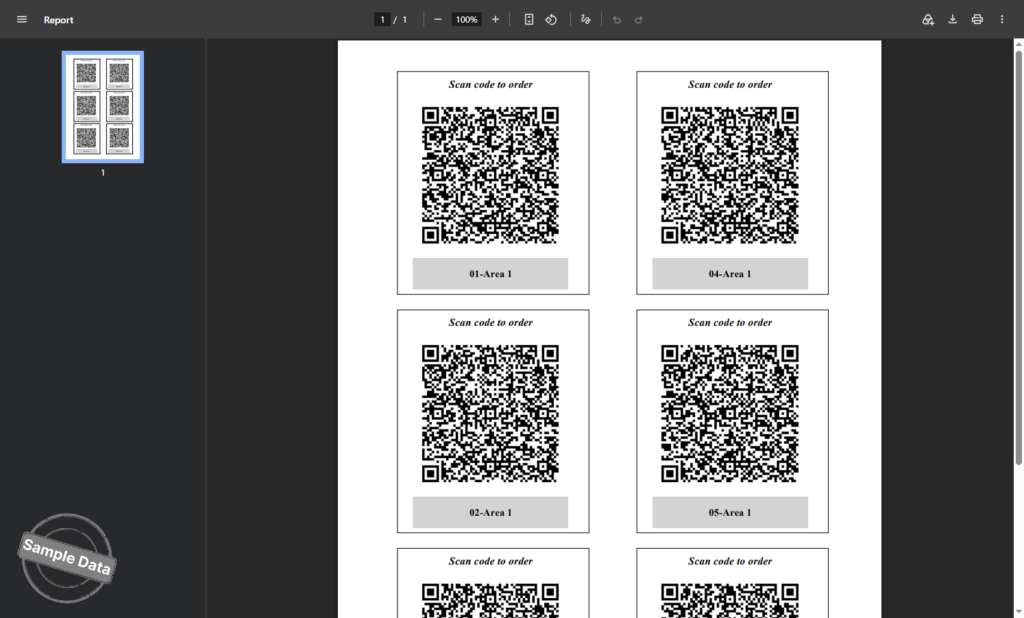
- Quick print of one PDF sheet that contains a standard card for every active table.
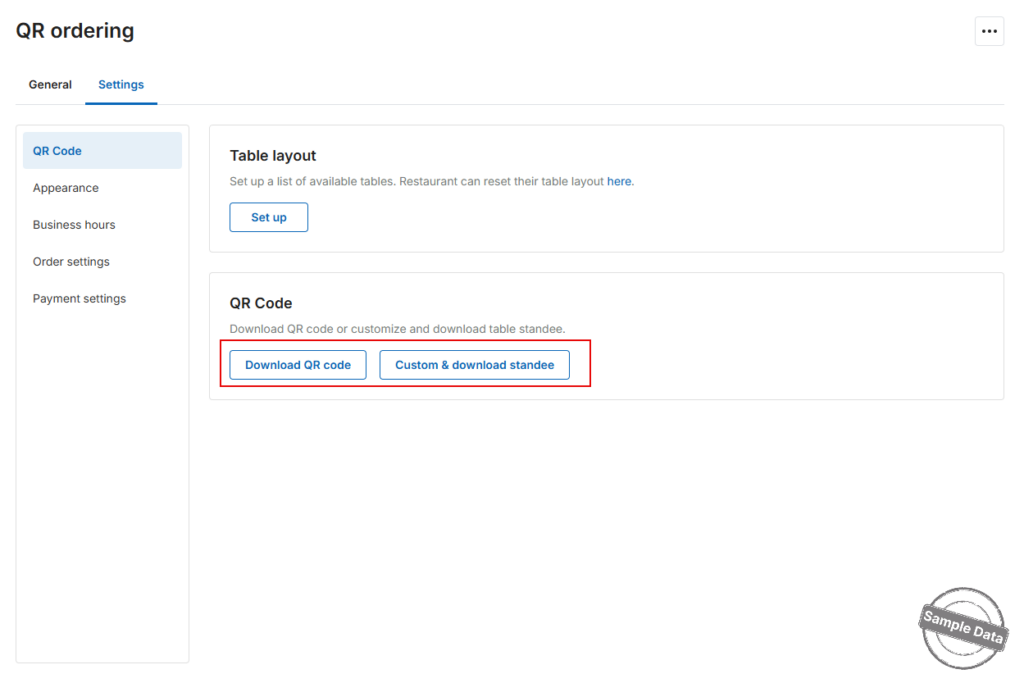
- Each card shows the table number and a ready-to-scan code.
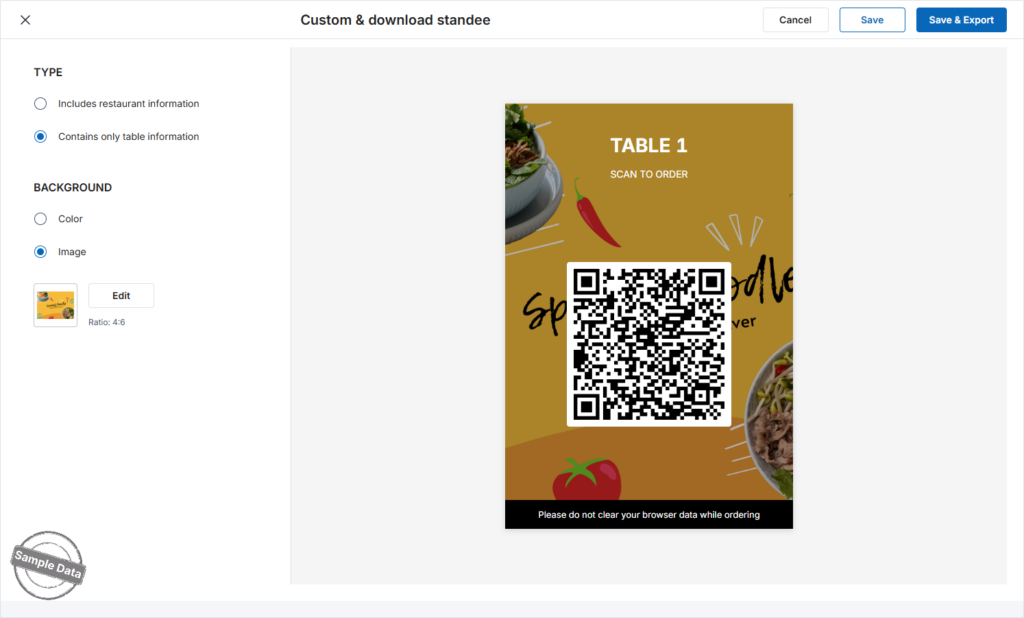
2. Custom & download standee: When you want branded cards or a different format for each table.
- Type: Pick whether the card shows your logo/venue name or just the table ID.
- Background:
- Color – choose any solid colour.
- Image – upload a 4 : 6 ratio picture for a fully branded look. Click Edit to replace the image.
- Save & Export: Generates and downloads the finished PNG/PDF to your computer.
- Save: Stores the design; you can return later and export when ready.
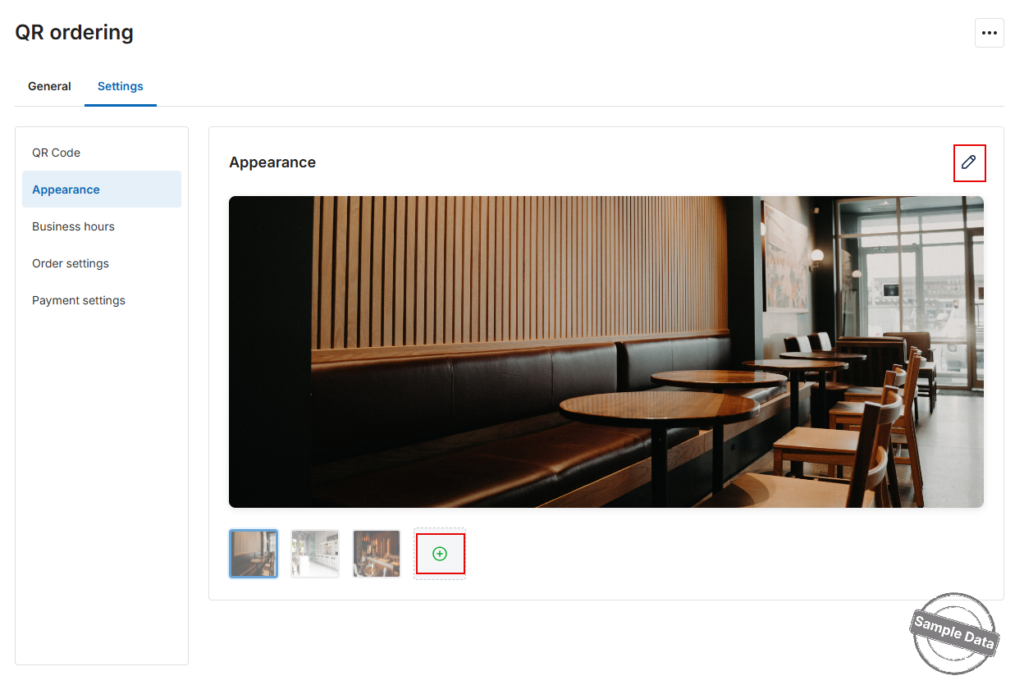
- Three stock photos are pre-loaded. Click Edit –> click the image to preview.
- Click the plus icon → choose an image from your computer: Max 5 MB per file and up to 2 extra images (total = 5)
6. Set up business hours
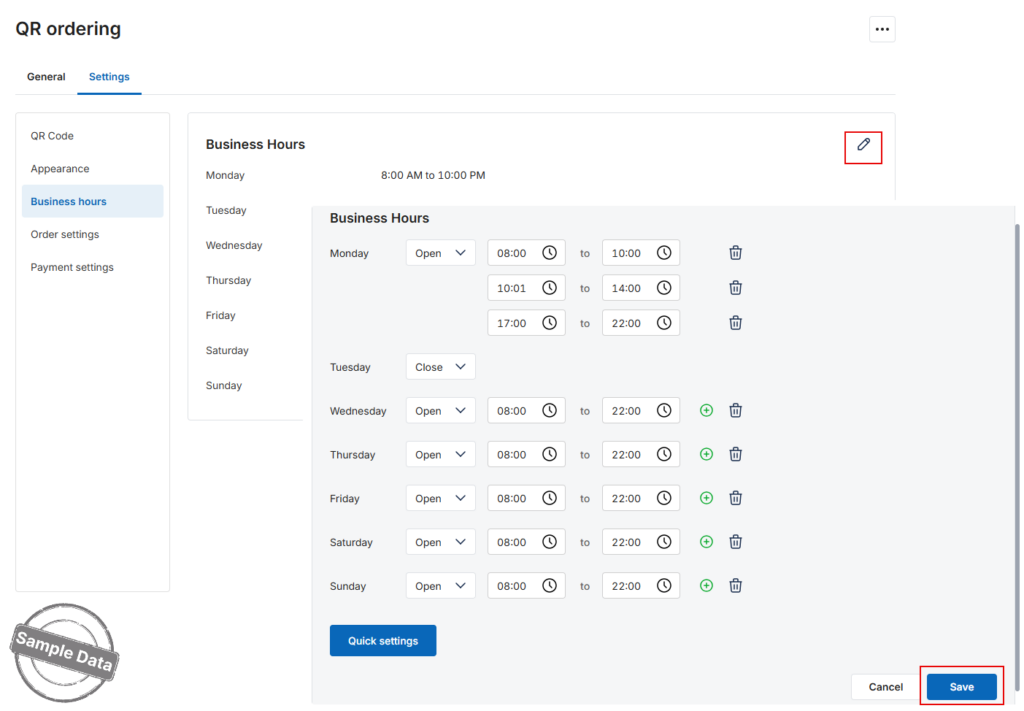
- The system starts with a default schedule of 08:00 – 22:00 for every day.
Adjust it at any time to fit your real opening hours. - Click Edit to update schedules.
- Change a time range: Adjust the from / to fields.
- Add a second / third slot: Click the plus icon. Max 3 schedules / day.
- Remove a schedule: Click the trash icon beside that row.
- Close a day: Change the status drop-down from Open to Close.
- Click Save.
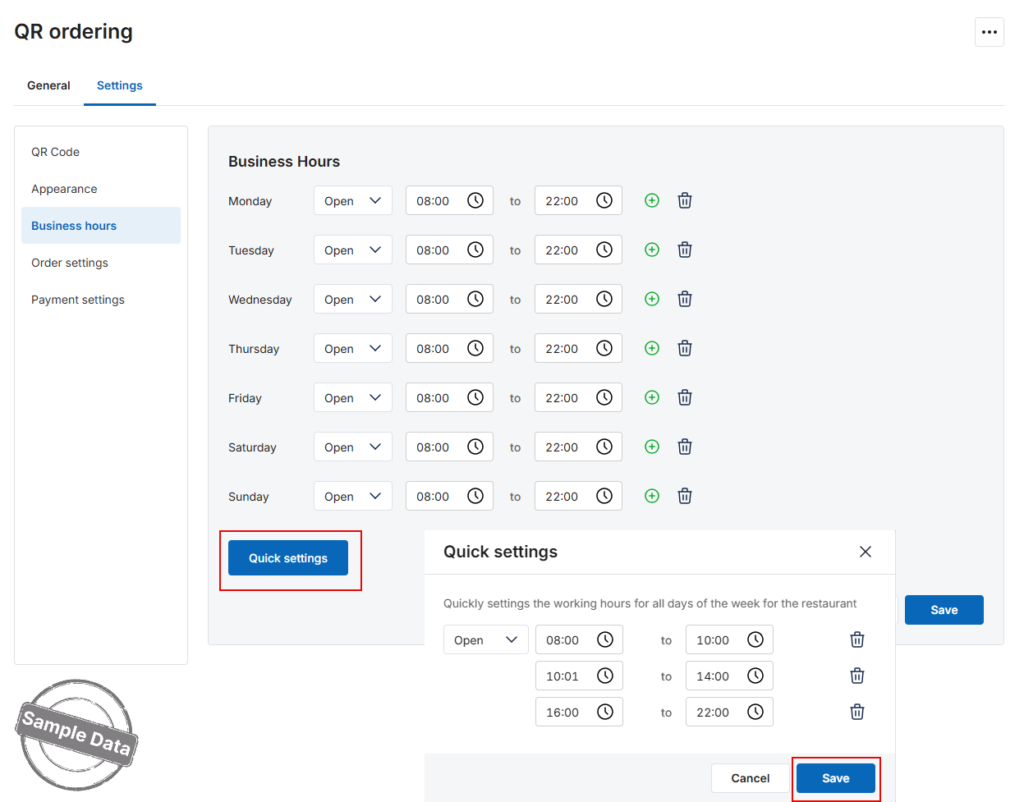
- Use Quick settings for Fast Copy
-
- Click Quick settings.
- Adjust the from / to fields
- Click the plus icon to add schedules. Max 3 schedules / day.
- Click Save.
7. Set up Orders
- Use this option to decide whether QR orders should go straight to the kitchen printer/KDS without staff approval.
- Click Edit –> Check Automatically confirm and send orders to the kitchen.
-
- All orders: Every QR order is confirmed instantly and routed to the kitchen, even if the guest has not paid yet (payment happens at the POS or when the bill is closed).
- Paid orders: Only orders that are pre-paid online are auto-sent to the kitchen. Unpaid orders stay in the POS Pending list for staff review.
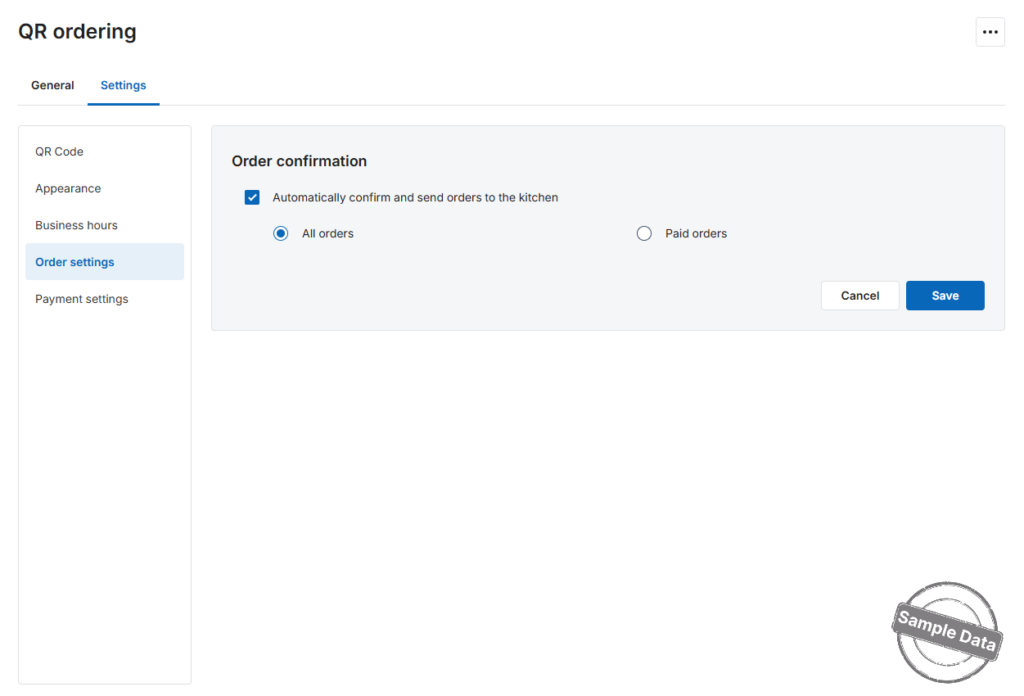
3. Click Save to activate the rule, or Cancel to discard.
8. Set up Payment
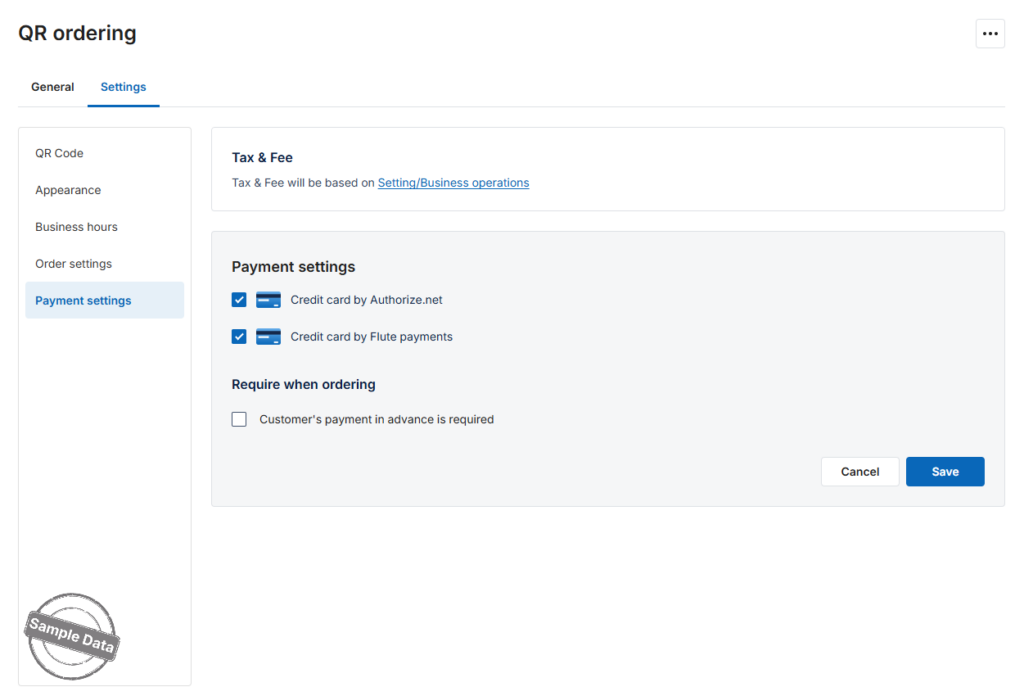
Use this panel to decide how guests will pay after they scan the QR code and to link a card gateway.
- The banner reminds you that all Tax & Fee rules come from System settings → Business operations.
- Credit card by Authorize.net: Lets guests pay online with any card type supported by your Authorize.net account.
- Credit card by Flute payments: Enables the Flute gateway (skip if you do not use Flute).
- Tick Customer’s payment in advance is required if you want all QR orders to be prepaid before they are sent to the POS. Otherwise, leave it unchecked.
- Click Save to apply the settings, or Cancel to discard.
Have a nice day!


