

Nội dung có trong bài
Ẩn
I. Purpose
To help restaurants receive and process orders from the Online Ordering website quickly and efficiently, saving time and optimizing service.
II. Tutorial Video
Watch the tutorial video here: https://www.youtube.com/watch?v=7pMjRQN1Dt4
III. Instruction Steps
1. Customer Ordering Process on the Online Website
a. Setting up Pickup Times
- The system defaults to “Pick up as soon as possible.”
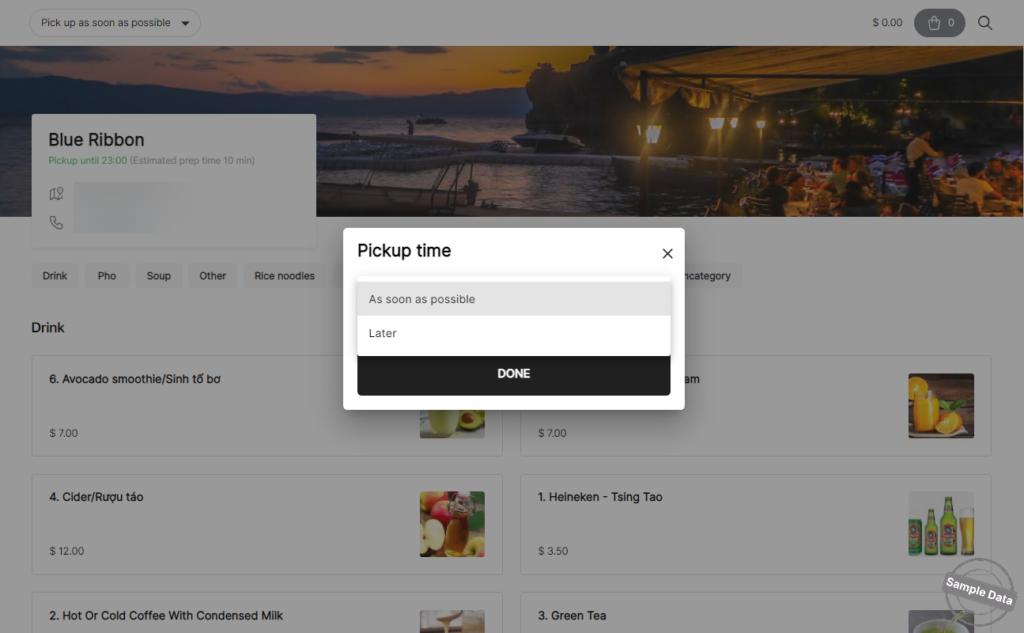
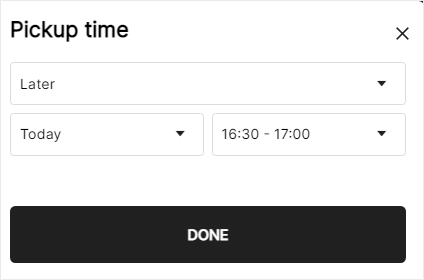
- Customers are allowed to select pickup dates (Today/Tomorrow) and specific time slots.
b. Selecting Items
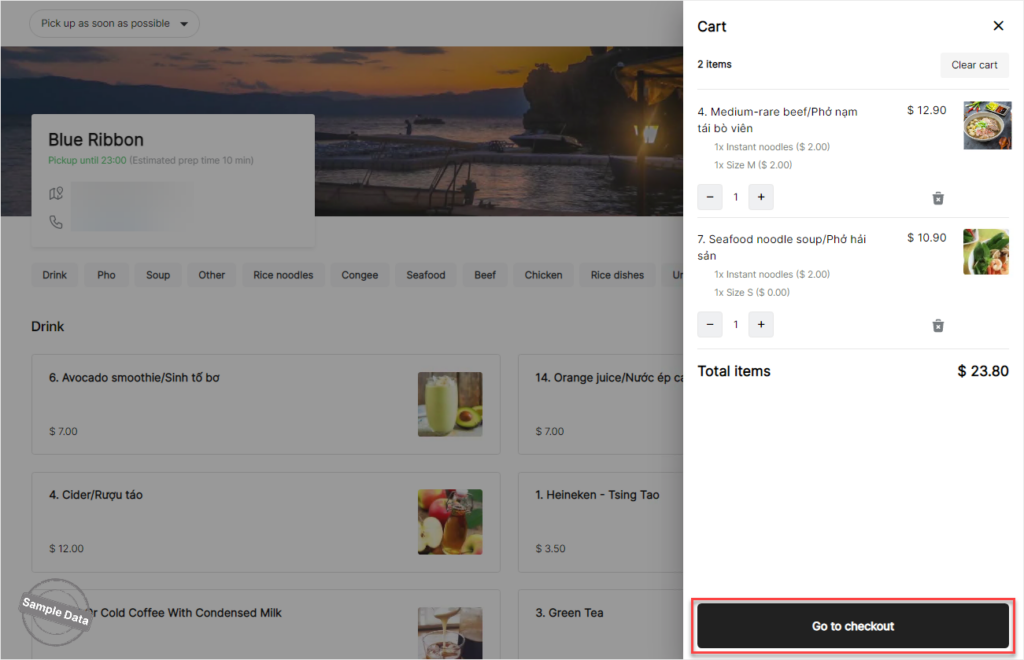
- Customers browse the website and click on items to add them to the shopping cart.
- Note: Inside the shopping cart, customers can adjust or remove item quantities.
- Once finished, customers click Go to checkout to proceed.
c. Checkout and Payment
- Information Entry: Customers enter their pickup details and select a payment method.
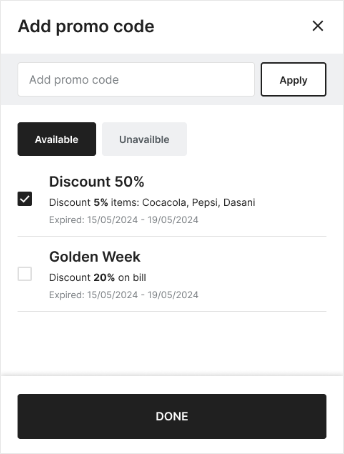
- Promo Codes: If the bill is eligible, customers can enter a promo code and click Apply.
- Tipping: Customers can select a suggested tip amount or click Custom to enter a specific amount, then click Done.
- Completion: After clicking Continue to payment, a “Success” notification will be displayed.
d. Order Tracking & Cancellation
- Tracking: After a successful order, customers can track their order progress and estimated completion time by clicking “Here” on the success screen. Detailed tracking can be viewed [here].
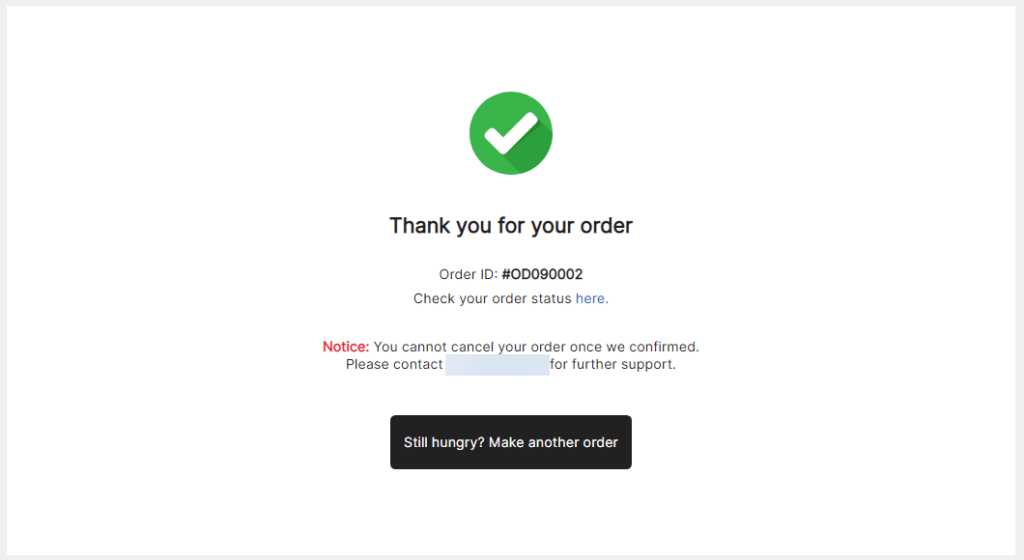
- Cancellation: Customers can cancel their order only if the restaurant has not yet confirmed it.
2. Cashier Order Processing Workflow
Once an order is placed, the cashier will receive a notification on the sales screen. To manage orders, click the bell icon and select Online Ordering, or go directly to the Orders Hub tab.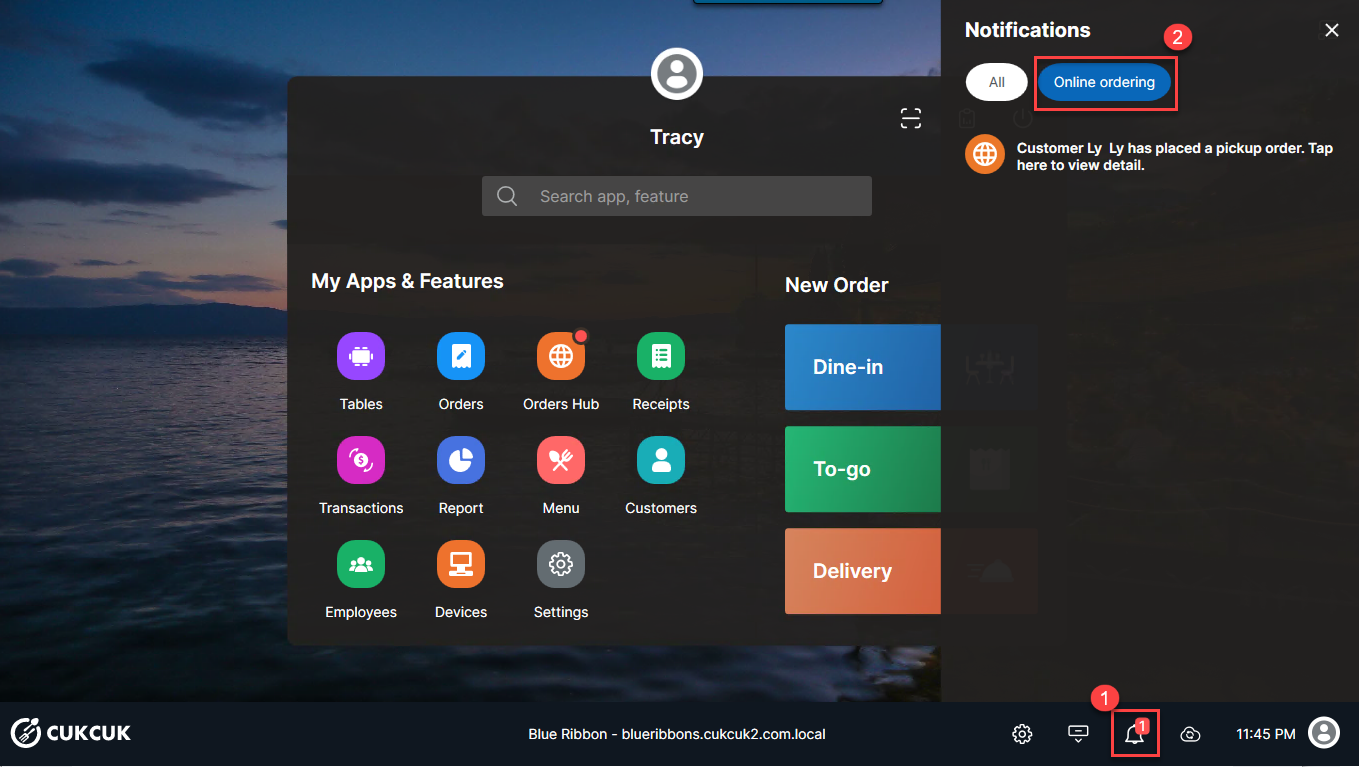
The workflow is divided into the following stages:
Stage 1: Need Approval
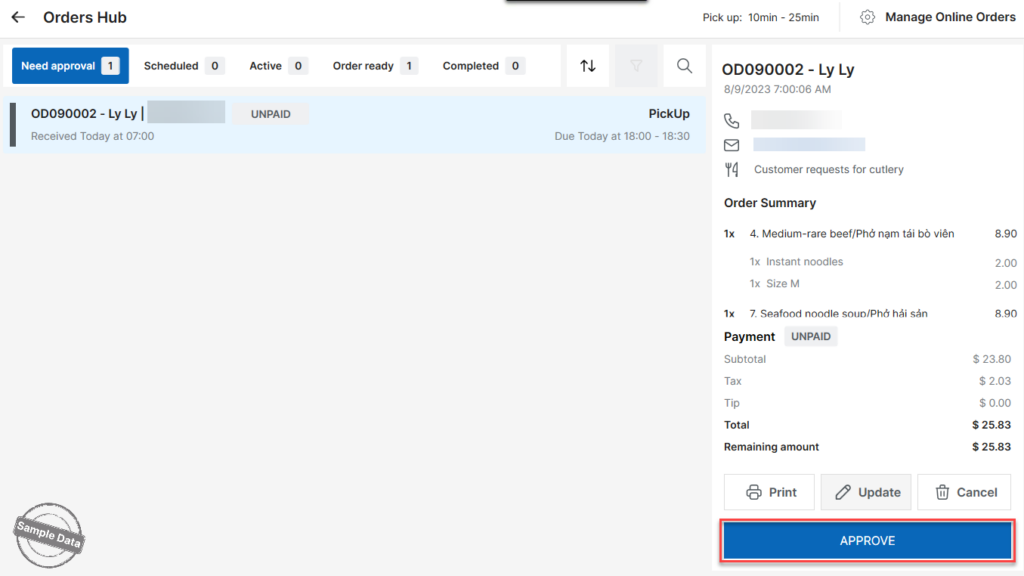
- The Need Approval tab displays all unconfirmed orders.
- Click Approve to confirm the order.
- Note on Permissions:
- To Update an order, only authorized staff can access it. (See role management guide here).
- To Cancel an order (at the customer’s request), all staff with sales roles are permitted to do so.
Stage 2: Scheduled
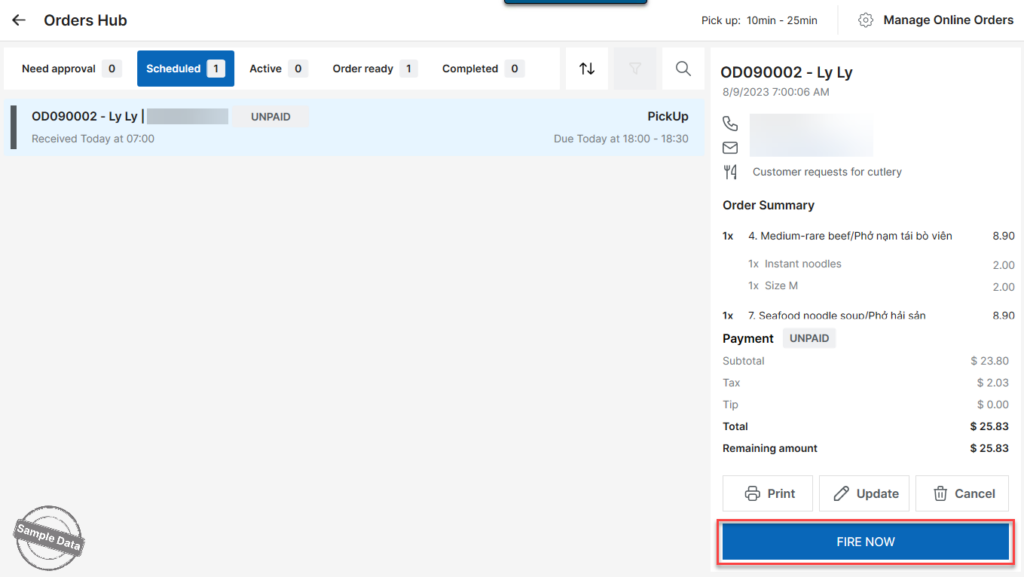
- The Scheduled tab displays orders that have been confirmed.
- Click Fire now to send the order to the Kitchen/Bar for preparation.
- Note on Permissions:
- To Update an order, only authorized staff can access it.
- To Cancel an order, all staff with sales roles are permitted.
Stage 3: Active
- The Active tab displays orders that have already been sent to the kitchen.
- Once the food is prepared, click Order ready to signal that the order is ready for the customer.
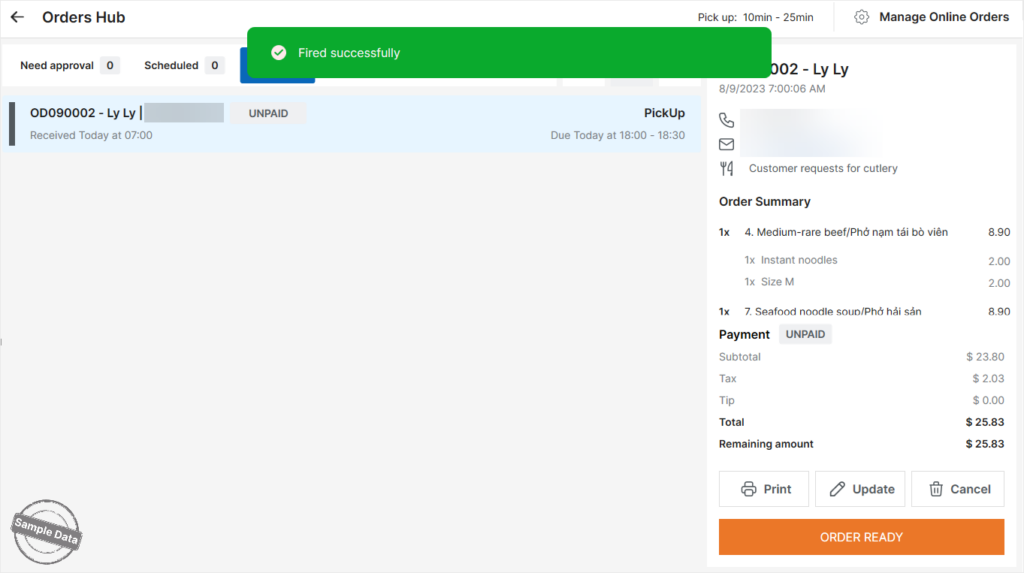
- Note on Permissions: Only authorized staff can perform Update or Cancel actions in this stage.
Stage 4: Order Ready
- The Order ready tab displays orders waiting to be picked up.
- Once the customer receives the order, the cashier clicks Complete to move to the payment screen.
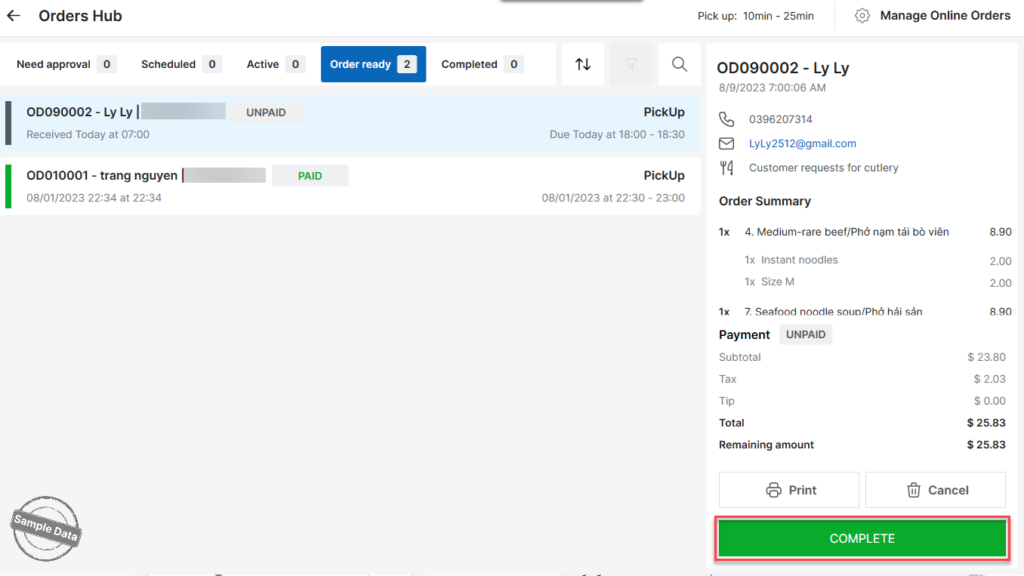
- Tipping: If the customer wants to add a tip, select Add tip, enter the amount, and click Pay.
Stage 5: Completed
- The Completed tab displays all successfully processed or cancelled orders.
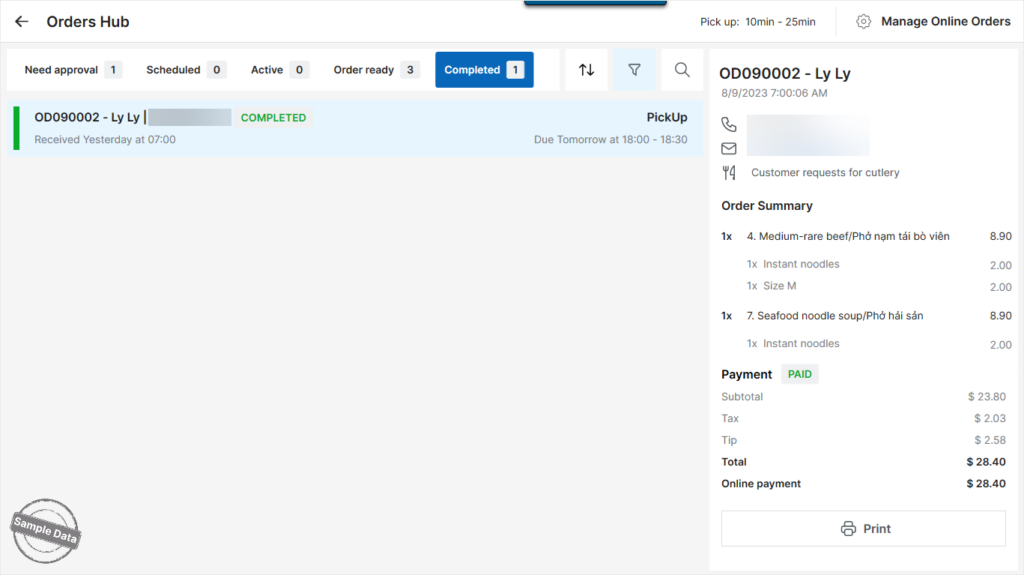
- Cashiers can apply taxes and fees during the final payment step.
Congratulations! You have successfully mastered the online order management process.


