

I. Purpose
Help restaurants set up Timekeeping, record employees’ clock-in and clock-out times, and manage working hours before creating payroll.
Managers can configure attendance rules and pay periods, identify missing or irregular time records, add or correct time cards, review estimated wages and labor costs, and export timekeeping data. Employees can clock in and out on the PC/POS or Tablet, following the restaurant’s attendance settings.
II. Instruction steps
1. Set up timekeeping on the management page
1.1. Install Timekeeping app
On the dashboard, go to Application and install Timekeeping.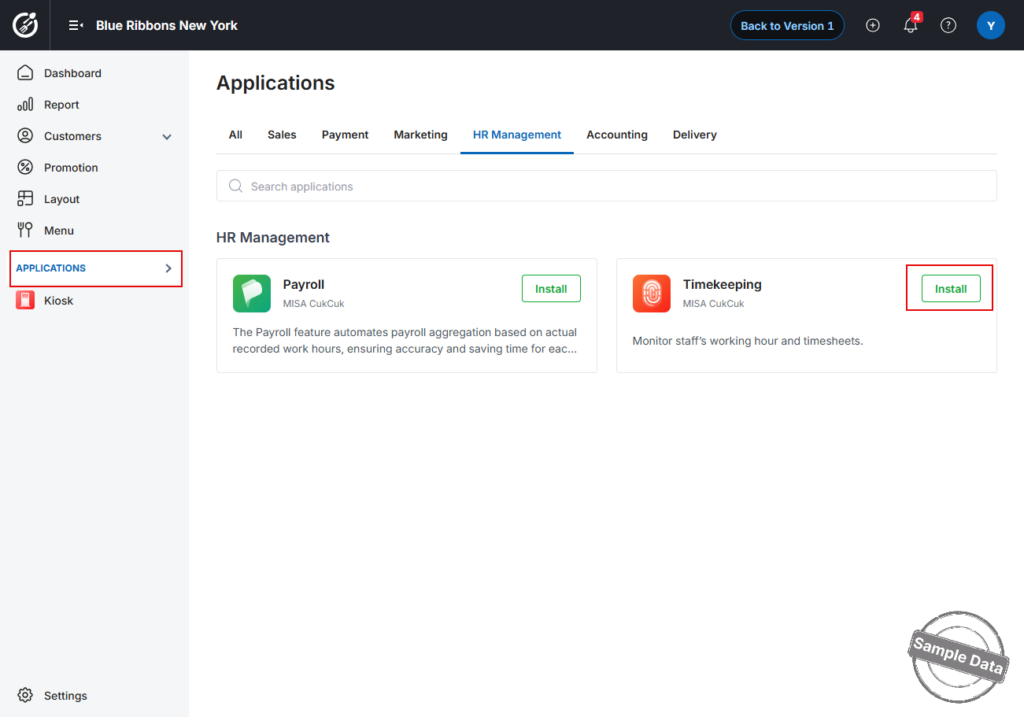
Click Install.
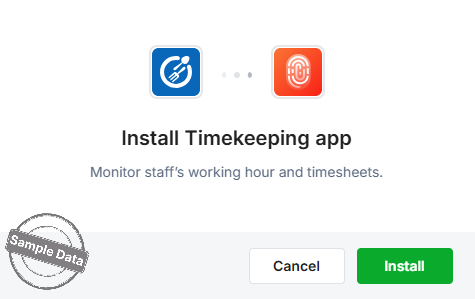
1.2. Configure General Settings
- Open the Settings tab
In the left-hand menu, click Settings to display the available configuration panels. - Review the default options
Two panels are shown by default:a. Working schedule / Scheduling- Tick Use Working schedule/Scheduling feature if you want to manage staff rosters directly in the system.
- Scheduling data is also used to identify attendance issues and calculate working hours according to the restaurant’s configured rules.
b. Close day
- Remind employees to clock in – sends a gentle reminder when staff forget to clock in.
- Required to clock in before starting work – blocks POS access until the employee clocks in.
- Use the tablet’s camera to capture employees in clock-in and clock-out – takes a photo for attendance verification.
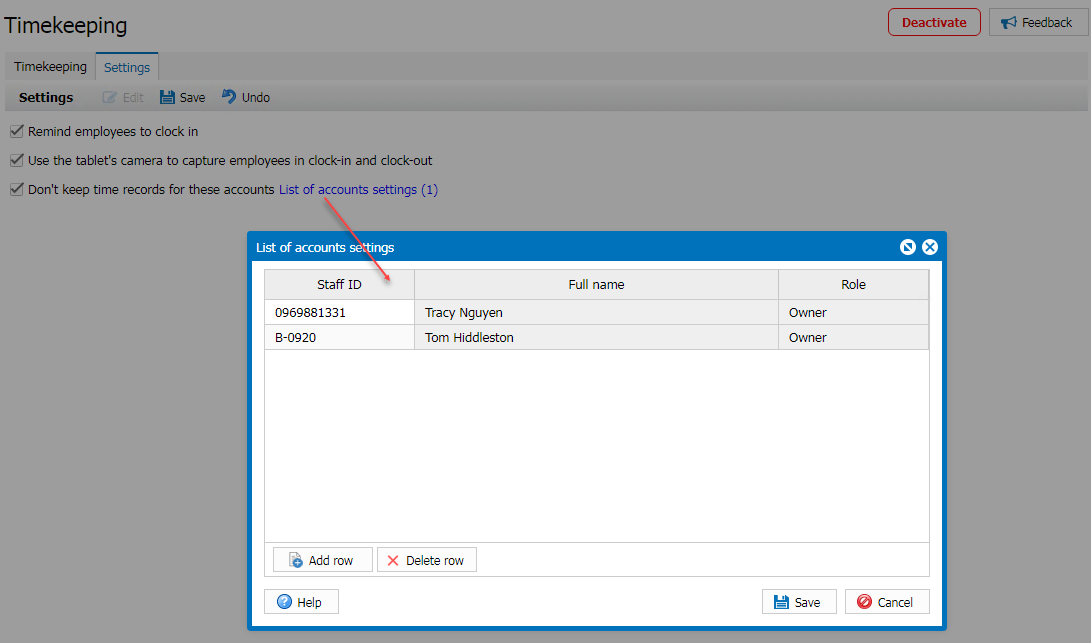
- Don’t keep time records for these accounts – exclude selected service accounts (e.g., kitchen display) from timekeeping.
- Log out after clock-out – forces an automatic logout when an employee clocks out.
- Edit a panel
- Click the Edit icon in the upper-right corner of a panel.
- Check or clear the options to match your restaurant’s workflow.
- Click Save to apply the new settings, or Cancel to discard them.
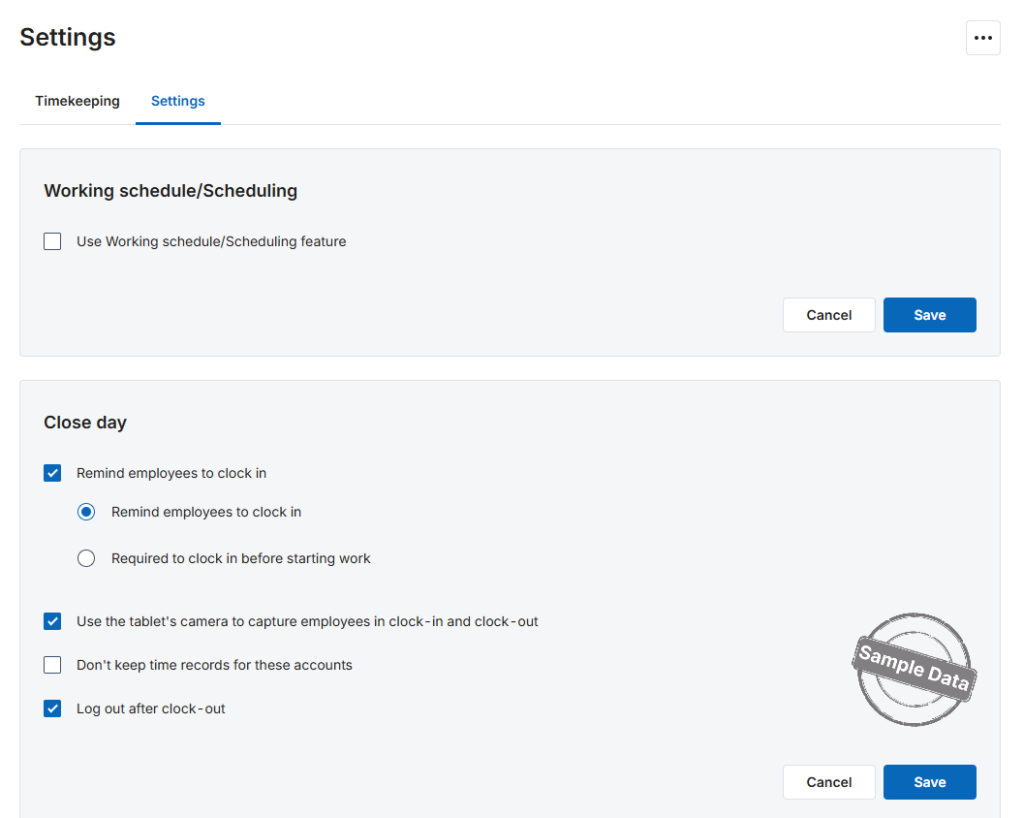 Your timekeeping and close-day preferences are now updated—employees will see the new rules the next time they clock in or out.
1.3. Configure Pay Periods
- In Timekeeping → Settings, find Pay period below Close day.
- Enable pay periods.
- Select a period:
- Weekly: Once a week. This is the default selection when pay periods are enabled.
- Bi-weekly: Once every two weeks.
- Semi-monthly: Two periods per month, from the 1st to the 15th and from the 16th to the last day of the month.
- Monthly: Once a month.
- For Monthly, select the starting day under Pay month starts on:
- Select a day from 1 to 31.
- The default is 1.
- Click Save.
- If changing an existing period, review the Change pay period message and confirm the change.
Notes:
- Pay periods are disabled by default.
- If disabled, the existing time filters remain available.
- Changing the pay period does not affect payroll records already created.
- No confirmation message appears if the selection remains unchanged.
- Changing First day of week in General settings also changes the reference point for Weekly and Bi-weekly periods.
1.4. View a Timesheet
The Timekeeping tab lets you track each employee’s working hours and adjust clock-in/clock-out records when necessary.
- Open the Timekeeping tab.
- Choose a Start date and End date, then click Apply.
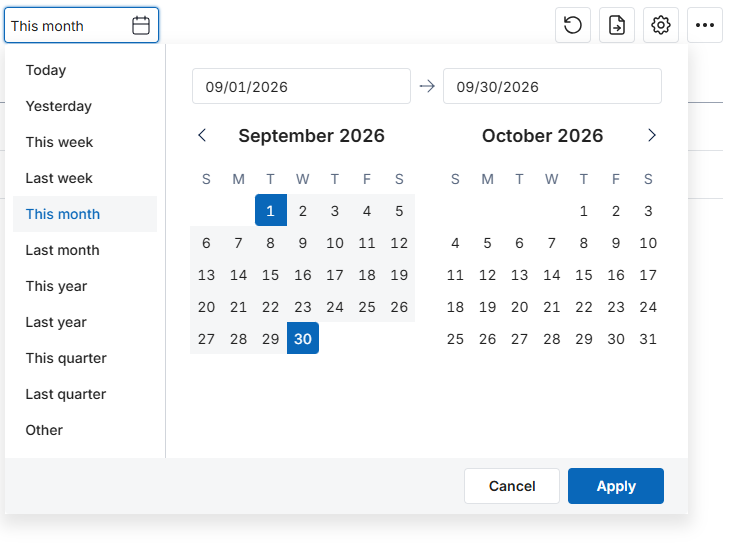
- The system shows:
• Total hours worked for each employee.
• Tip, Total, and Date.
- The system shows:
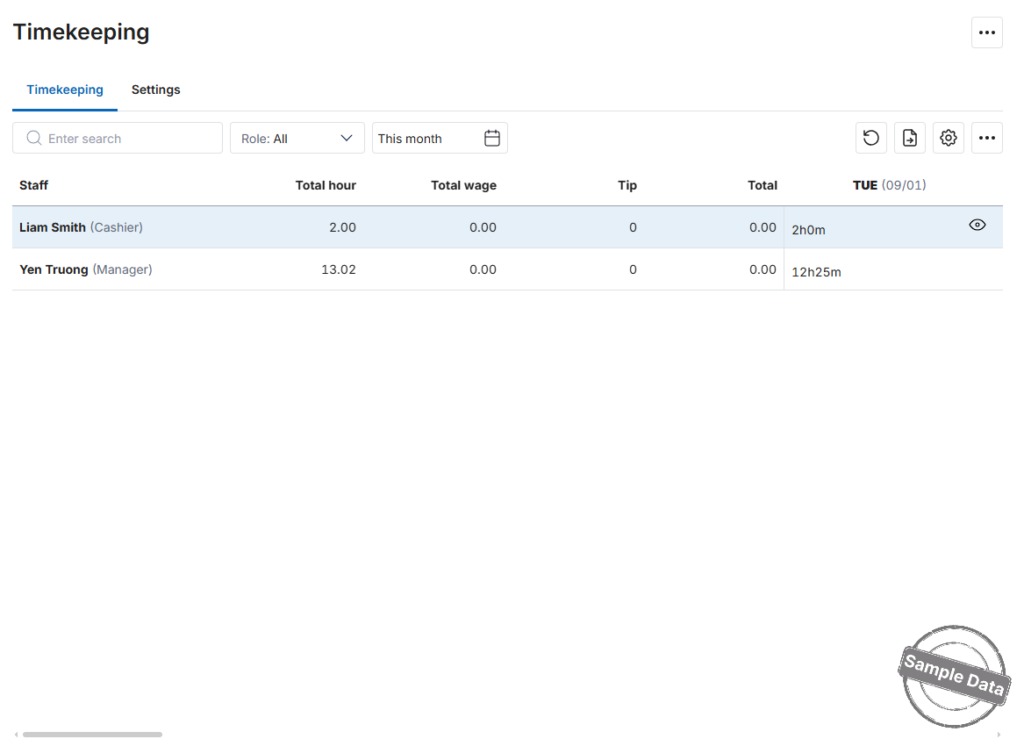
Note: You can display up to 31 consecutive days. Selecting a longer range triggers the warning “Your date range cannot exceed a month. Try a smaller range.”
1.5. View Timesheets by Pay Period
When Pay period is enabled, you can select:
- This pay period
- Last pay period
- Next pay period
The default filter is This pay period. Check the date range displayed on the calendar before reviewing the records.
Display behavior:
- Each employee’s records are expanded by default. You can collapse or expand them as needed.
- If an employee has multiple clock-in/clock-out entries on the same day, each entry appears on a separate row.
Review Timesheet Information
The timesheet includes:
- Date: Working date.
- Role: Employee role at the selected location.
- Wage rate: Configured hourly wage.
- Time card: Clock-in and clock-out times.
- Issue: Attendance issue requiring review.
- Total hours: Total working hours.
- Total wage: Wage calculated from attendance data.
- Tip: Tips received during the reporting period across payment methods.
- Total: Total wages and tips.
The system calculates:
Notes:
- Wage rate, Total wage, Tip, and Total appear only when Payroll is installed.
- If Hourly wage has not been configured, Total wage displays “-”.
- If the wage rate changes multiple times during the selected period, the system uses the most recently configured rate on the management site.
1.4. Review Attendance Issues
Check the Issue column for:
- Not clocked: Missing attendance data, such as a clock-in record without a clock-out record.
- Late coming: Arriving late.
- Early leaving: Leaving early.
- Early coming: Arriving early.
- Late leaving: Leaving late.
If no issue is detected, the column is blank.
Notes:
- Schedule-related issues apply only when Scheduling is used.
- If an employee has a scheduled shift but no attendance records, Time card is blank and Not clocked appears.
- If several issues apply and one involves missing attendance data, the system displays Not clocked.
1.5. Review Hours Calculated with Scheduling
- If Use actual time to calculate wage is enabled, working hours are calculated from actual clock-in and clock-out times.
- If disabled, the system applies the configured rules for early arrivals, late departures, and breaks.
The Time card field continues to display actual attendance times. If attendance data is missing, the field is blank.
1.6. Customize the Timesheet Display
- Open Customize Timekeeping.
- Select the columns you want to display or clear those you want to hide.
- Review the updated timesheet.
Available columns include Date, Role, Wage rate, Time card, Issue, Total hours, Total wage, Tip, and Total.
Note: Wage-related columns are available only when Payroll is installed.
1.7. View the Timekeeping Summary
- In Timekeeping, click View Summary.
- Review the reporting period. The summary initially retains the period selected in Timekeeping.
- Enter an employee’s name or ID in Search, if needed.
- Filter by Role or change the reporting period.
- Review Overview and the employee summary.
The Overview section includes:
- Sales: Net sales for the selected location and period.
- Estimated wage: Total estimated employee wages.
- Labor percentage: Estimated wages as a percentage of sales.
Notes:
- If there are no sales in the period, Labor percentage displays N/A.
- If Payroll data is unavailable, Estimated wage and Labor percentage display “–”.
- The positions of the three Overview indicators are fixed and cannot be reordered.
The employee summary includes Staff name, Role, Wage rate, Total hours, Total wage, Tip, and Total.
Employees without attendance records are still listed, with summarized attendance values of 0.00.
To customize or export the summary:
- Open Customize Timekeeping to select the columns to display.
- Select or clear Overview to show or hide the overview section.
- Click Export to export the summary.
1.8. Update Clock-In / Clock-Out Data
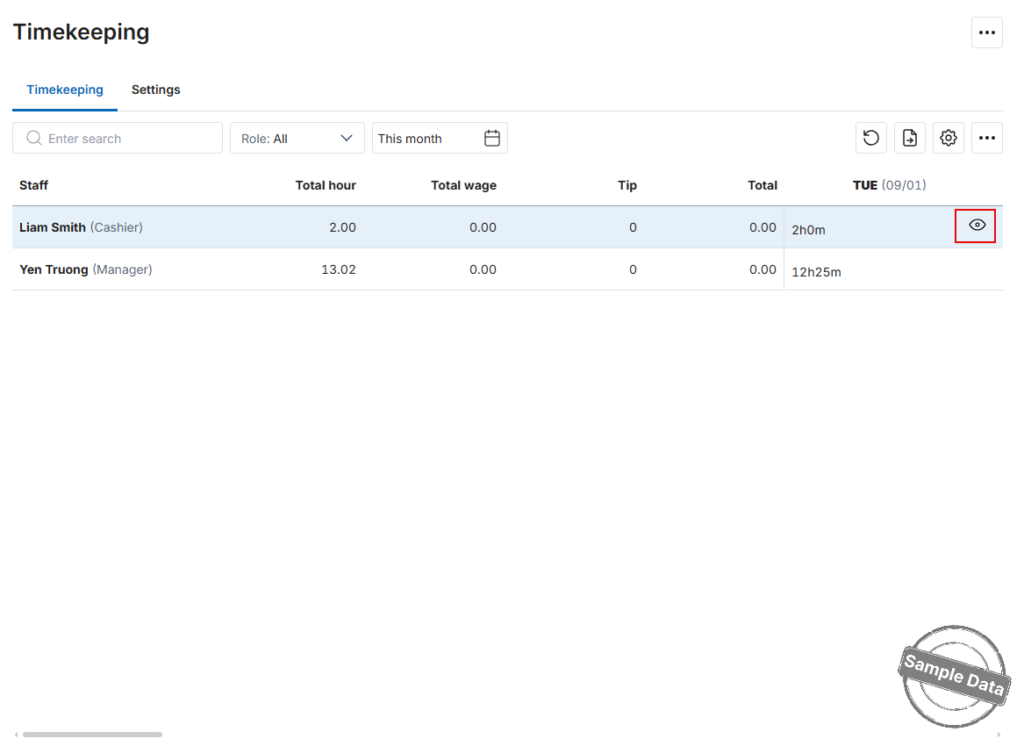
- Find the employee that needs a correction and click the eye icon to open their record.
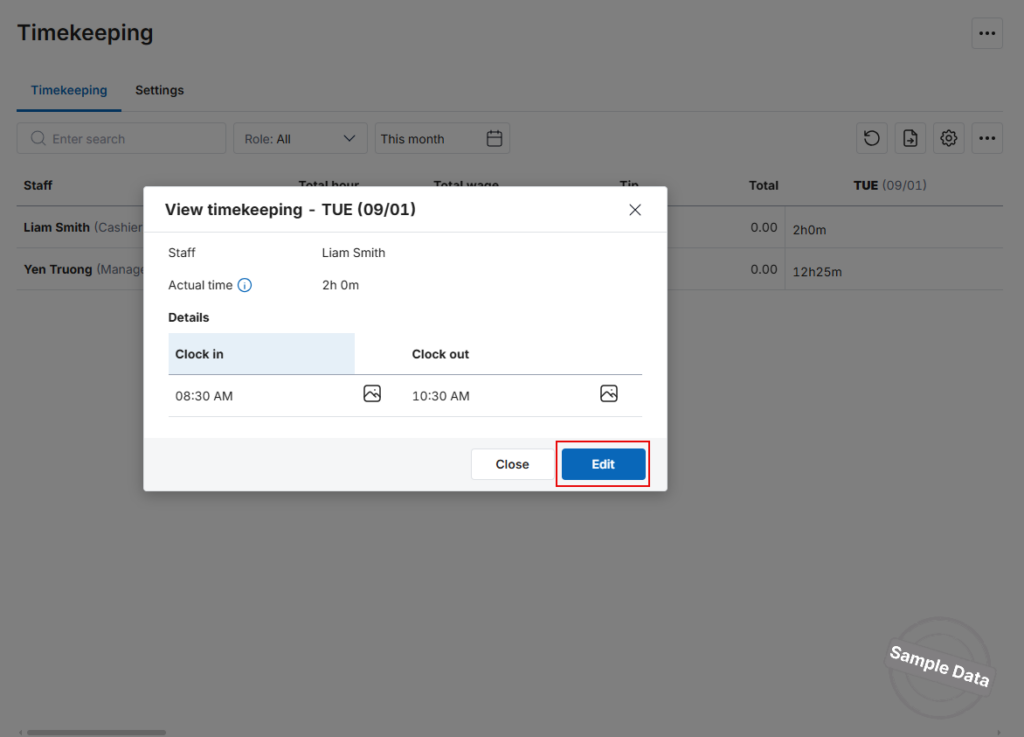
- Click Edit.
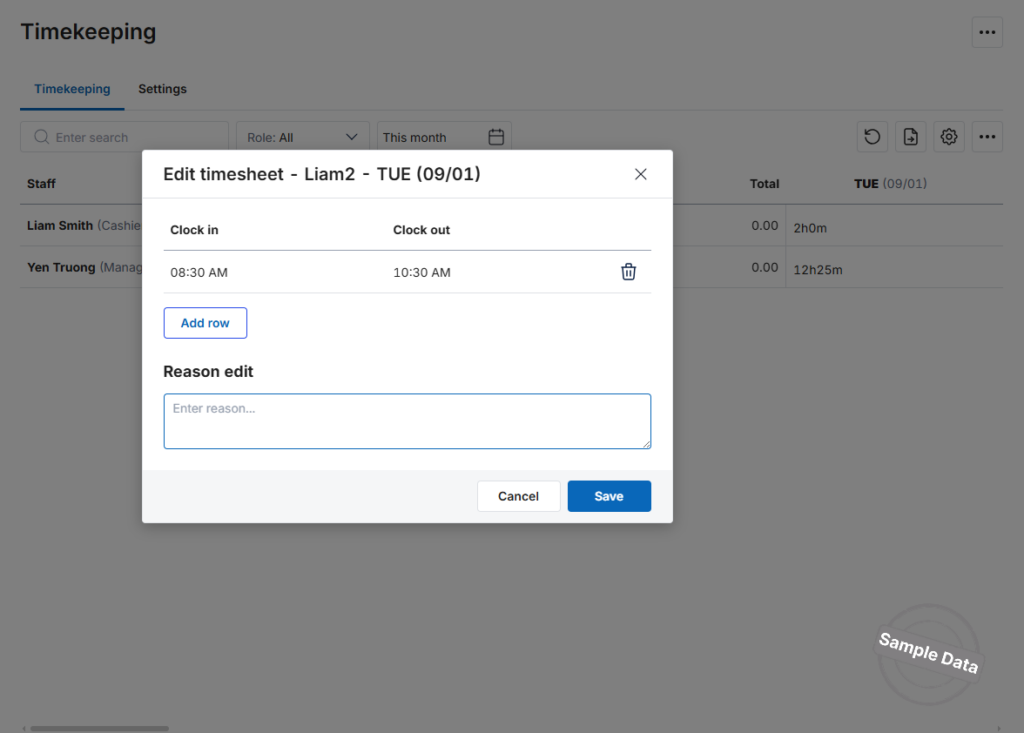
- Use Add row or Delete row to insert or remove time entries.
- Enter a brief Reason for the change.
- Click Save to confirm.
Handle Time Cards Already Used in Payroll
If payroll has already been created for the working date, the system prevents editing and displays: Cannot Edit. A payroll for this working day already exists, so you cannot edit it.
Click OK to return to Timekeeping.
If the corresponding payroll is deleted, the time card can be edited again.
Handle Overlapping Time Cards
If the entered time overlaps with an existing record, the system displays Duplicate time card, including the employee’s name and the existing time range.
Click OK, correct the time range, and save again.
Add Missing Time Cards
When the restaurant does not use Scheduling, Add time card appears at the end of each employee’s attendance list.
- Select Add time card for the employee.
- Select a working date within the current reporting period.
- Enter Clock in and Clock out.
- Click Add row to add another attendance entry for the same day, if needed.
- Click Save.
Each saved entry appears on a separate row.
Notes:
- Only dates within the selected reporting period are available.
- If the filter is Today, the current date is selected automatically.
- New entries cannot overlap with one another. Overlapping entries display Time period cannot overlap.
- New entries cannot overlap with existing records. Such overlaps display Duplicate time card.
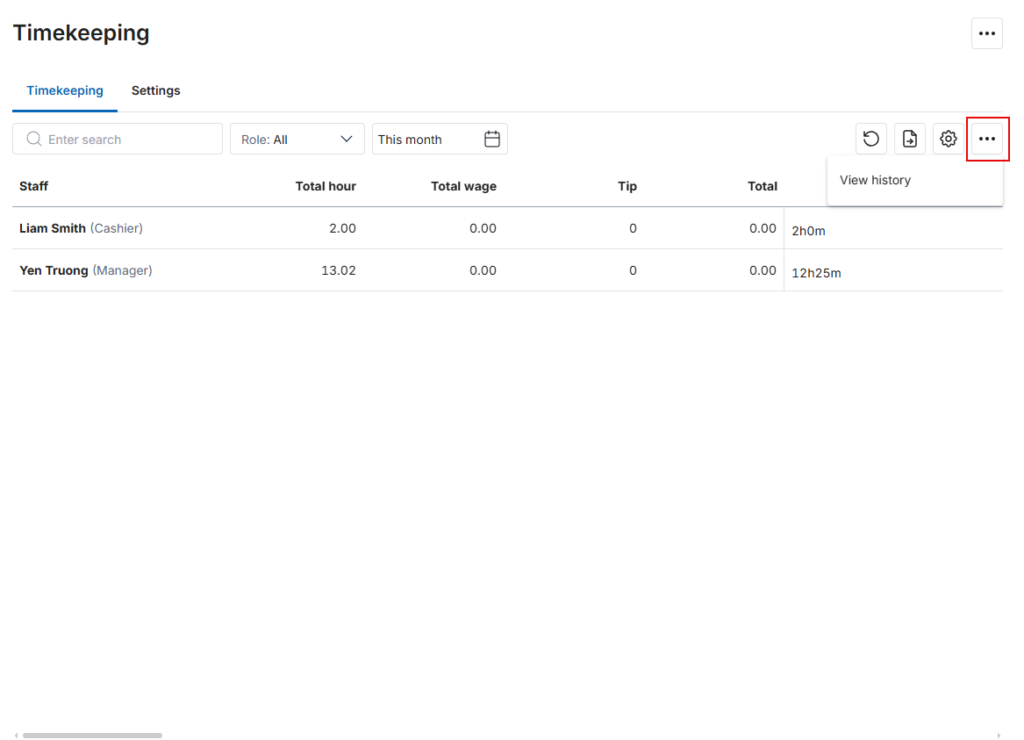
1.9. Check Edit History
Click the icon  to review every timesheet adjustment made for all employees.
Your timesheets are now up to date and fully audited.
Export Data and Review Attendance History
- Click Export in Timekeeping to export attendance data.
- The exported file includes all timekeeping information, regardless of which columns are currently displayed.
- Select View history to review attendance history.
1.10. Create Payroll Using Pay Periods
This applies when Pay period is enabled in Timekeeping → Settings.
- Open Payroll.
- Select Add payroll.
- Choose:
- This pay period
- Last pay period
- Next pay period
- Review the selected date range.
- Complete the existing payroll creation workflow.
- Click Save.
Notes:
- The default filter is This pay period.
- The same pay-period options are available under Payroll → Time.
- Existing checks for overlapping payroll periods remain unchanged.
Selected Dates Do Not Match a Pay Period
If a manually selected date range does not match a standard pay period, the system displays Pay period mismatch when saving.
The warning indicates that working hours and overtime are calculated by pay period, so payroll may not match the timesheet.
- Select Yes to continue creating payroll.
- Select Cancel to return to Add payroll and adjust the date range.
2. Employees clock in at the start and clock out at the end of shift
2.1. Clock-in
To clock in, employees should:
- Log in to the PC sales software.
Case 1: If the restaurant has enabled Remind employees to clock in in Timekeeping/Settings on the management page:
- A clock-in notification will appear. Click Clock in to confirm your attendance.
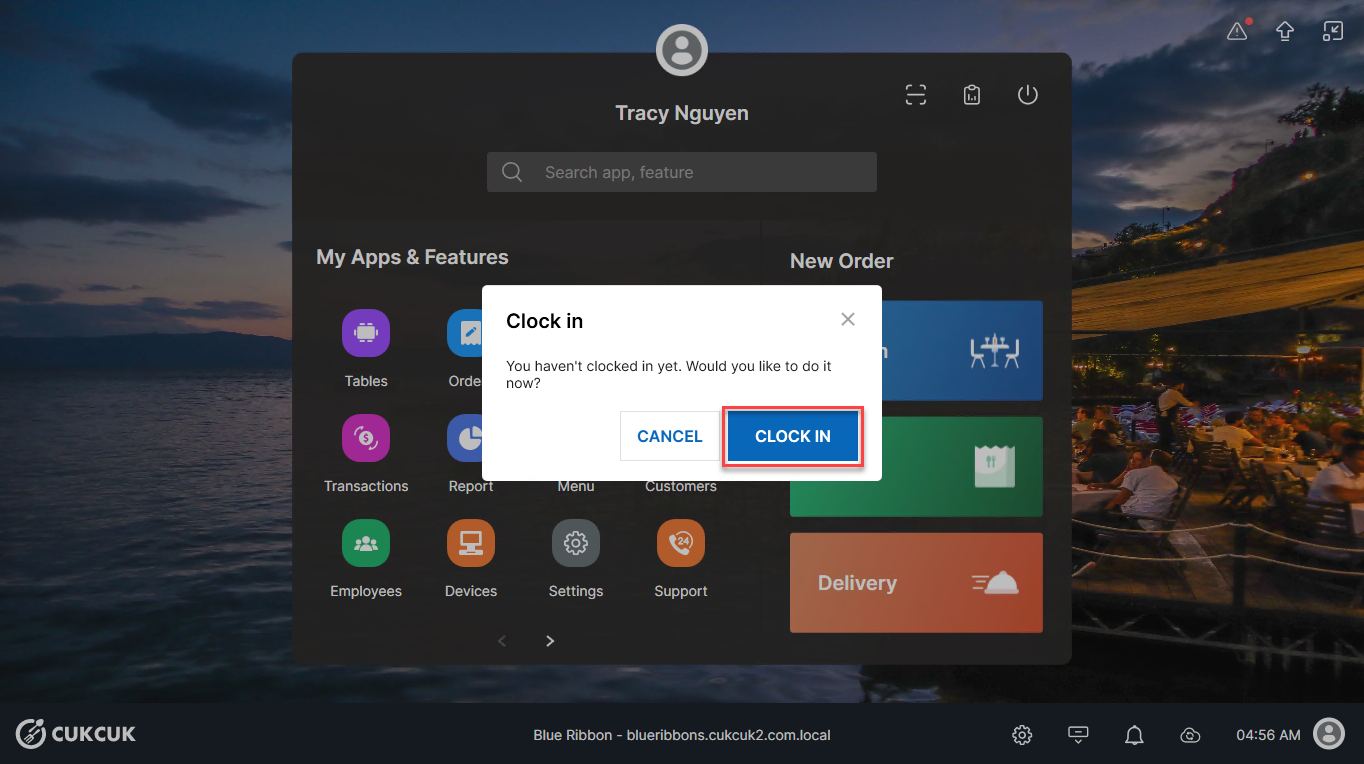
– This message will appear.
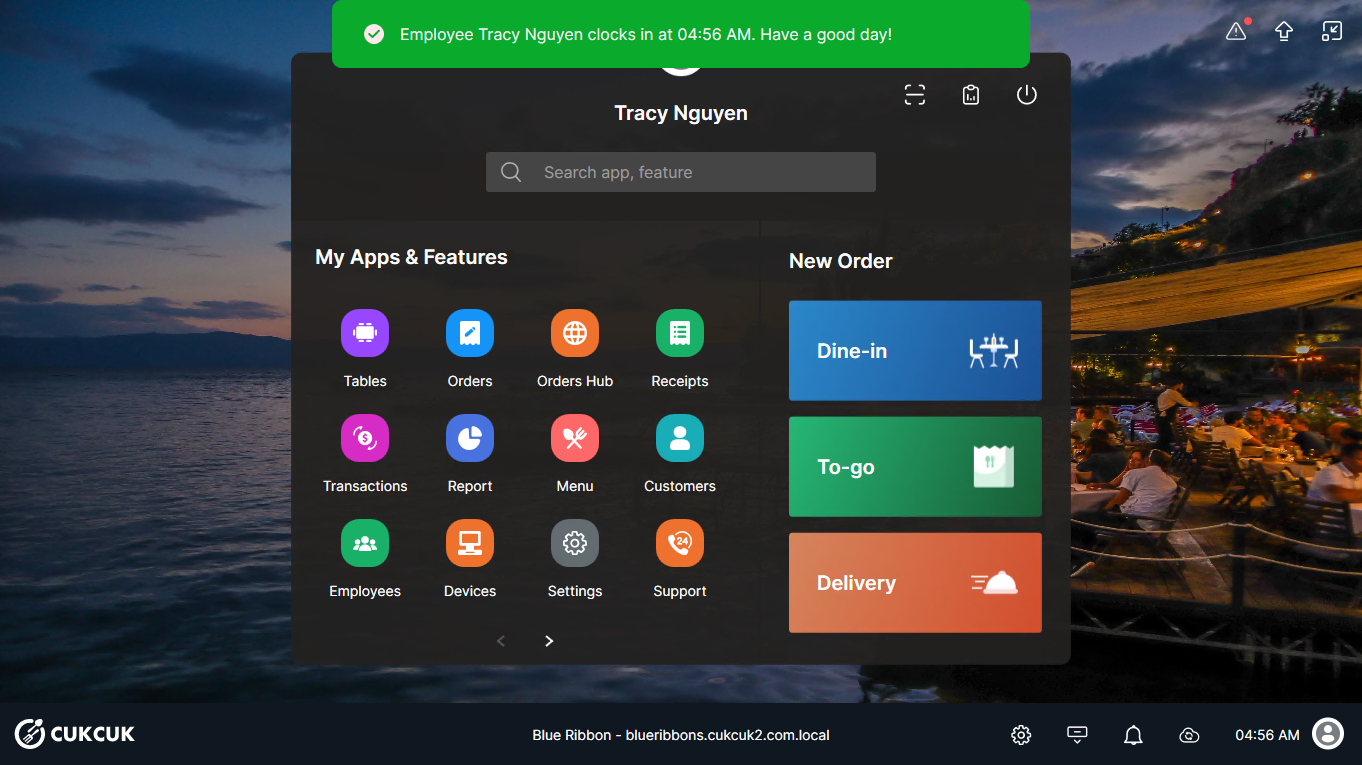
Case 2: If the reminder setting is not enabled:
- On the main screen, click Clock-in/out.
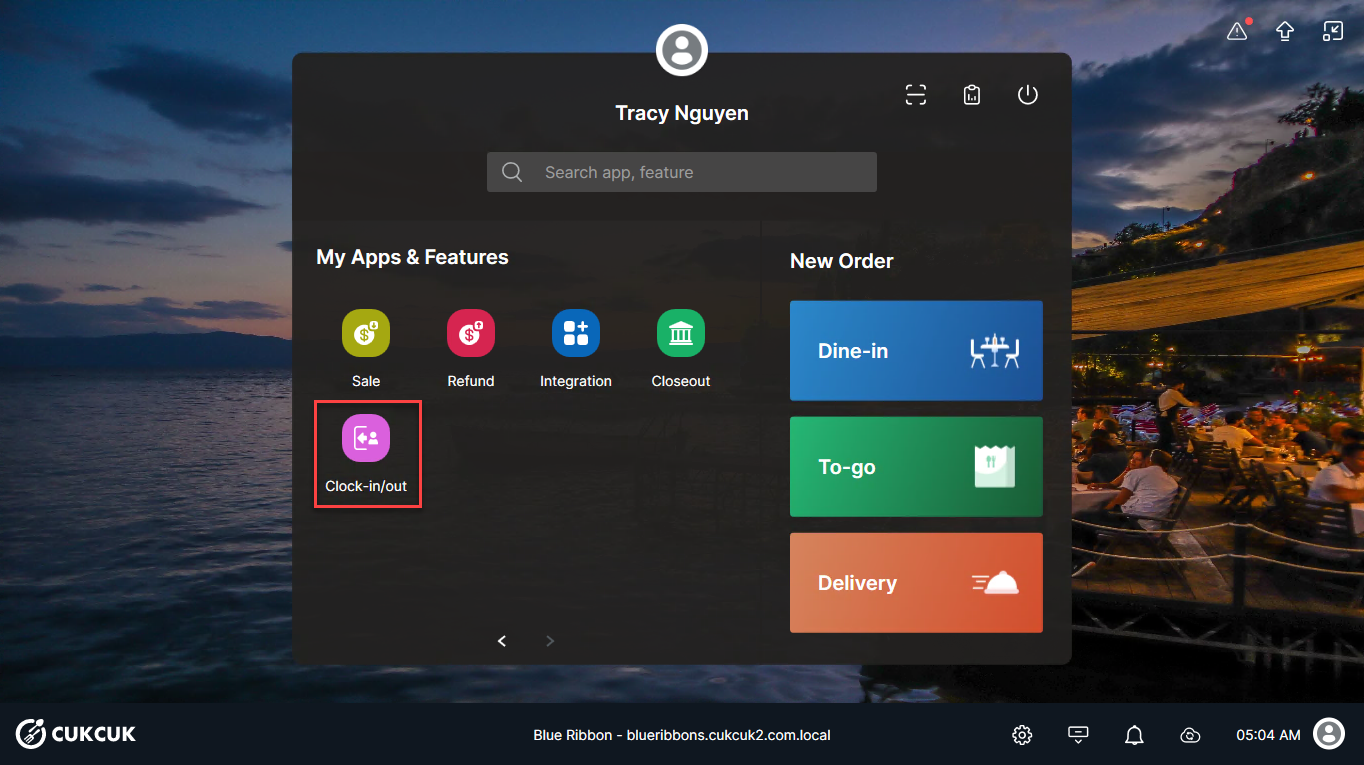
- On the Clock-in/Clock-out screen, click Clock in to confirm.
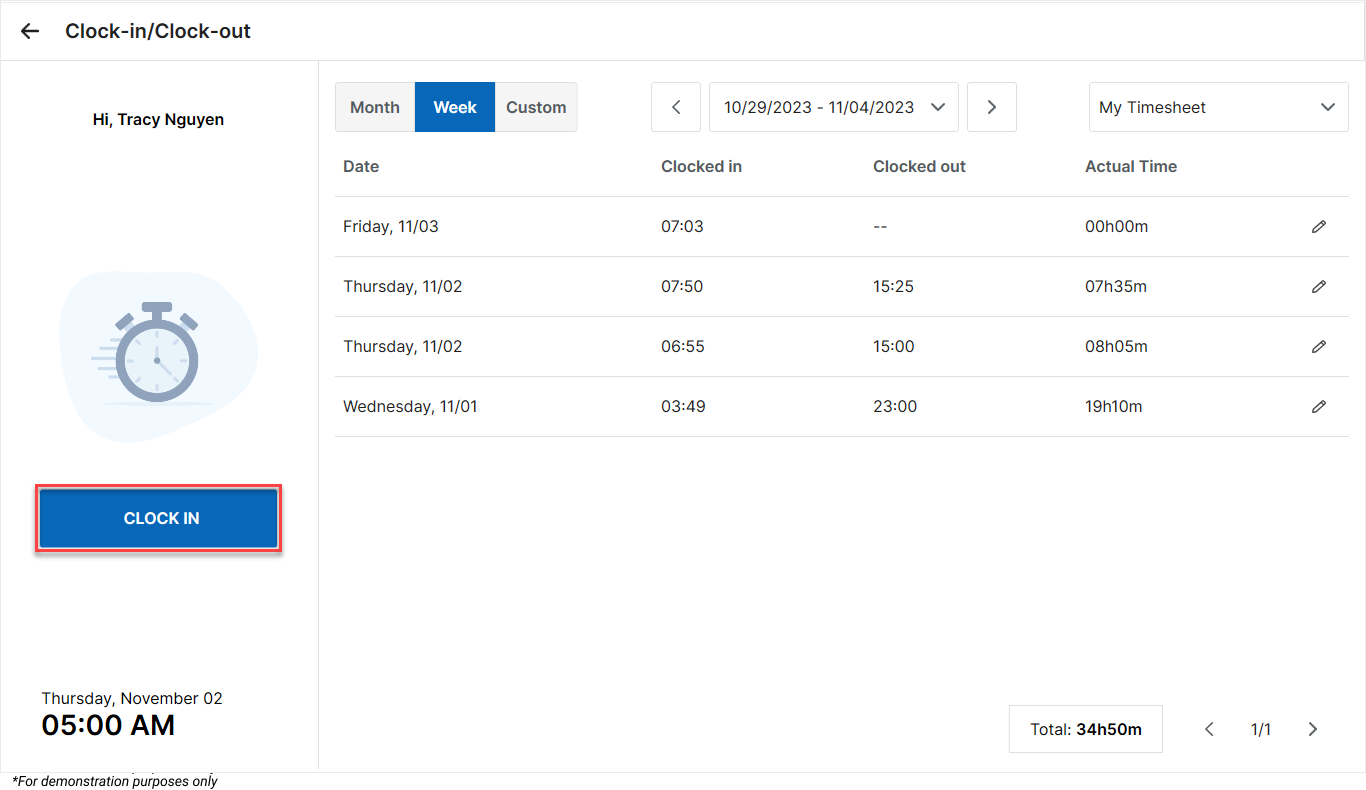
- The screen will display a “successful clock-in” message.
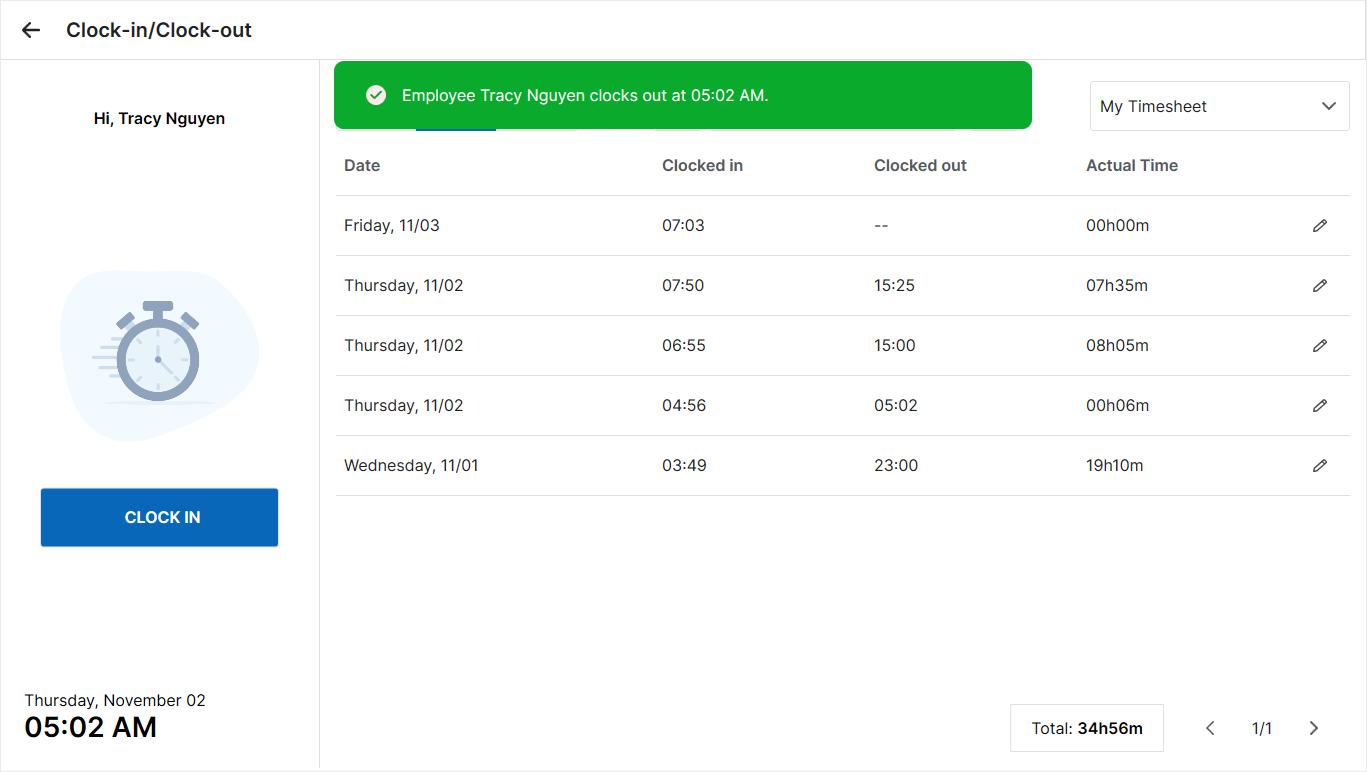
2.2. Clock-out
At the end of the shift, employees should repeat the above steps to Clock-out.
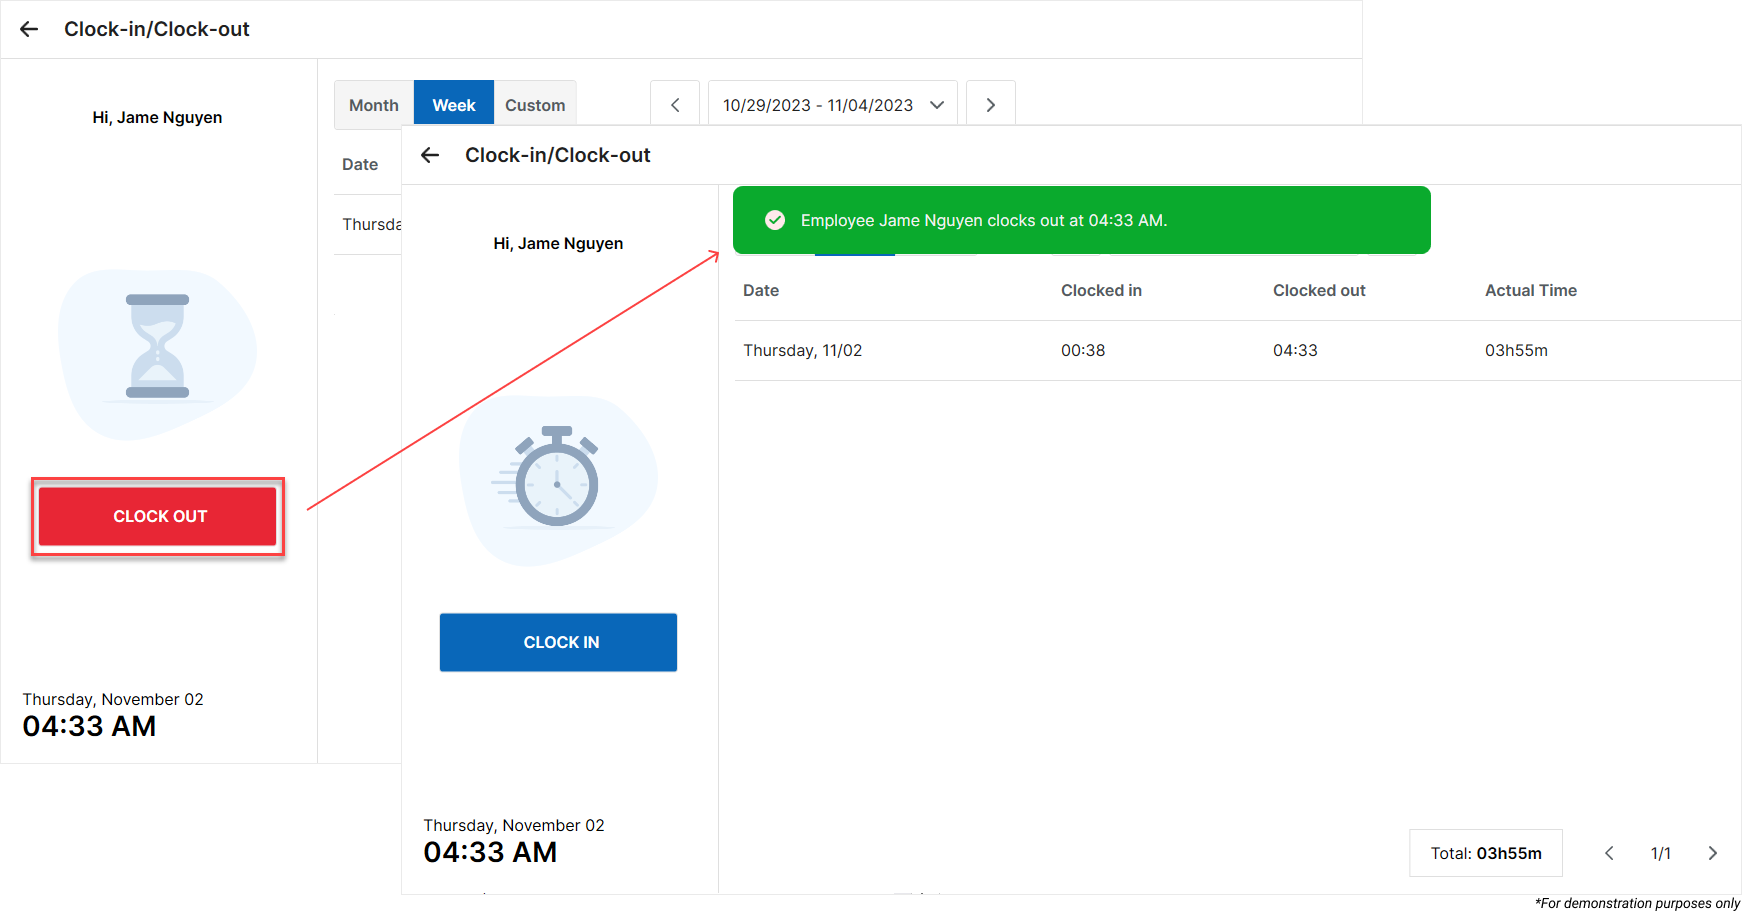
Notes: If Log out after clock-out is enabled, the system automatically logs the employee out.
2.3. Edit Timekeeping Records
Employees with the Timekeeping permission in Role Management can:
- View their own clock-in history and edit time records for themselves or other employees.
- Edit their own or other employees’ clock-in/out times.
Click the icon  to make adjustments if you haven’t clocked out or need to correct a time entry.
Then, click Done to save your changes.
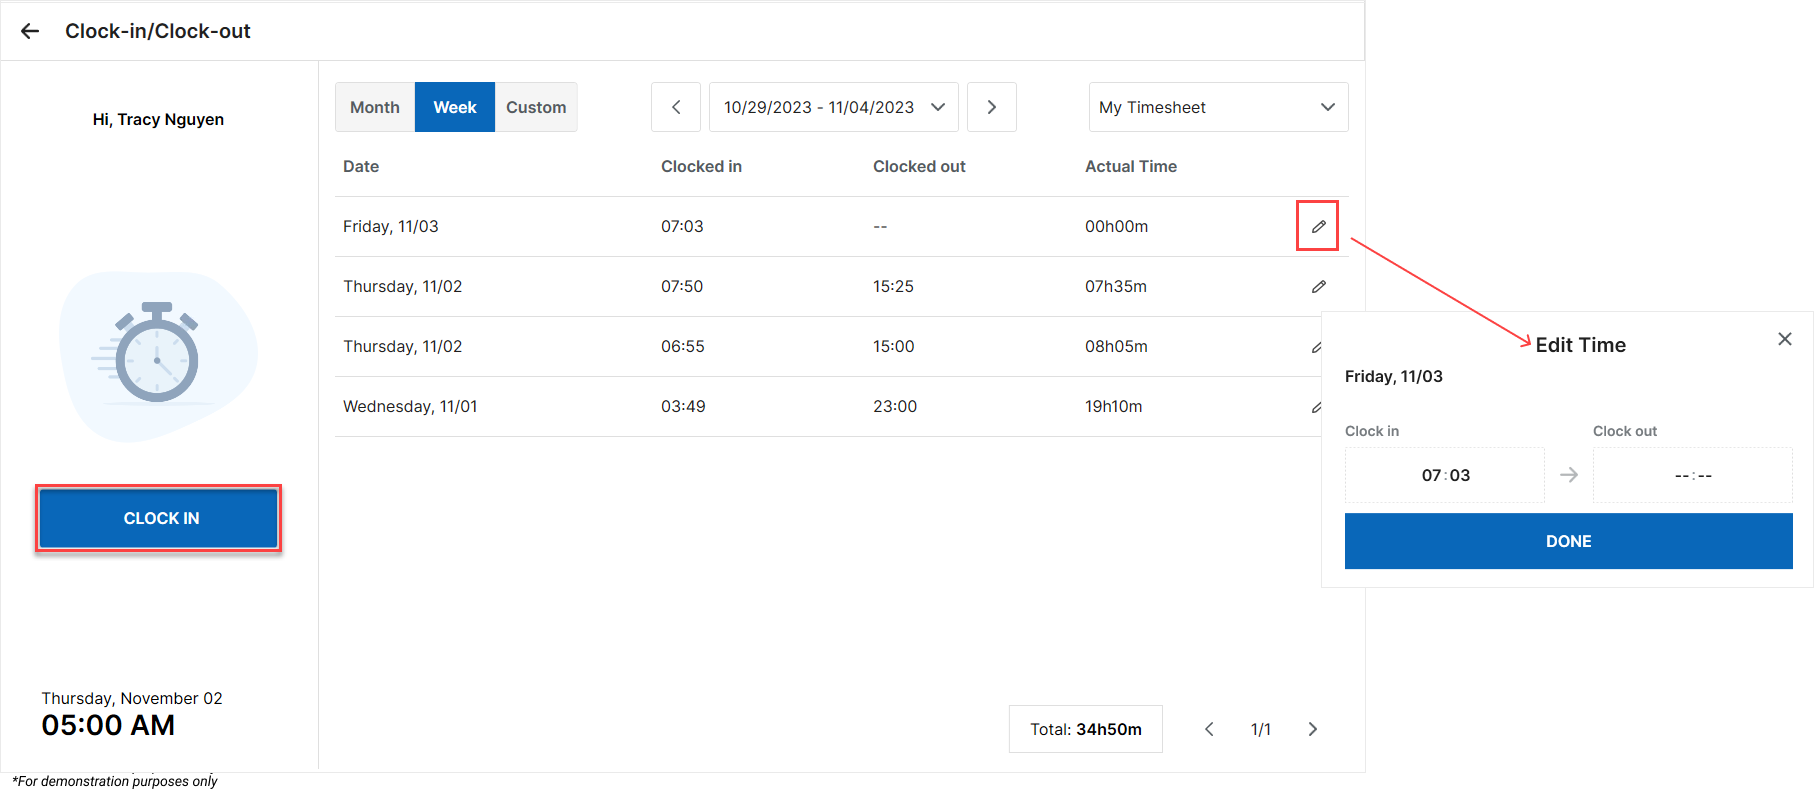
Additionally, CUKCUK supports timekeeping for employees on the Tablet App—the steps are the same as on the PC sales software.
IV. NOTES
| Setting Description | Details |
|---|---|
| 1. Remind employees to clock in | After logging in to the PC sales software, a notification appears allowing employees to clock in for attendance. |
| 2. Use the tablet’s camera to capture employees in clock-in and clock-out | Allows restaurants to use the tablet camera to record employees’ timekeeping images when logging into the sales app. |
| 3. Don’t keep time records for these accounts / List of account settings | Allows restaurants to select employee accounts that do not need timekeeping when logging into the sales software/app.
|
| 4. Check Attendance Before Creating Payroll | Review missing attendance records, late arrivals, early departures, and working hours before creating payroll. |
| 5. Use the Correct Time Card Action |
|
| 6. Review Payroll Restrictions | Time cards already included in payroll cannot be edited unless the corresponding payroll is deleted. Changing pay-period settings does not modify existing payroll records. |
| 7. Check Permissions | Timekeeping access, editing, sorting, and filtering remain subject to the restaurant’s permissions and settings. |
Have a nice day!


