

I. Purpose
The barcode management feature allows managers to assign barcodes to menu items, print barcode labels, and use barcodes during order entry.
II. Instruction steps
1. Set up barcodes
Enable Barcode Management
Before assigning barcodes, you must activate the barcode feature in your sales settings.
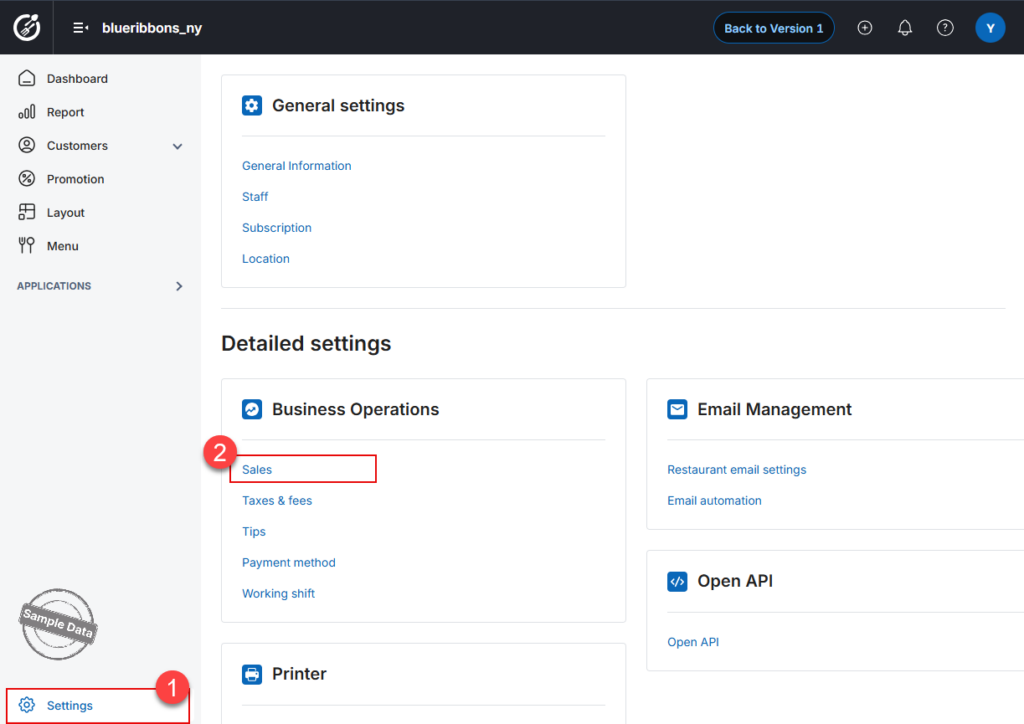
- On the Dashboard, go to Settings.
- Select the Sales section.
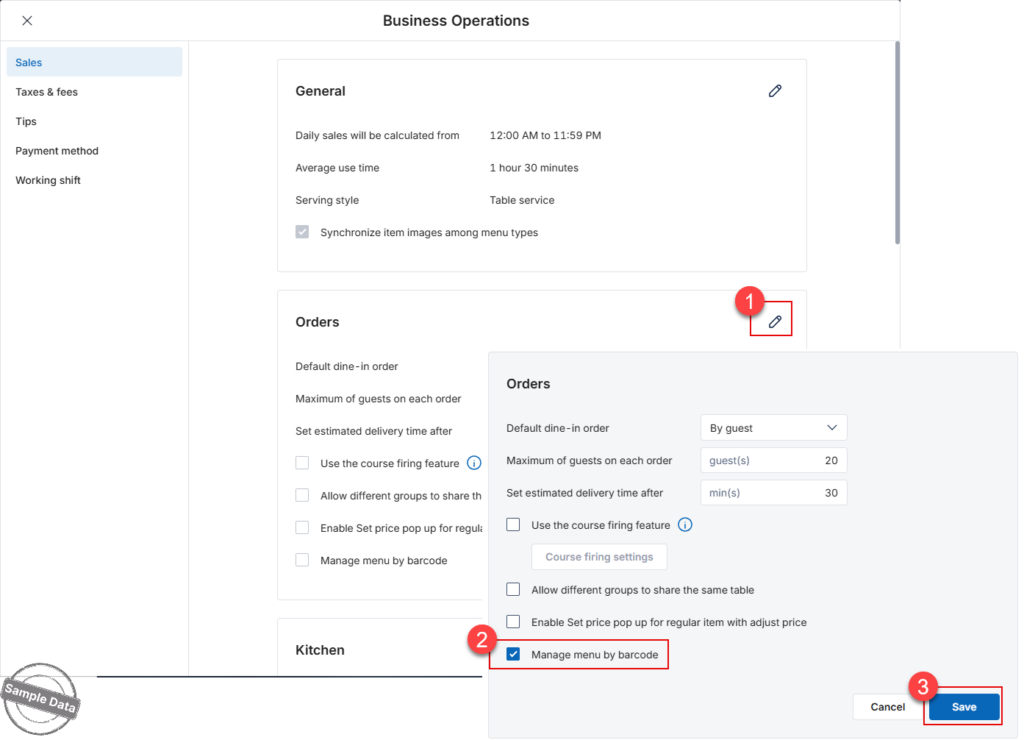
- Navigate to the Orders tab and click the Edit icon.
- Check the box for Manage menu by barcode.
- Click Save to apply the changes.
Assign Barcodes to Items
You can generate barcodes for both your existing menu and new items you plan to add.
Option A: For Existing Items
If you want to add a barcode to an item already in your system:
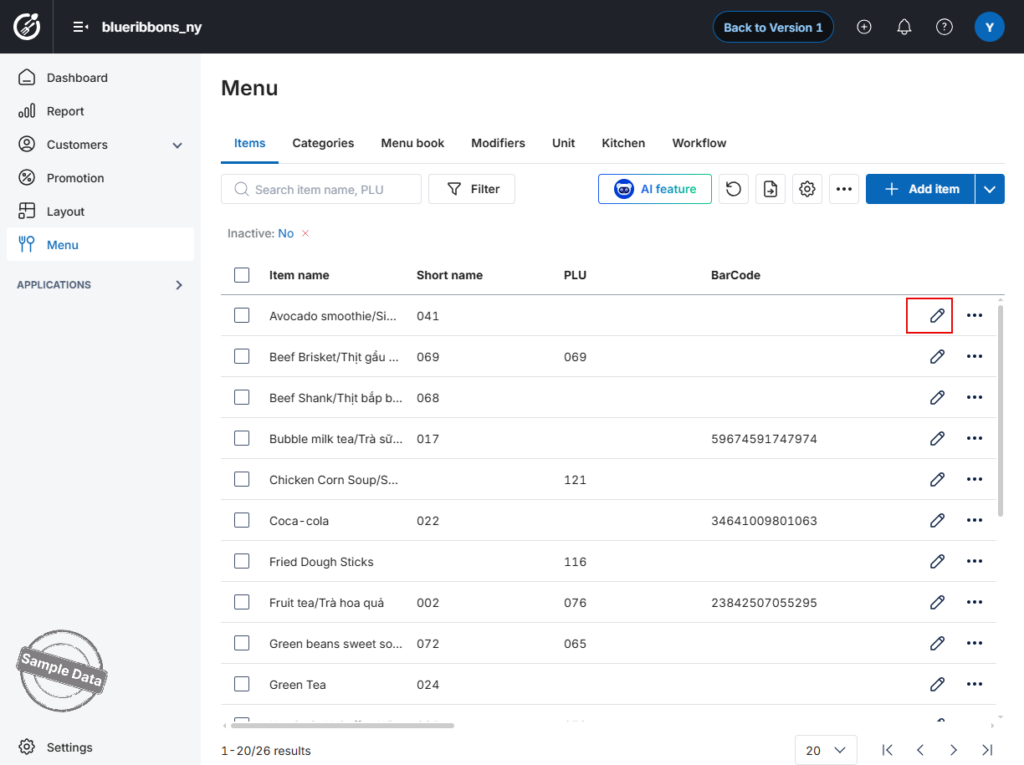
- Go to the Menu module.
- Locate the item you wish to update and click the Edit icon.
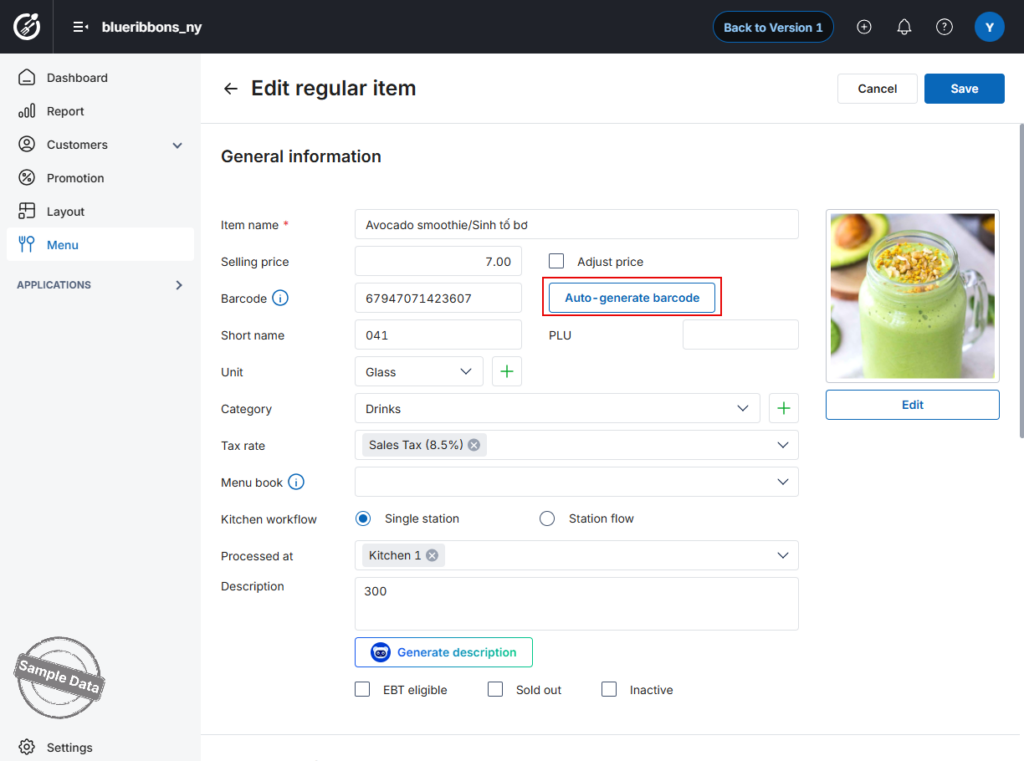
- In the Barcode field, you can:
- Manually enter a specific barcode number.
- Click Auto generate barcode to let the system create one for you.
- Click Save to complete the process.
Option B: For New Items
If you are adding a new item to your menu:
- Click the Add item button.
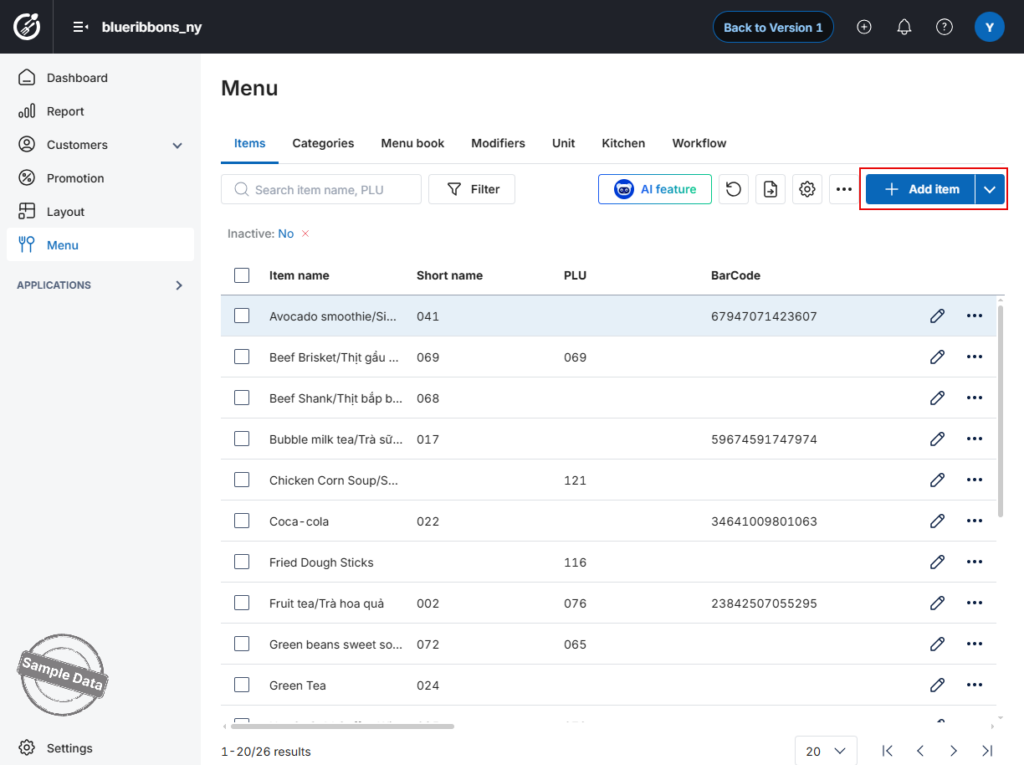
- Fill in all required item information.
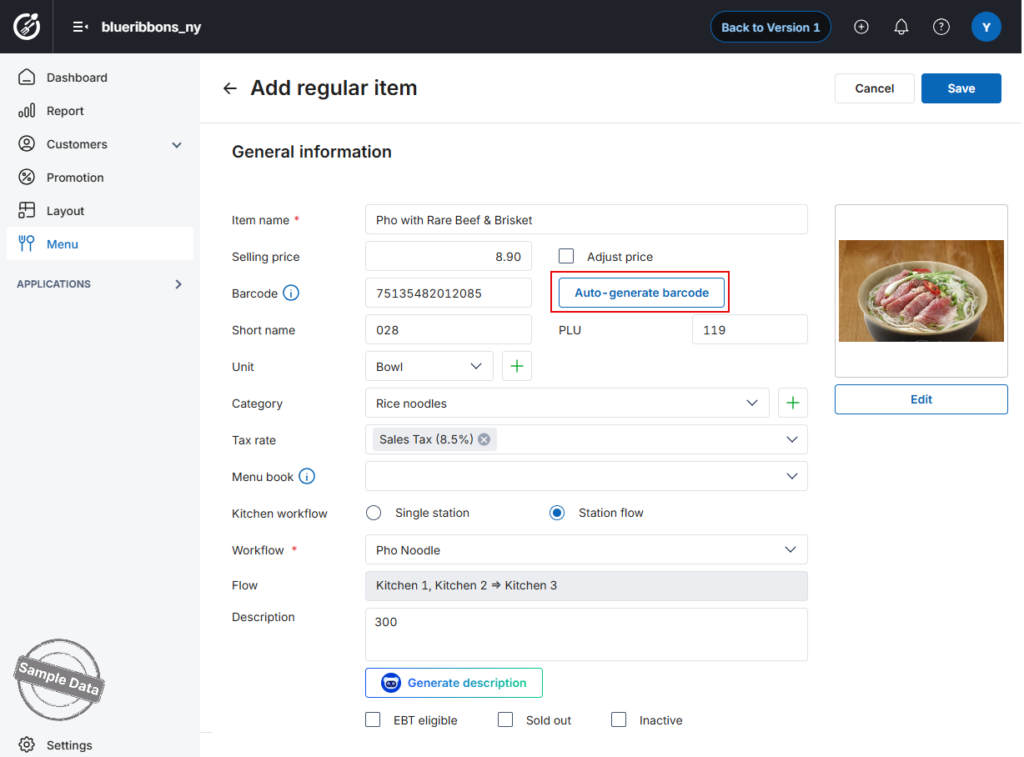
- In the Barcode field, either manually enter the code or click Auto generate barcode.
- Click Save to add the new item with its barcode to the system.
2. Print labels
a. Set up printer
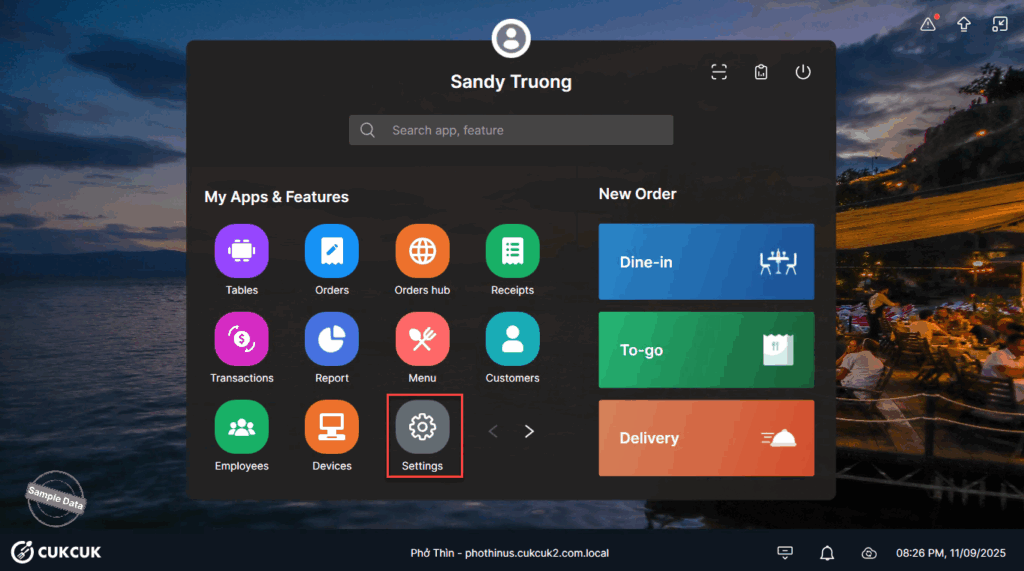
On POS, go to Settings.
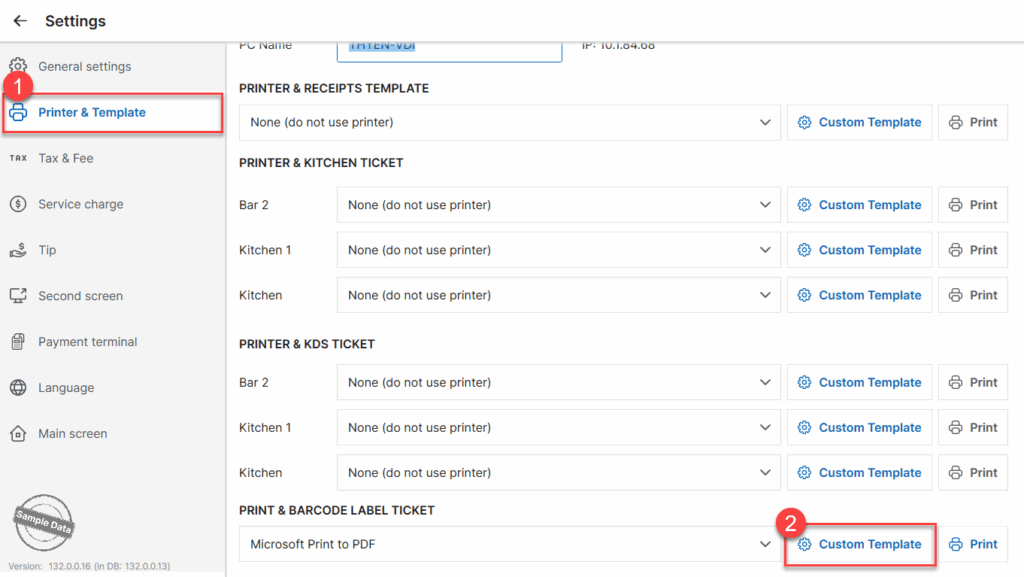
On Printer & Template tab, select a printer at Print & Barcode Label Ticket. Click Custom Template.
You can edit margins
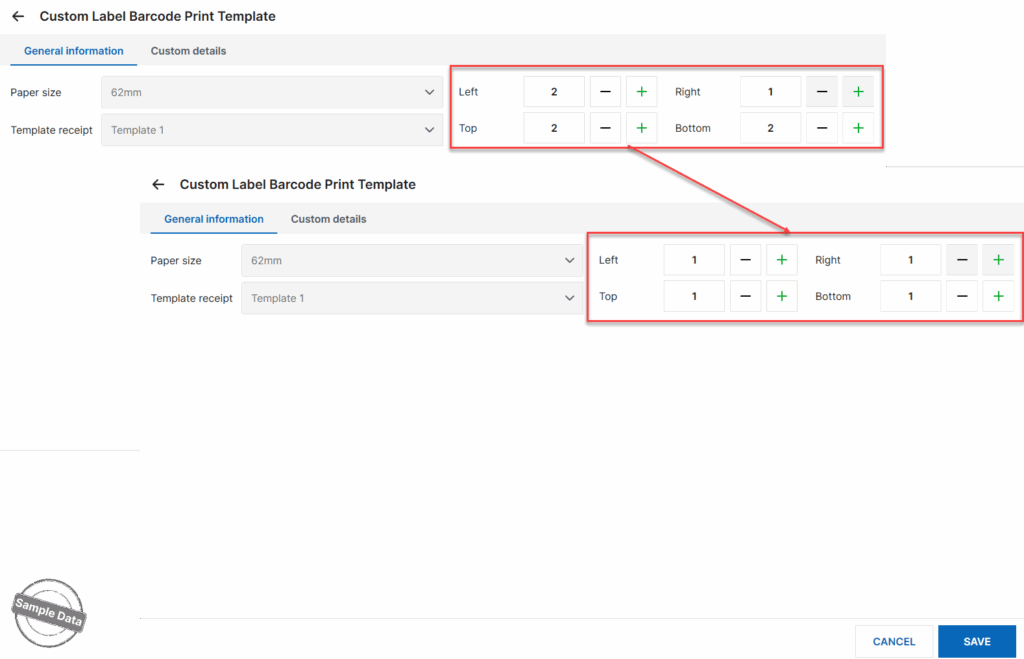
and check or uncheck information to be shown on the barcode.
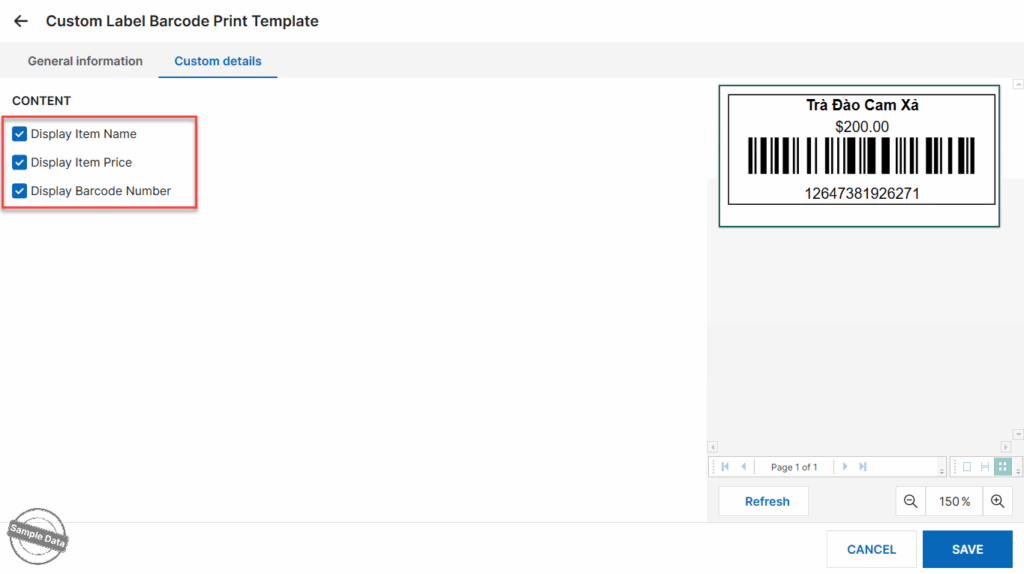
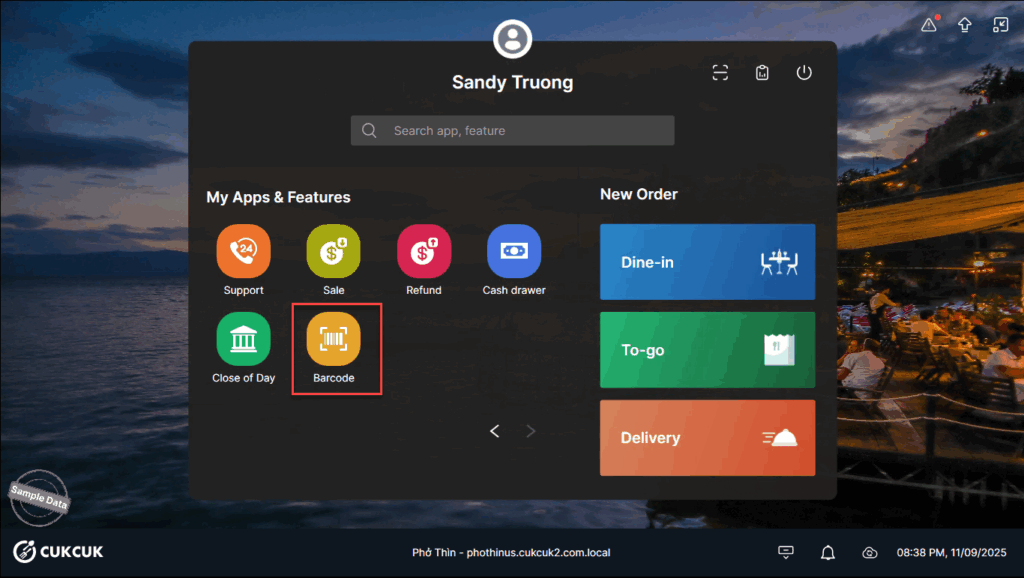
b. Print labels
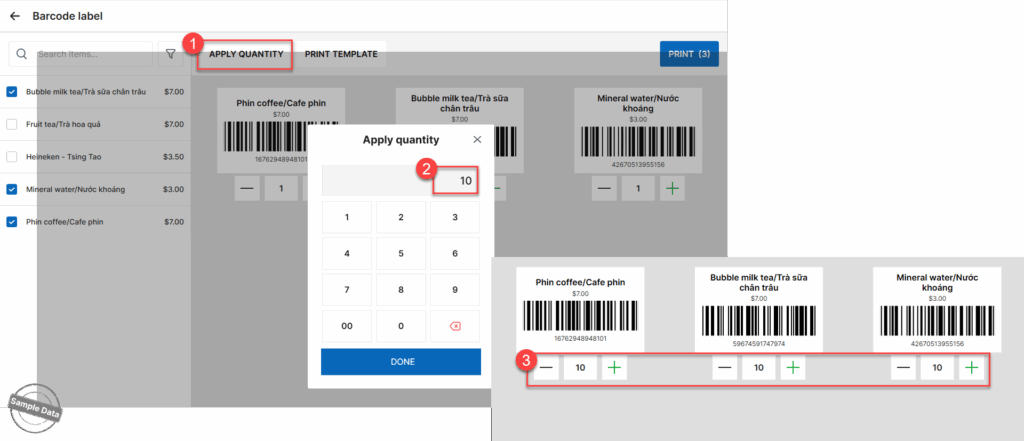
On POS, go to Barcode.
Check item(s) to print barcode.
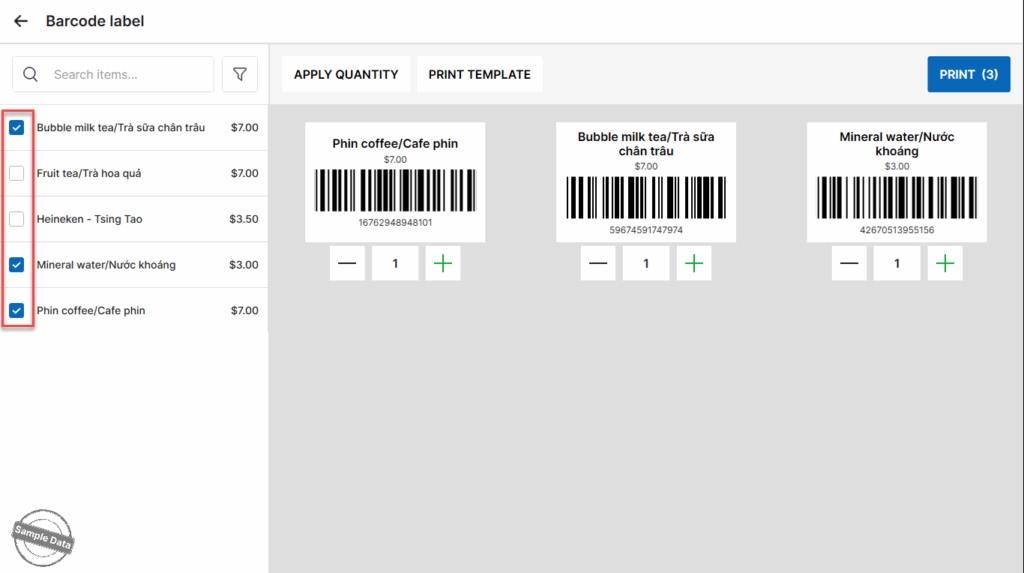
Click Apply quantity and enter the number of barcodes applied to all items.
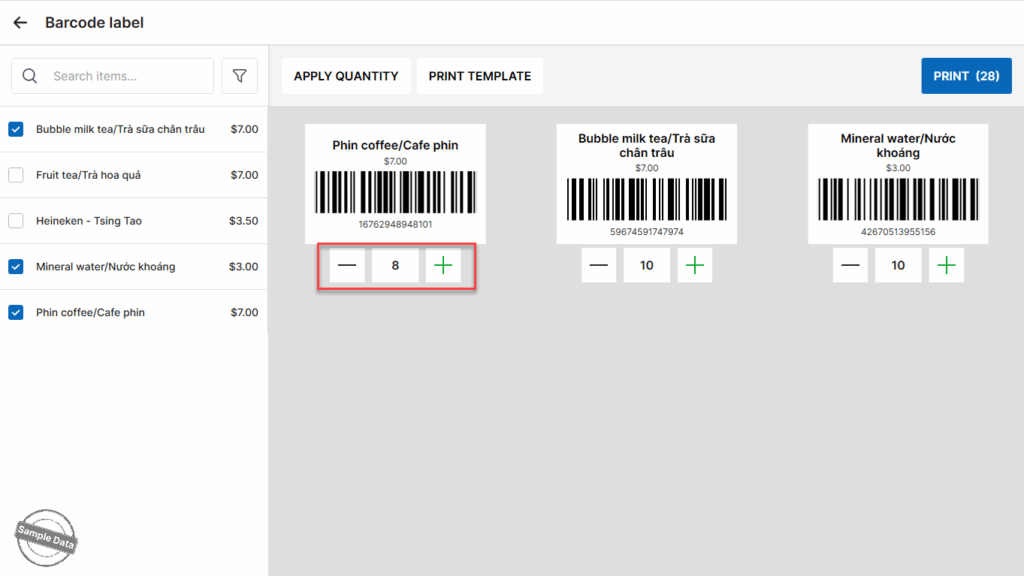
You can increase or decrease the number of printed labels for each item by tapping the minus (-) or plus (+) icon.
3. Order items using barcode
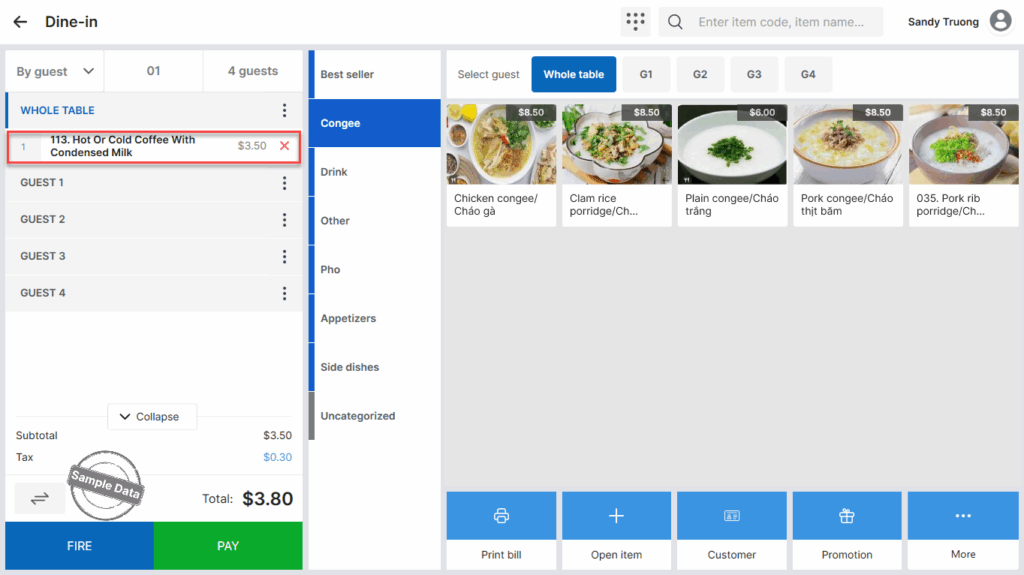
Upon taking order, the staff just scans the code and the item will be added to the order.
Have a nice day!


