

I. Purpose
With the Booking feature, the customers can easily make reservations and the staff can manage tables efficiently.
II. Instruction steps
1. Install Booking app
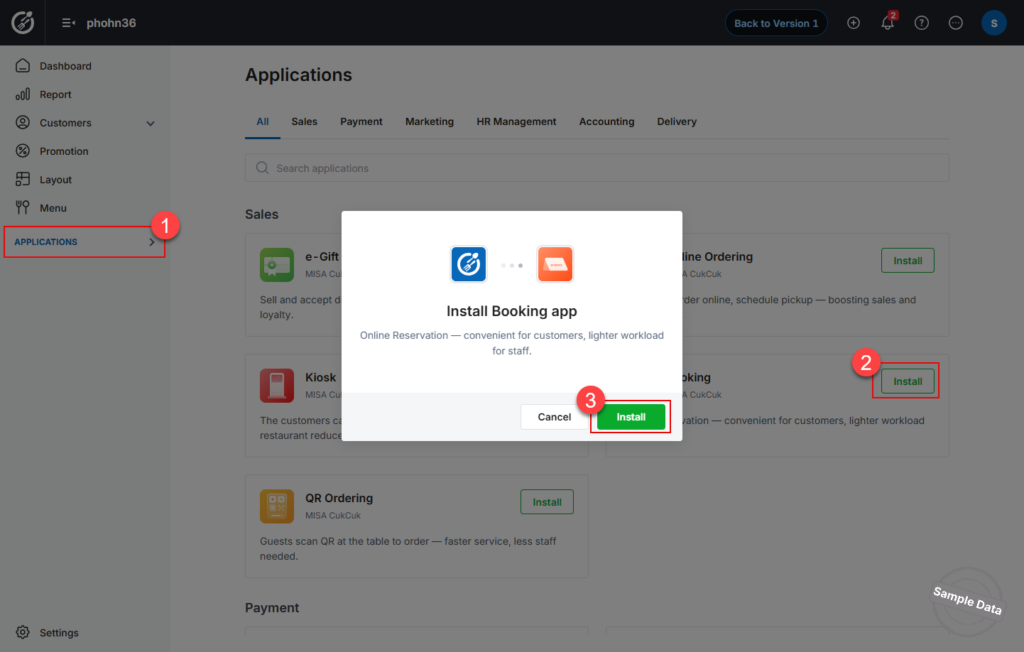
- On the dashboard, go to Applications.
- Find Booking application and click Install.
- Then click Install.
2. Set up Online reservation
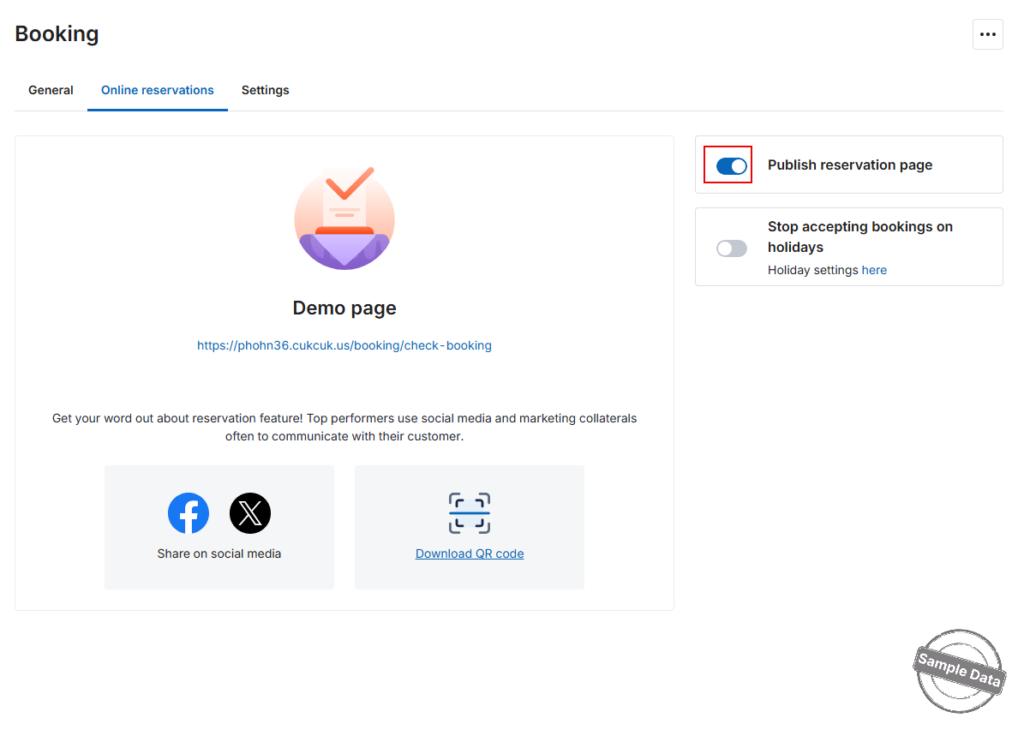
If the restaurant offers online reservation, go to Online reservation tab and turn on Publish reservation page.
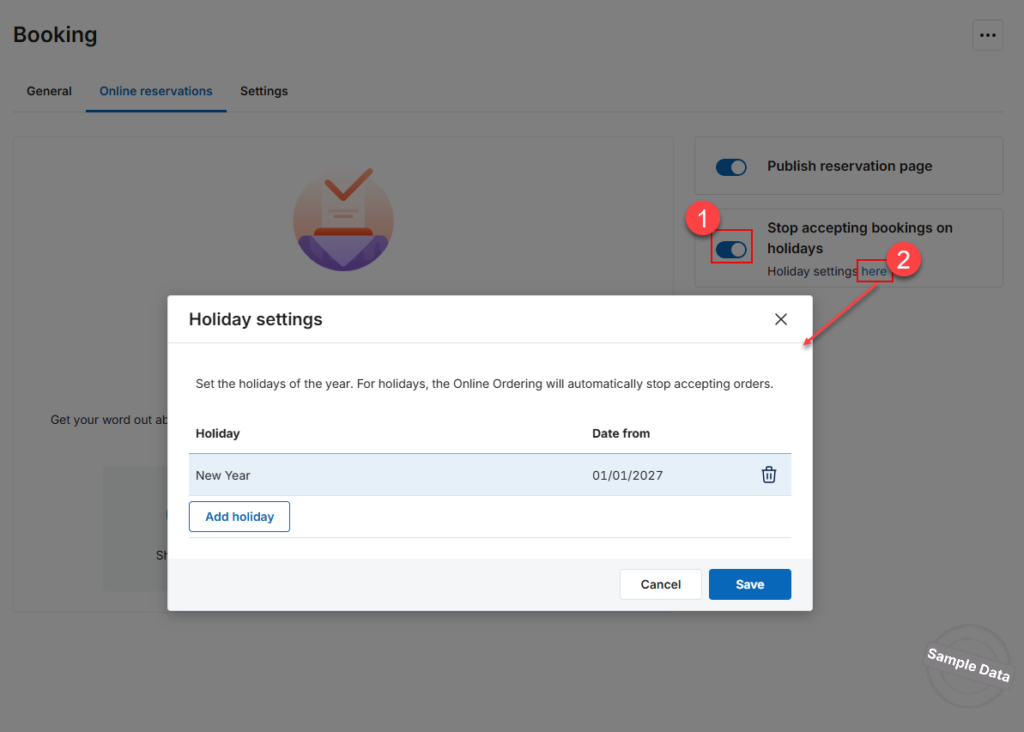
If there are any days when the restaurant does not accept online bookings, turn on Stop accepting bookings on holidays.
Click here in “Holiday settings here” and add holiday(s). Click Save to save the changes.
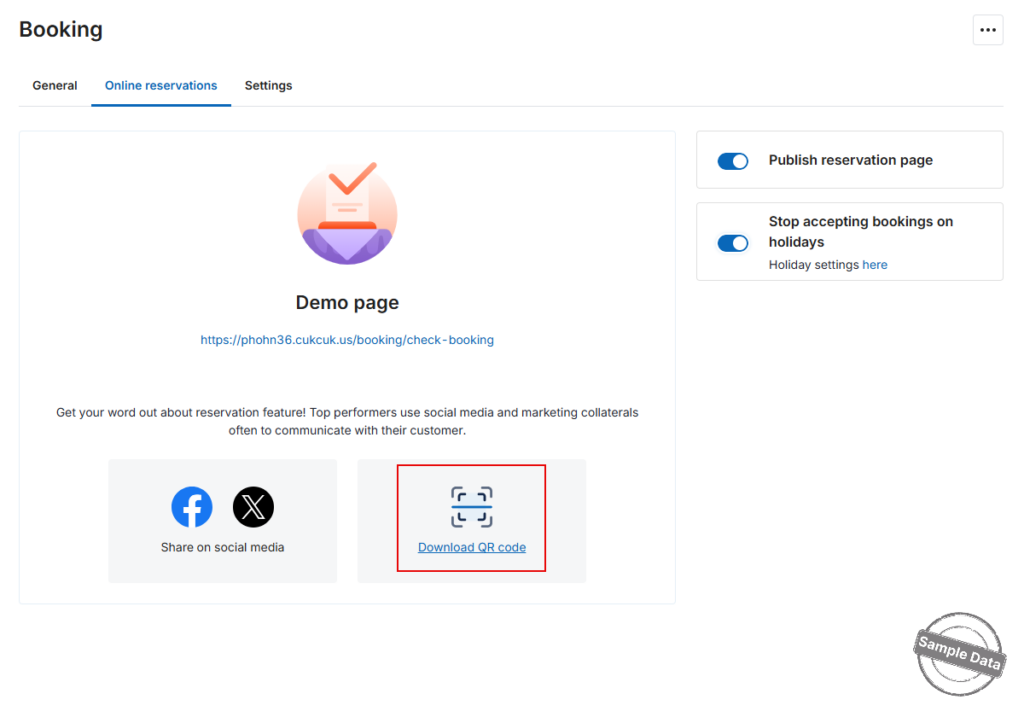
After that, copy the link or download QR Code and share it to the customers.
3. Set up booking method
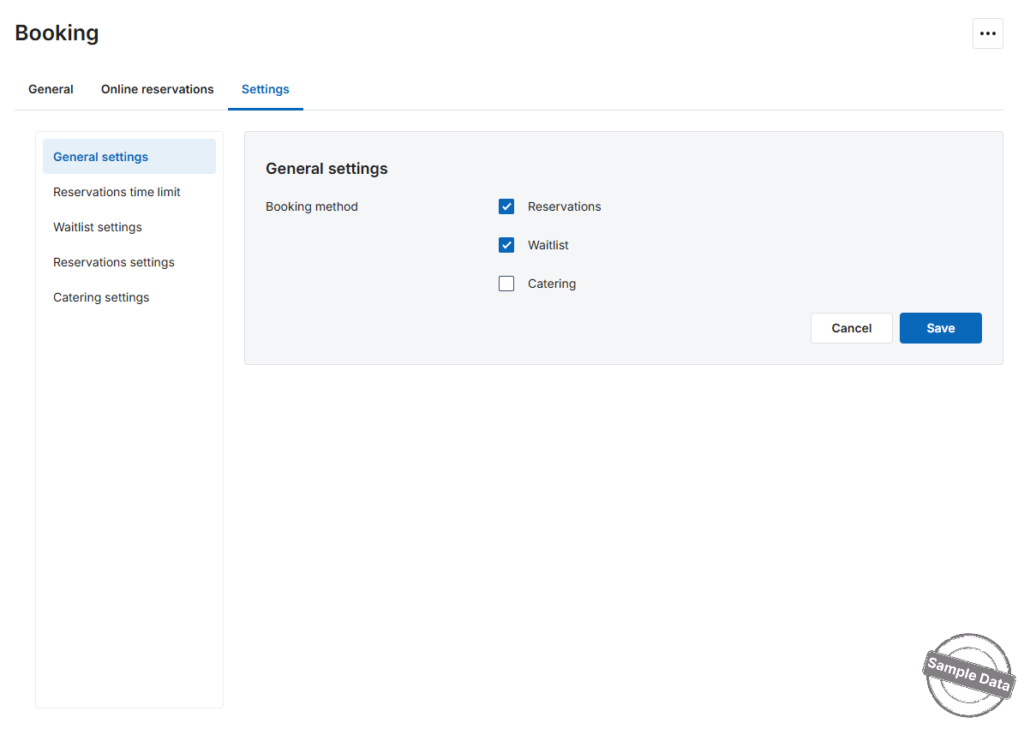
Go to Settings tab. In the General settings part, check the applicable booking methods.
4. Set up reservation time limit
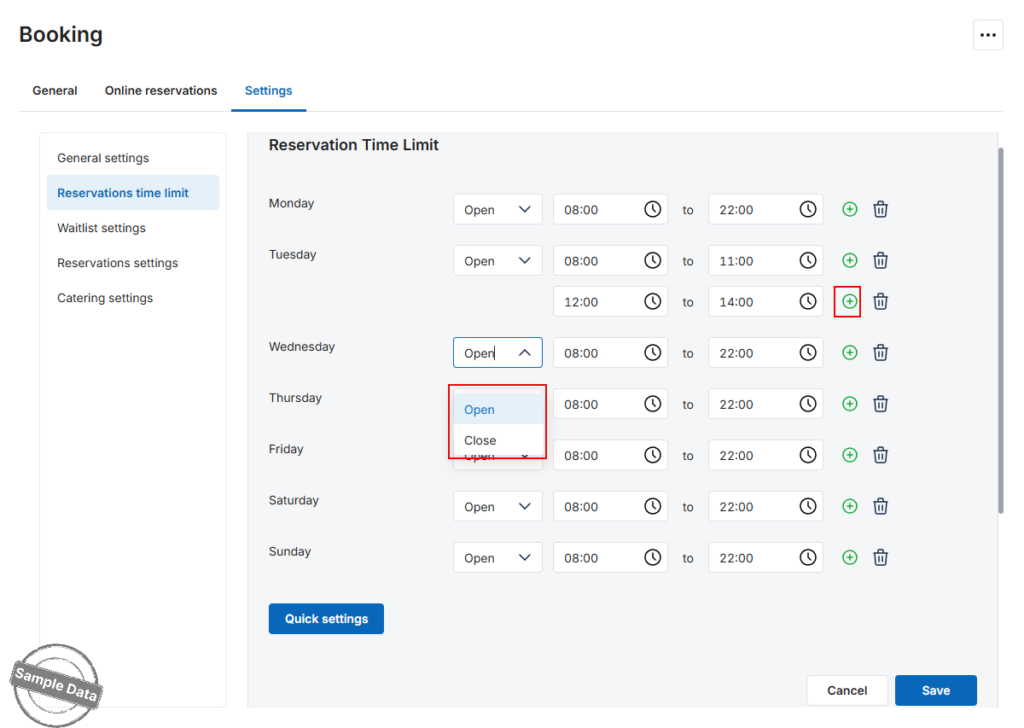
- Go to Reservations time limit part -> Click edit icon.
- Set Daily Time Ranges:
- For every day of the week, pick Open / Close from the drop-down.
- Enter the start and end times.
- You can add up to three time slots per day.
- Delete a slot anytime with the trash icon.
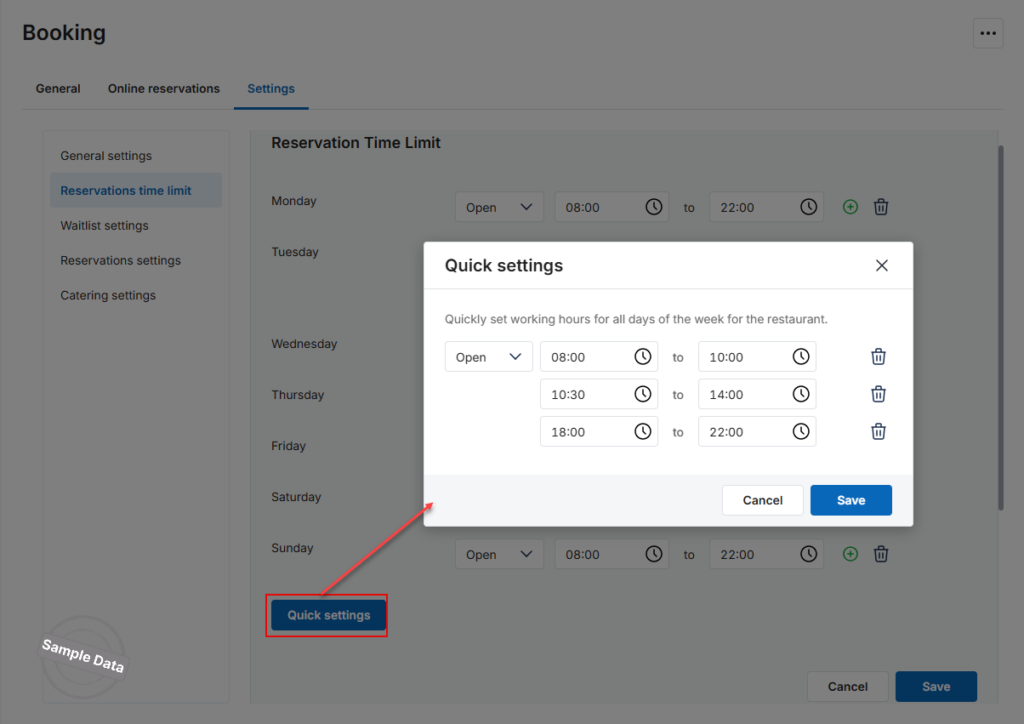
- Quick Settings (copy one day to others)
- Click Quick settings.
- Enter the start and end times.
- You can add up to three time slots per day.
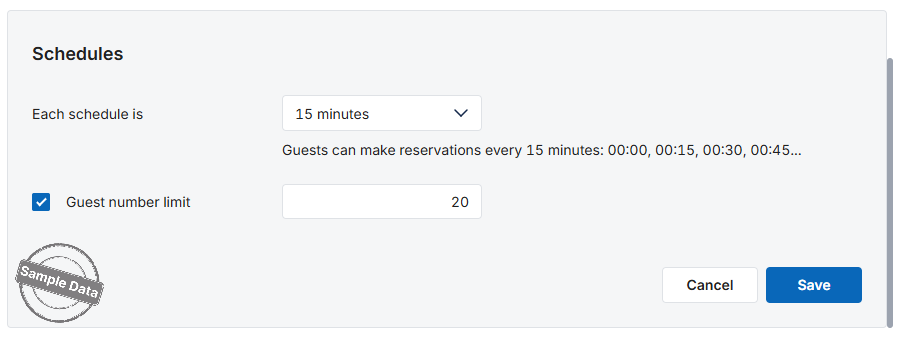
- Configure Slot Duration & Capacity
- Scroll to Schedules → click edit icon.
- Select the length of each slot (15–60 minutes), e.g. with 15 minutes, guests can book at 08:00, 08:15, 08:30 …
- (Optional) Tick Guest number limit and type the maximum covers allowed per slot.
- Click Save.
5. Other settings
5.1. Reservation Rules
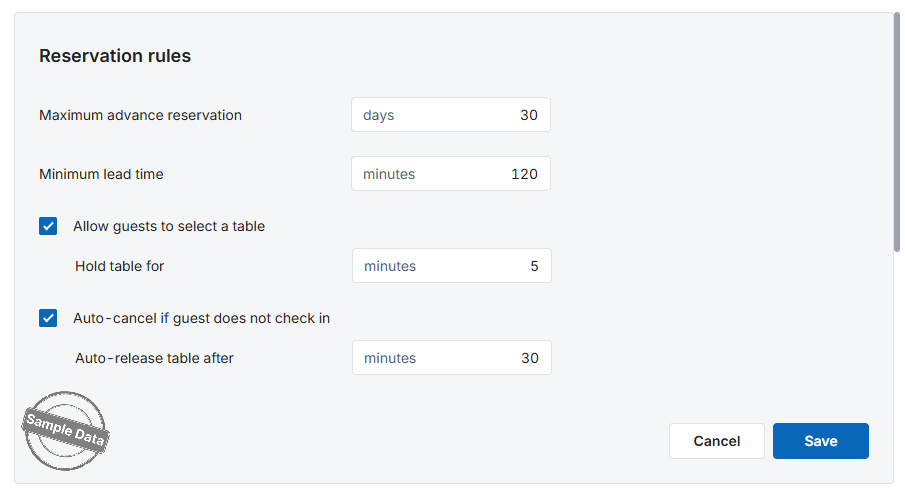
Click Edit icon beside Reservation rules, set the limits, then Save.
- Maximum advance reservation – how many days ahead guests can book (e.g., 30 days).
- Minimum lead time – minimum time (minutes) before the slot starts (e.g., 120 min).
- Allow guests to select a table – let diners pick a specific table on the widget.
• Optionally hold the chosen table for X minutes. - Auto-cancel if guest does not check in – release the table automatically after X minutes of no-show.
5.2. Required Reservation Information
Tick the fields the guest must fill in (First name, Last name, Phone number, Email).
Press Save when finished.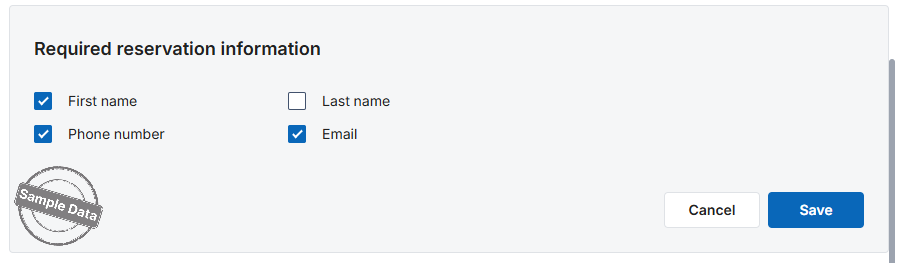
5.3. Suggested Tags
Click edit icon next to Suggested tags to pre-define reasons or areas that guests can pick (e.g., Birthday, Non-smoking, Near the door). Type a tag and enter comma (,) to add the tag. Follow the same steps for other tags. Click X icon to delete non-applicalbe tag(s).
Click Save.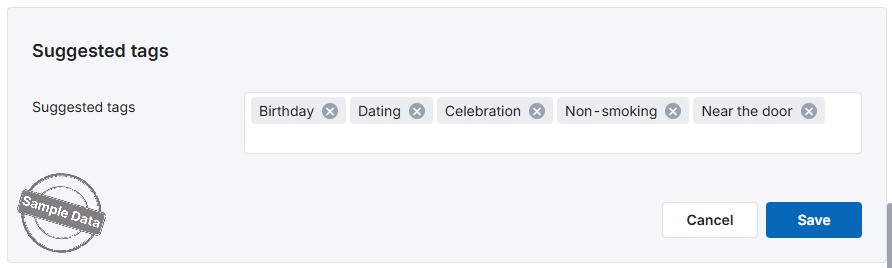
5.4. Auto-Confirm Requests
Go to Confirm reservation request, tick Automatically confirm reservation requests if you want new bookings to be accepted without manual review, then Save.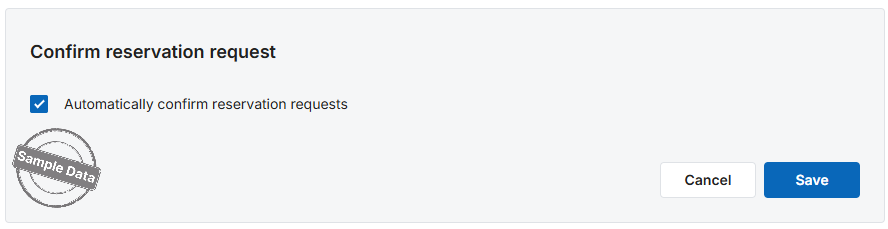
5.5. Non-SMS Notifications
Under Reservation notifications (non-SMS), edit the text the system shows when a booking is pending.
Save your message.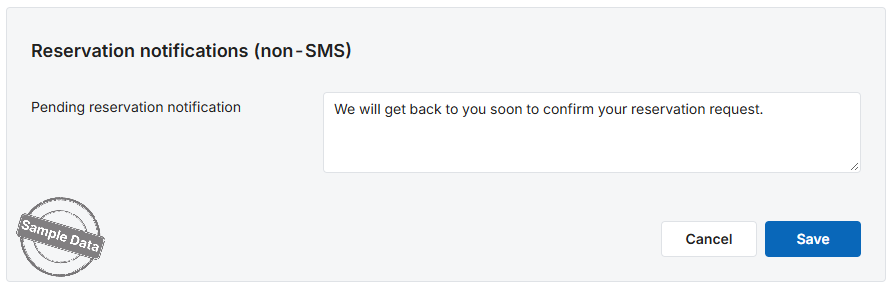
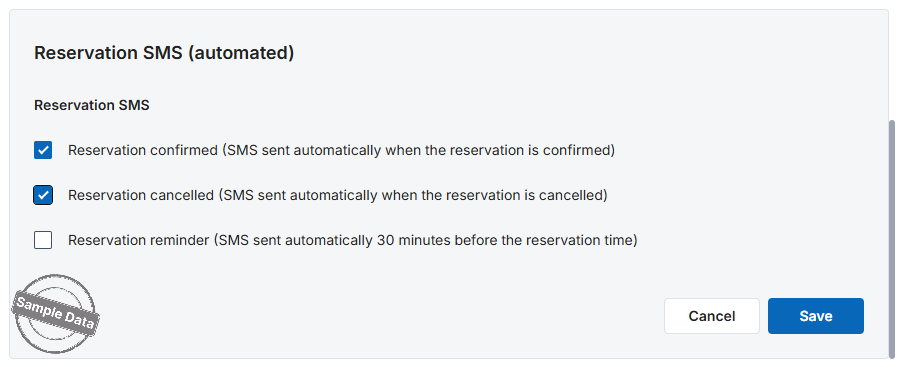
5.6. Automated SMS
In Reservation SMS (automated), tick any combination of:
- Reservation confirmed – send SMS instantly once the booking is approved.
- Reservation cancelled – notify the guest if the booking is rejected or cancelled.
- Reservation reminder – send a reminder 30 minutes before the reserved time.
Click Save to activate.
 Have a nice day!


