

I. Purpose
This feature allows restaurants and bars to securely store a customer’s payment information from the first order, eliminating the need for multiple payment transactions when additional items are ordered.
II. Instruction steps
1. Enable Pre‑Authorization on the Dashboard
Step 1: Access Sales Settings
- On the Dashboard, go to Settings.
- Select Sales.

Step 2: Activate Pre‑Auth Feature
- Scroll down to the Payment section.
- Click the Edit icon.
- Check Use the pre-auth feature.
- Set the default pre-authorization amount.
- Click Save to apply the changes.

The Pre‑Authorization feature is now enabled.
2. Configure and Use Pre‑Authorization on POS
a. Connect the Payment Terminal
- On the POS, go to Settings.

- Select the Payment Terminal tab.
- Choose the appropriate payment terminal and connection type.
- Enter the required information.
- Click Connect.

The payment terminal is now connected.
b. Process a Pre‑Auth (Open Tab) on POS
Step 1: Open a Tab
- Click Open Tab.

- Select Card Info and choose an existing customer.
- If the customer is new, add their information and click Done.

- If the customer is new, add their information and click Done.
- Click Next to continue.
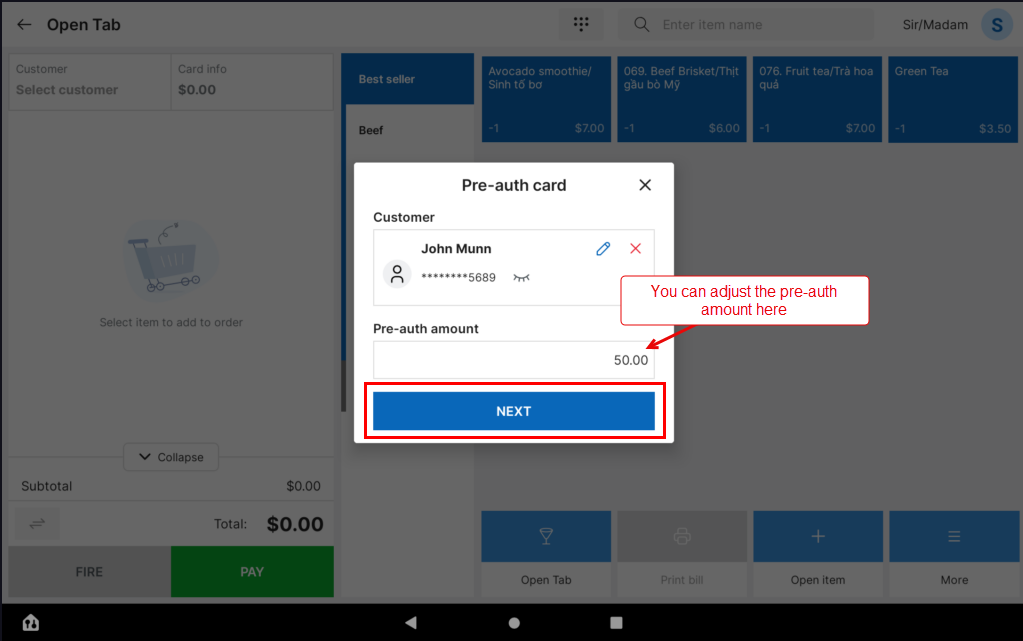
Step 2: Confirm Pre‑Authorization
- Confirm the transaction on the payment terminal.
- The system will pre‑authorize the default amount.

The tab is now successfully opened.
Step 3: Take Orders
- Select the items ordered by the customer.
- Click Fire to send the order to the kitchen/bar.

Step 4: Add Additional Items (If Needed)
If the customer orders more items:
- Go to Order.

- Select the customer’s open tab.

- Add the new items.
- Click Fire to send them to the kitchen/bar.

Step 5: Finalize Payment
When the customer is ready to pay:
- Open the customer’s order.
- Click Pay.

- Click Pay again to complete the transaction.

The system will capture the final amount from the pre‑authorized card.
Have a nice day!


